Digital Alchemy – Part 6
This is Part 6 of the Digital Alchemy tutorial where previously Lady Shade Awoke.
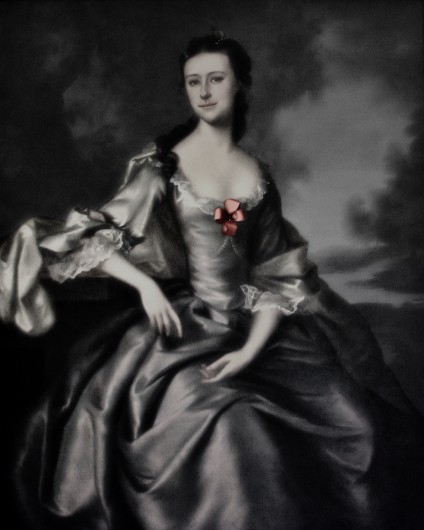
Lady Shade is washed out as she has no colour to make her stick out. In previous sections, we created layers for her lips and the flower. Now is the time to bring some colour back to the Lady, so let’s start with the flower adorning her dress.
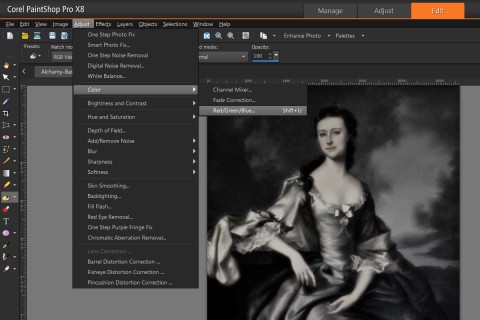
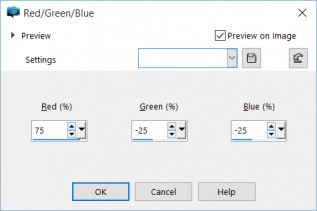
Make sure the Rose Layer is visible prior to selecting it. From the Adjust menu, select Color followed by Red/Green/Blue. When the Red/Green/Blue window appears set the options as follows:
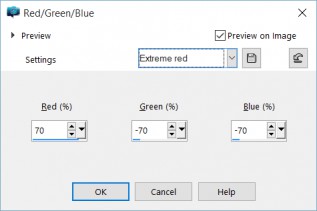
This above imbues the Rose Layer with a pink hue. If you are interested in having the Rose Layer take on more of a blood red colour, use the settings shown below instead. It is recommend you place these variants in separate layers so you can transition from one to the other.
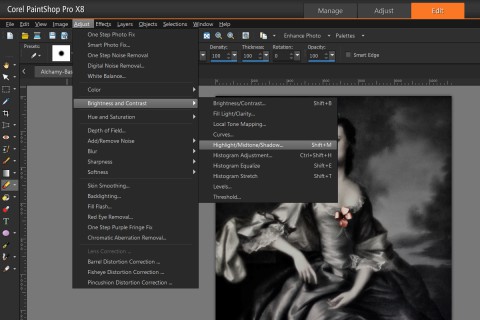
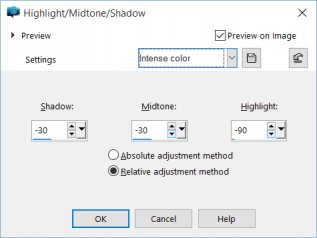
Now that the colours have been changed, we will enhance the shadows within that layer. From the Adjust menu, select Brightness and Contrast then Highlight/Midtone/Shadow.
From the newly opened Highlight/Midtone/Shadow window; set the options as you see them below or select Intense color under Settings.
When done, click on OK to apply this effect to the layer. Now adjust the Blend Mode by selecting Soft Light. Note, you can experiment and see how the different filters apply.
Next in Part 7, Lady Shade will get Lips to Die For.
![]() Give the Lady a Flower by Evelyn Chartres is licensed under a Creative Commons Attribution-ShareAlike 4.0 International License.
Give the Lady a Flower by Evelyn Chartres is licensed under a Creative Commons Attribution-ShareAlike 4.0 International License.


Leave a Reply