Digital Alchemy – Part 12
This is Part 12 of the Digital Alchemy tutorial and previously we created an Ethereal Night.
The base resolution for this picture is barely within the guidelines set out by Amazon Kindle Direct Publishing. Obviously, we cannot create additional pixels where none exists. Modern programs have gotten far more effective at increasing image size without leading to a dramatic loss in quality, however there are limits and artefacts will be introduced.
Fortunately, the original shot was a painting and we have the option of using Corel PaintShop Pro to the image in brush strokes to simulate a painting. This will smooth out errors and leave us with a high-resolution image.
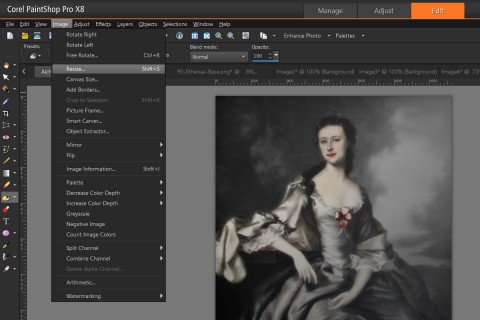
From the Image menu, select Resize.
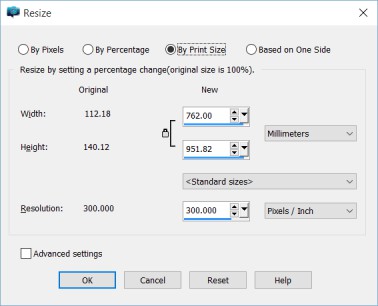
From the Resize window, you can resize based on Pixels, Percentage, Print Size and Based on One Side. Select By Pixels, then set the Width to 9000 pixels.
When you switch to By Print Size, more options become available. Namely, you can set the Resolution (density) in pixels per inch (Pixels/Inch) also known as Dots Per Inch (DPI).
This measurement is important for printing an image and should be considered when self-publishing through CreateSpace or similar. We want to set the Resolution to 300, which is better than the 96 DPI used for screens.
Switching from one resize method to the other maintains settings; so set the Resolution then return to Pixels to find your selected pixel intact.
|
Note This multiple section Resize window is new with Corel PaintShop Pro X8. Earlier versions had an all inclusive window instead. However, the capabilities is the same between versions. |
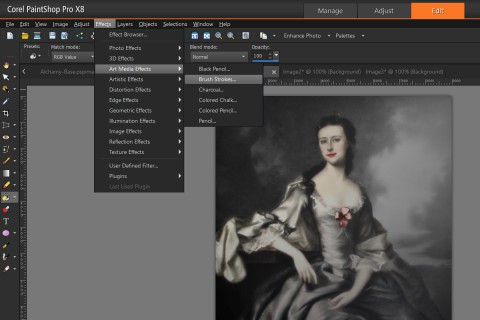
Now we have a larger image than the original, flaws an all. From the Effects menu, select Art Media Effects then Brush Strokes.
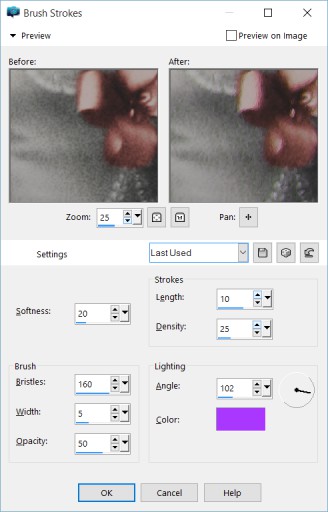
Brush Strokes is powerful and yet slow effect, especially at high resolutions, so selecting the Preview on Image check-box is not recommended.
Select Factory Defaults from Settings then change the Color under Lighting to introduce purple with the brush strokes. To learn more about these settings, click on the Dice button to observe how changes play a role in the effect.
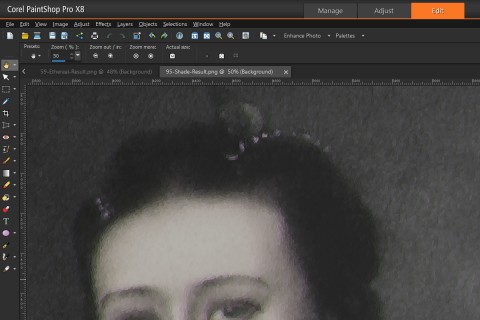
When satisfied with, you end up with an effect similar to the one shown below. To showcase the effect, a zoomed in portion of her head is shown to highlight the introduced purple plays a part in colouring her crown.
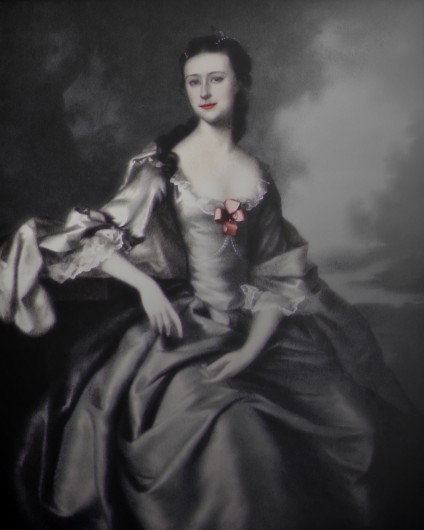
Lastly, this is a full version Lady Ethereal is shown below:
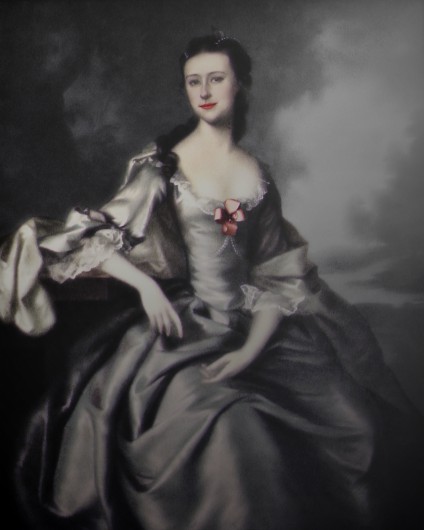
Instead of using Lady Shade, use the Soft Light blend on the Original version of the Lady. This version has more skin tone and is a better suited for some covers.
