Digital Alchemy – Part 11
This is Part 11 of the Digital Alchemy tutorial and previously we Removed Lady Shade’s Glow.
Lady Shade in the previous section fits in well with an eerie scenes. Now we will experiment with a variant that creates a ghostly background; one which may be might encountered when a fog rolls in. We need to use Radial Gradients to achieve this effect.
|
Note These new layers must be be located above all others for them to be effective. |
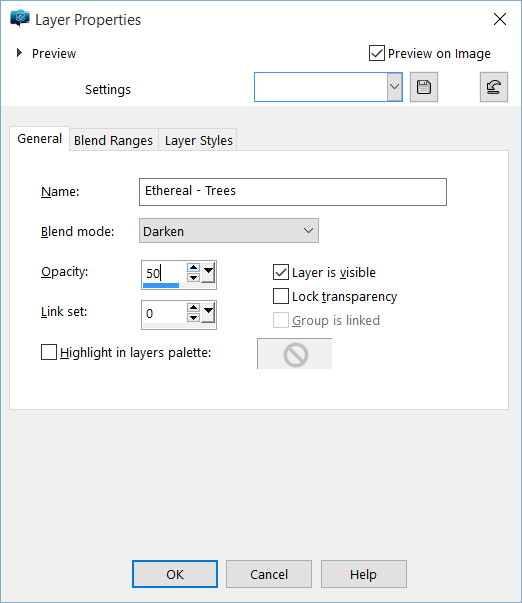
First, create a New Raster Layer then provide the settings shown below. Set the Blend mode to Darken then reduce the Opacity to 50%.
|
Definition – Darken Displays pixels in the selected layer that are darker than the underlying layers. Pixels lighter than the underlying layers disappear. |
Using the Material Properties window, click on the + button to create a new gradient. The mechanisms discussed in Let There Be Night are still in play.
However, with the Night Sky Layer we did not care about Centre Point or Focus Point, as we wanted a linear and gradual transition. Now Radial Gradients are used (select the third from the top), these settings will play a large part in how the gradient will progress and from which point.
These layers may seem counter-intuitive, since this layer aims to maintain lightness in certain areas while they darken those covered by a gradient we will creat next. Replicate the settings shown below then click on the OK button.
When prompted to save; provide a meaningful name. Gradients cannot be sampled using the Dropper Tool, so saving your gradients is the only way to create or modify them later.
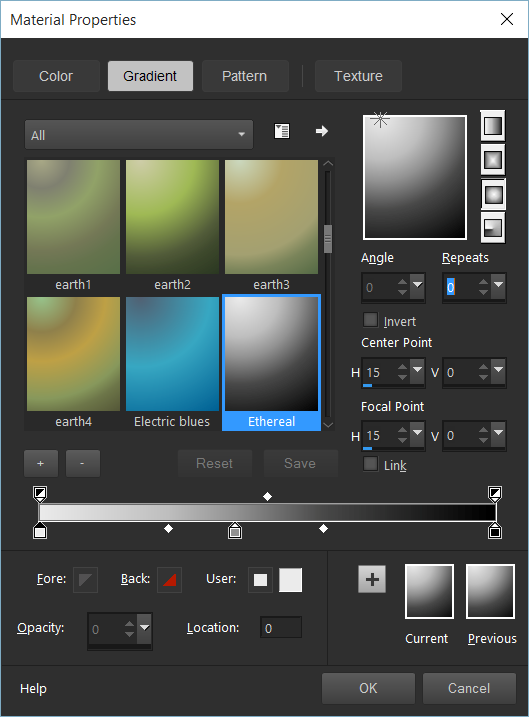
Once the new gradient is complete, use the Fill Tool from the Tools Bar to populate the Ethereal – Trees Layer.
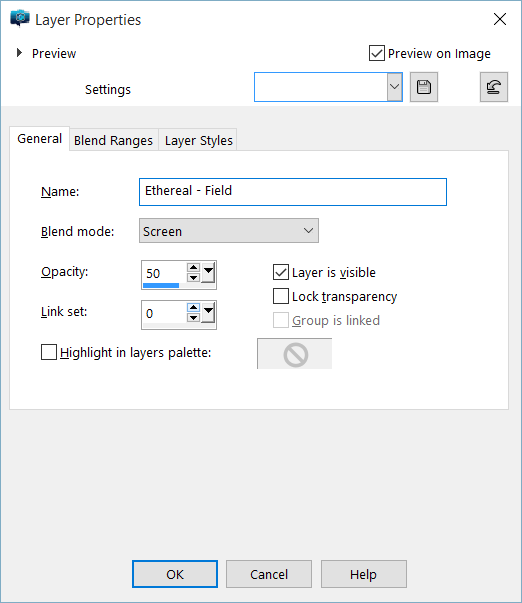
Now create a New Raster Layer then select Screen as the Blend Mode vice Darken from the previous layer.
|
Definition – Screen Lightens the colors of underlying layers by multiplying the inverse of the selected layer and of the underlying layers. The result is a color that is the same or a lightened version of the selected layer. This blend mode produces the same result regardless of the order in which the layers are stacked on the Layers palette. |
Because of the Screen Blend Mode, this gradient will lighten many areas in the field including Lady Shade. This is why the Darken Blend Mode was created previously to counteract some of these effects.
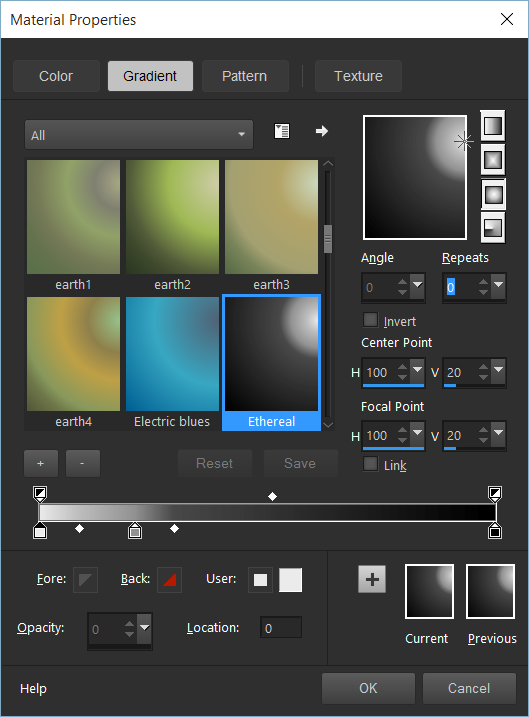
Once you use the Fill Tool from the Tools Bar to populate the Ethereal – Field Layer you will end up with something that looks like this.
Next in Part 12, we will give Lady Shade a Mild Dose of the ‘Eat Me’ Cake.


