Tag: Soft Light

  • Give the Lady a Flower

    Digital Alchemy – Part 6

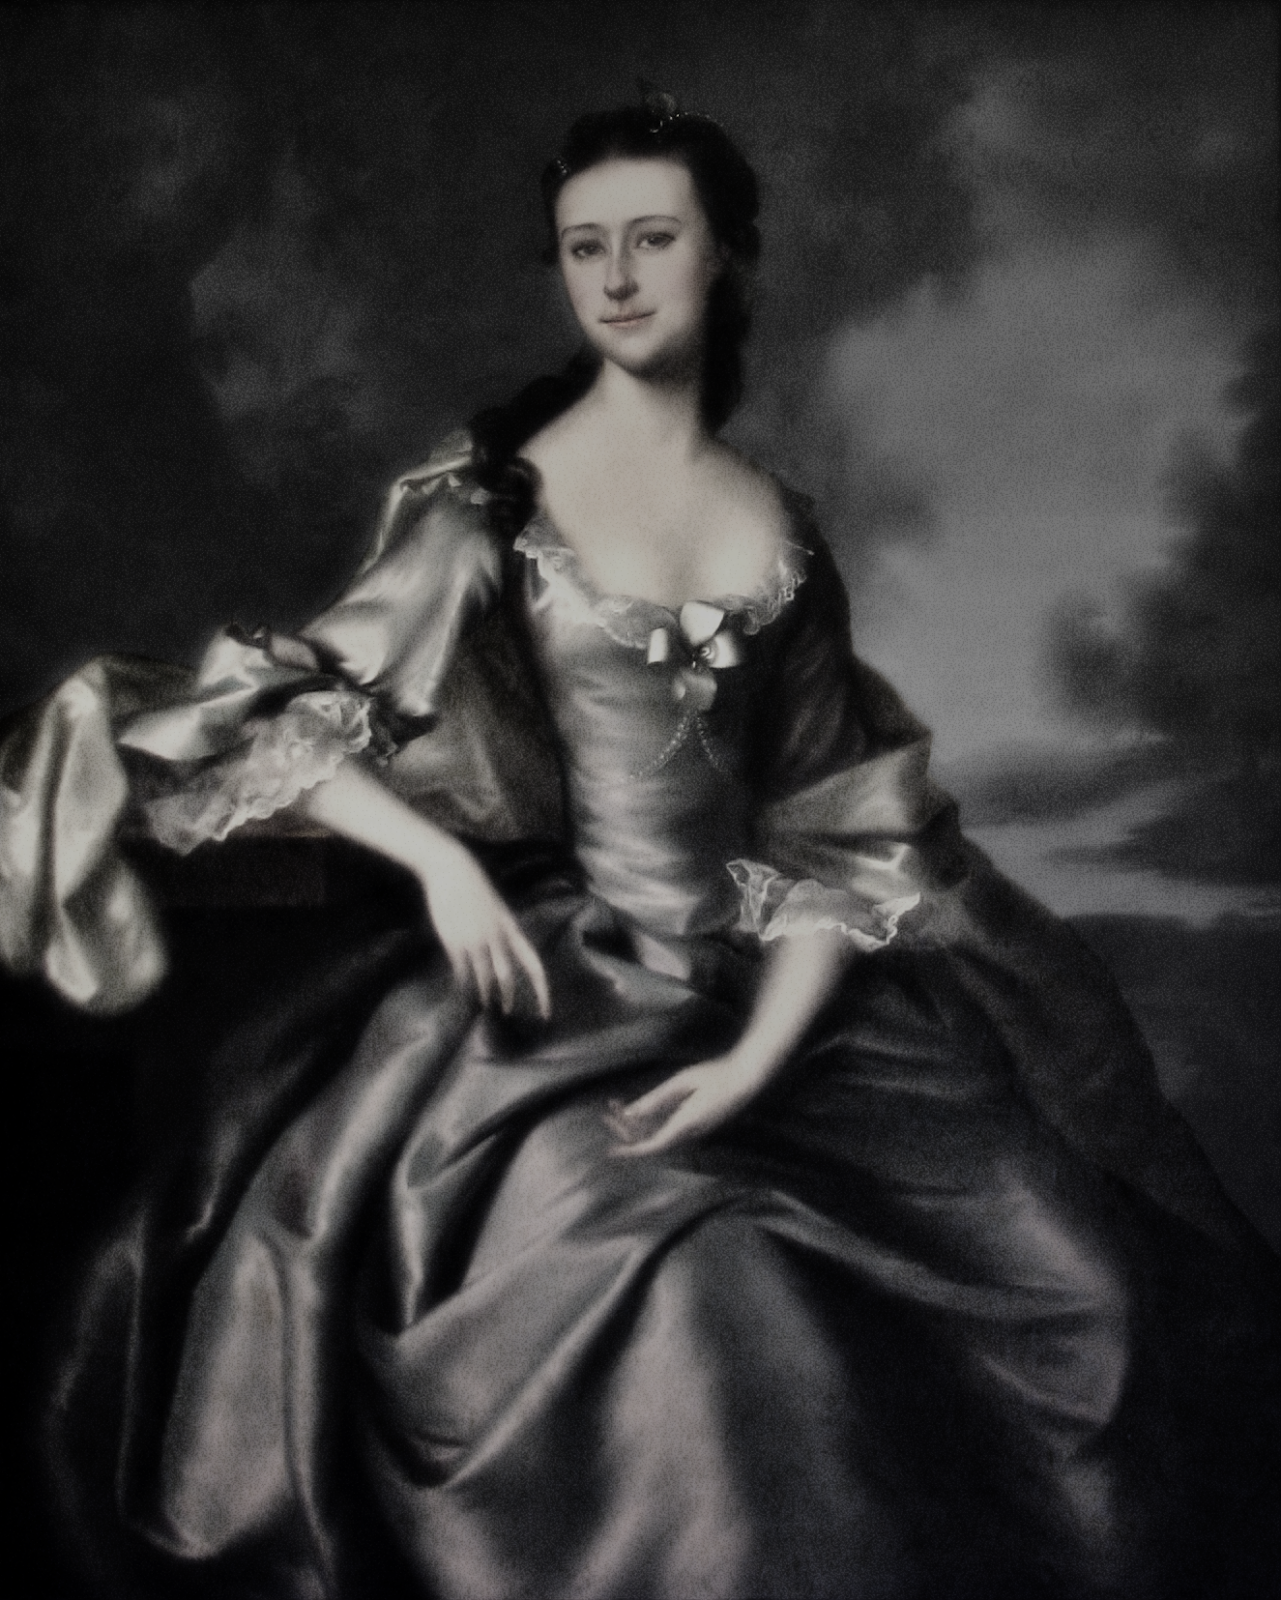
    This is Part 6 of the Digital Alchemy tutorial where previously Lady Shade Awoke.

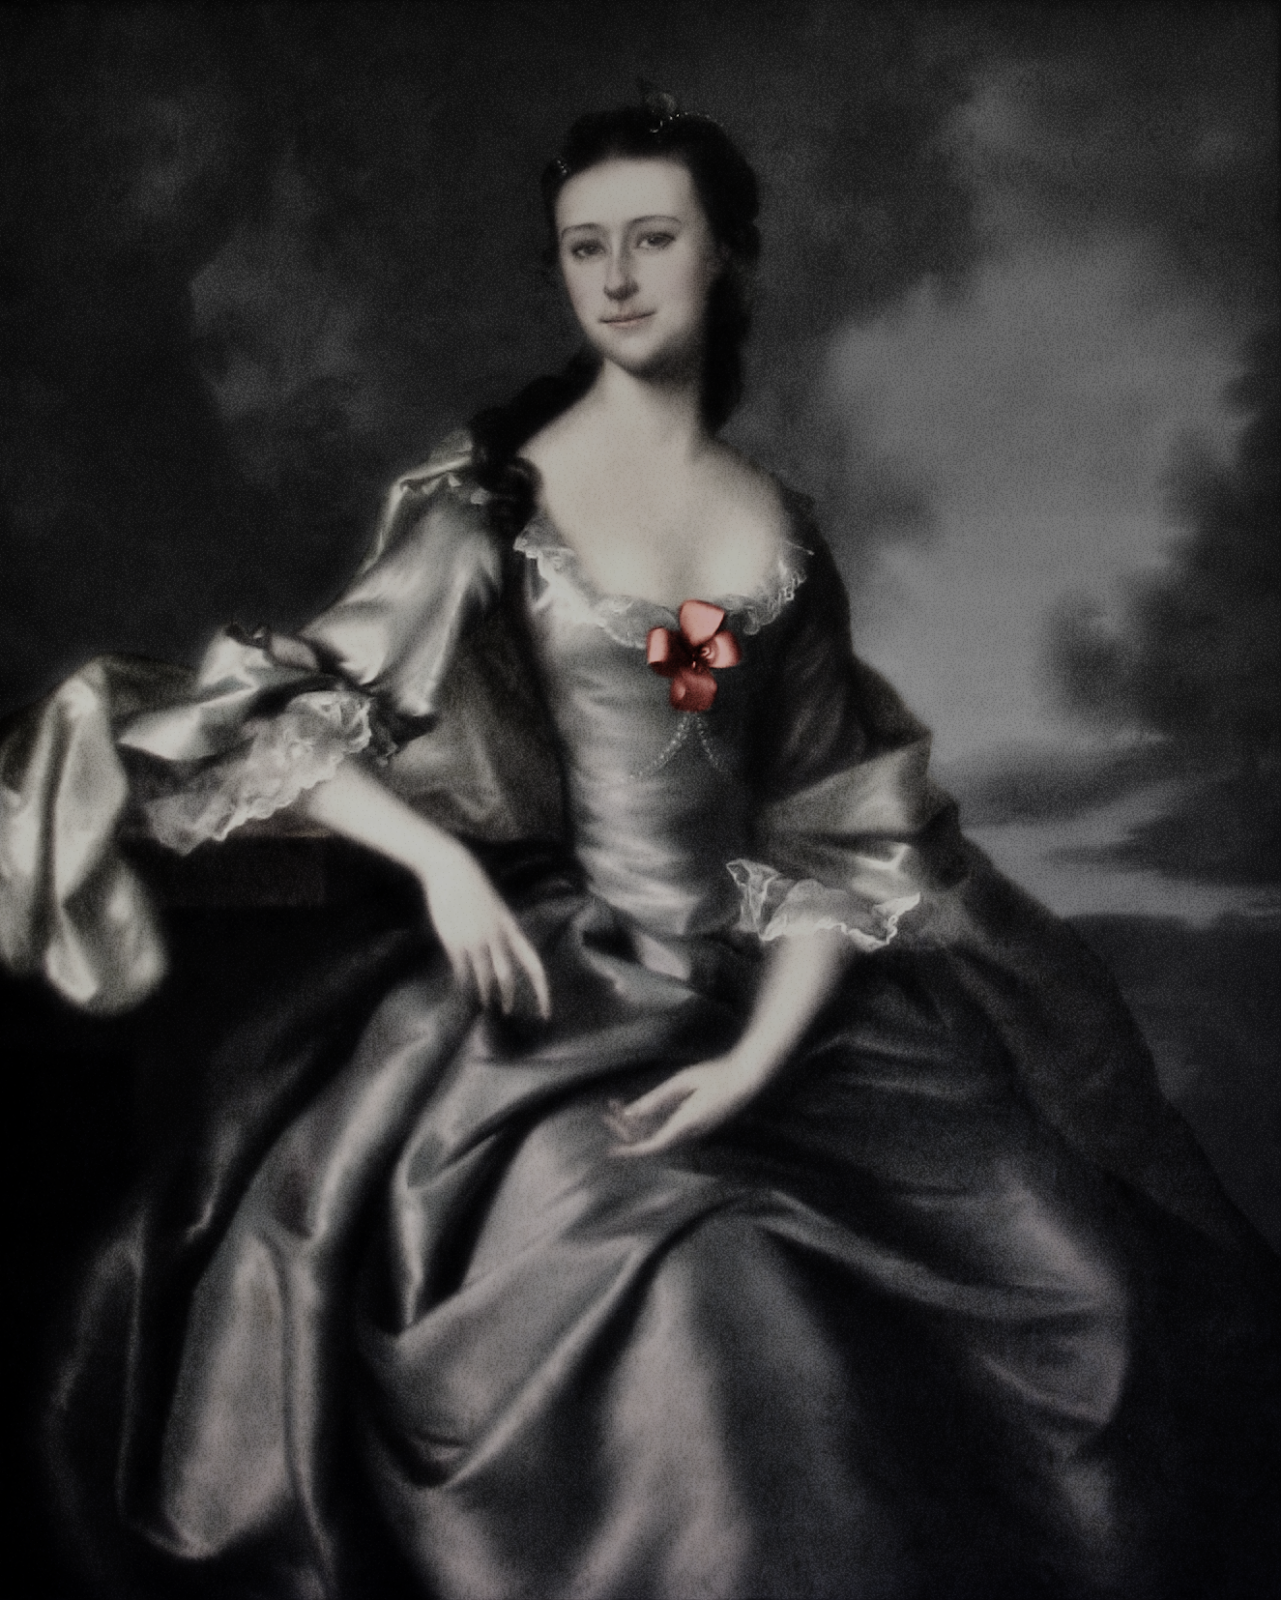
    Lady Shade is washed out as she has no colour to make her stick out. In previous sections, we created layers for her lips and the flower. Now is the time to bring some colour back to the Lady, so let’s start with the flower adorning her dress.

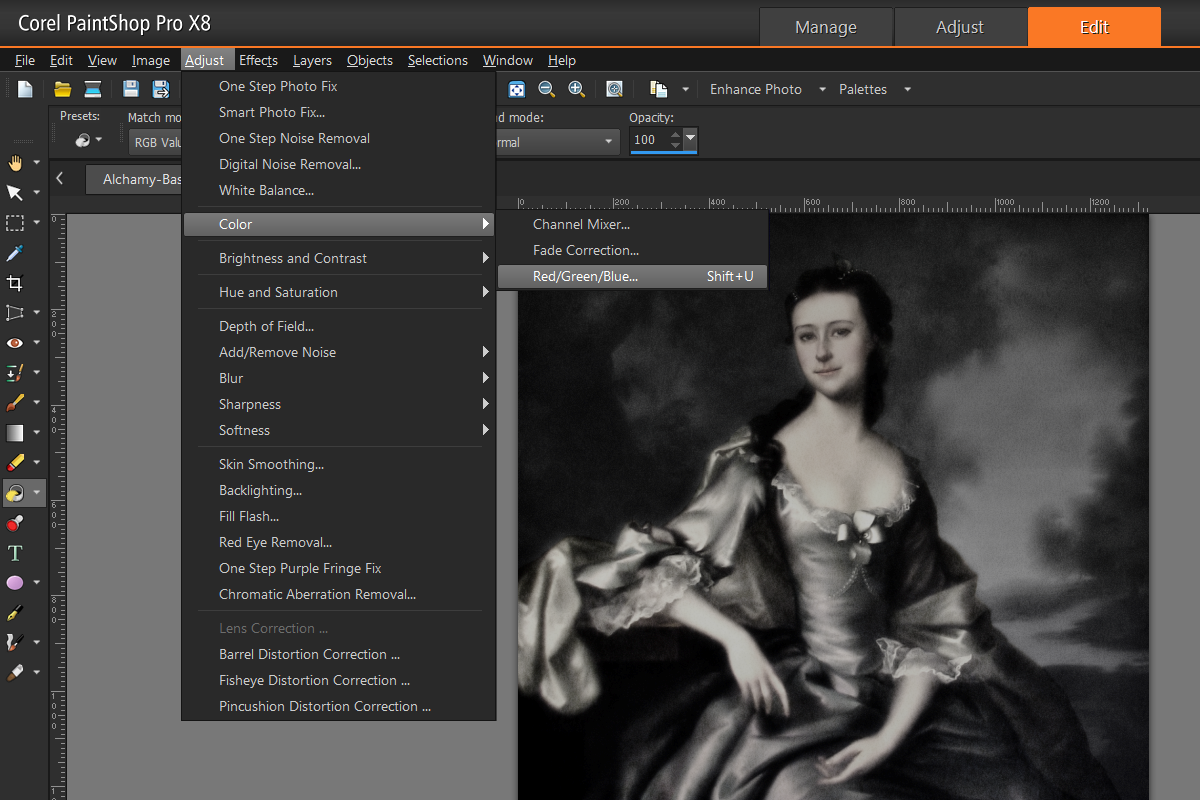
    Make sure the Rose Layer is visible prior to selecting it. From the Adjust menu, select Color followed by Red/Green/Blue. When the Red/Green/Blue window appears set the options as follows:

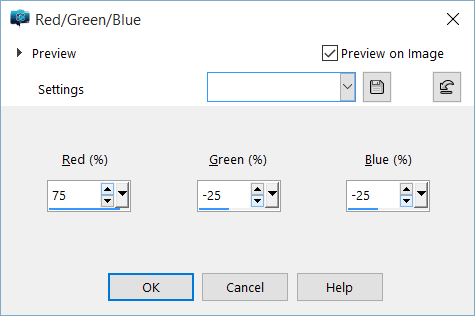
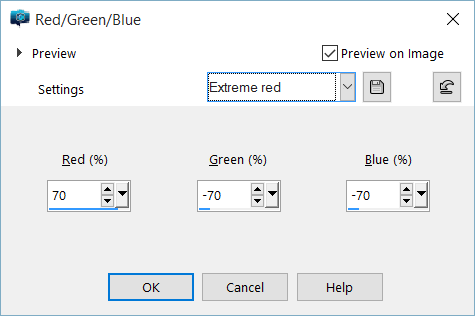
    This above imbues the Rose Layer with a pink hue. If you are interested in having the Rose Layer take on more of a blood red colour, use the settings shown below instead. It is recommend you place these variants in separate layers so you can transition from one to the other.

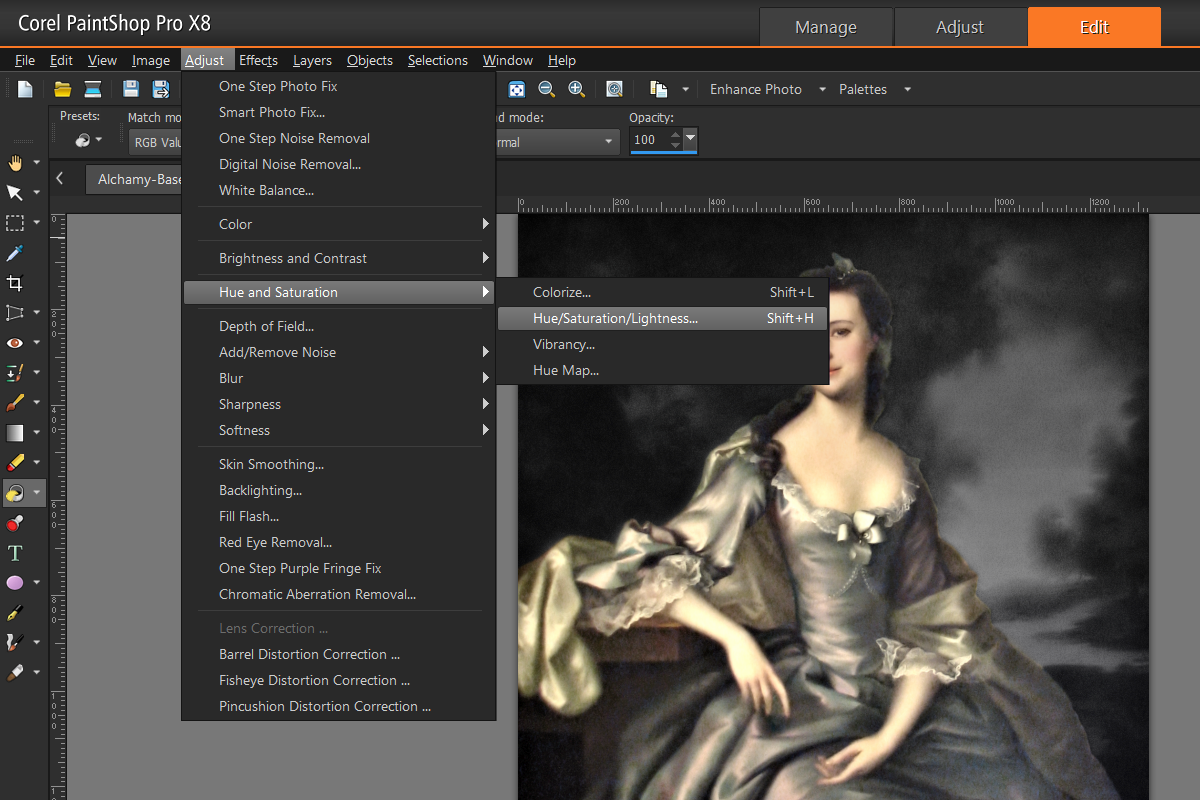
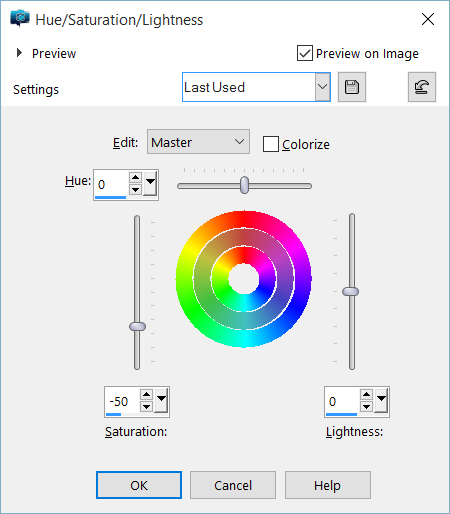
    Now that the colours have been changed, we will enhance the shadows within that layer. From the Adjust menu, select Brightness and Contrast then Highlight/Midtone/Shadow.

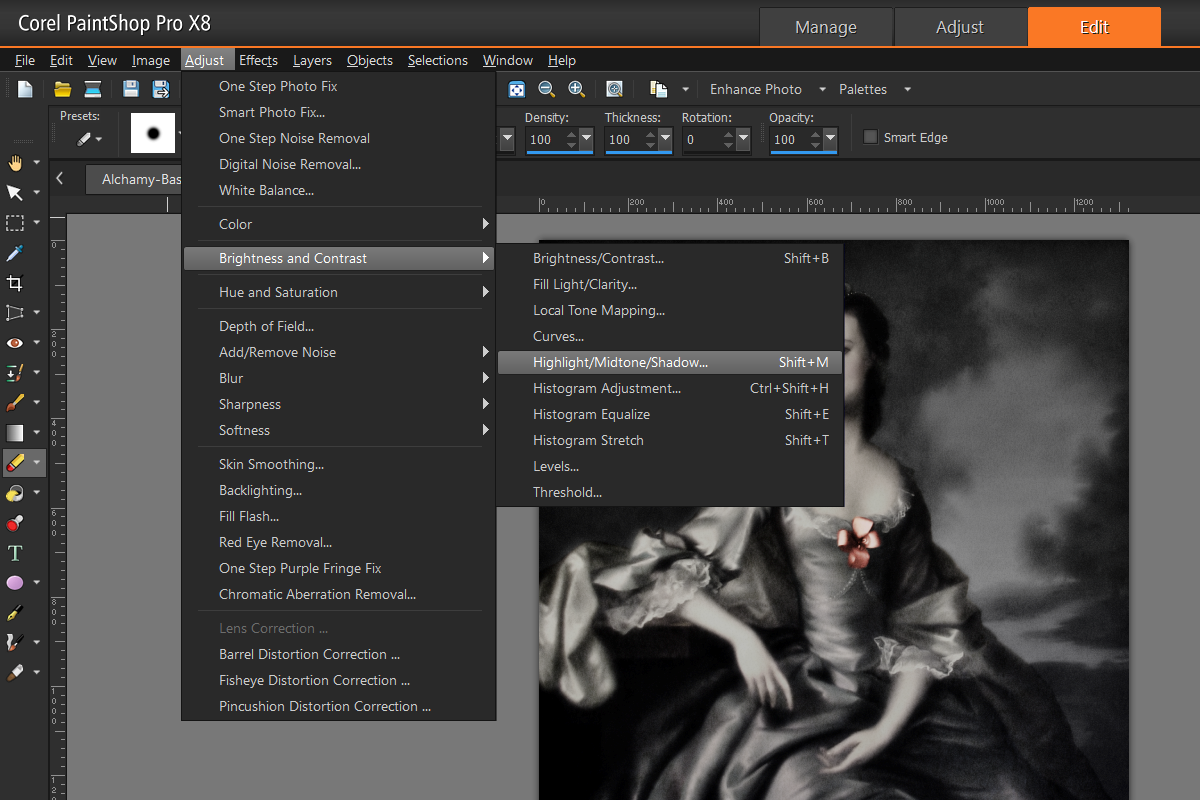
    From the newly opened Highlight/Midtone/Shadow window; set the options as you see them below or select Intense color under Settings.

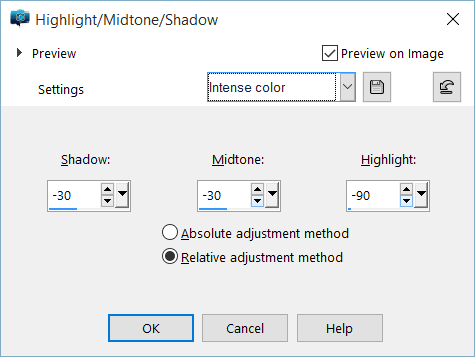
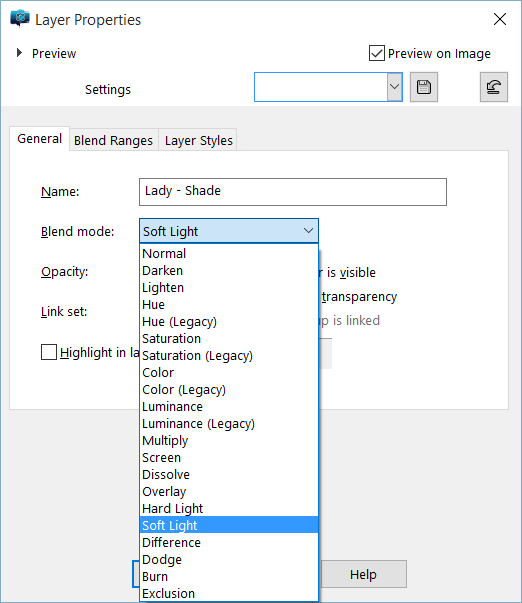
    When done, click on OK to apply this effect to the layer. Now adjust the Blend Mode by selecting Soft Light. Note, you can experiment and see how the different filters apply.

    Next in Part 7, Lady Shade will get Lips to Die For.


  • Lips to Die For

    Digital Alchemy – Part 7

    In Part 7 of the Digital Alchemy tutorial and previously we Gave the Lady a Flower.

    Modifying the lips follows the same procedures used in Give the Lady a Flower. First adjust Red/Green/Blue then Highlight/Midtone/Shadow followed by setting Blend Mode to Soft Light.

    In this case you will need to use the Eraser tool from the Tools Bar to clear out excess material. Once satisfied, your image should approximate the one below.

    Next in Part 8, Lady Shade will be Green with Envy.


  • Lady Shade Awakens

    Digital Alchemy – Part 5

    This is part 5 of the Digital Alchemy tutorial and previously we embodied the phrase Let There be Night.

    Lady Shade is a variant which has some effects normally associated with the undead. Duplicate Lady – Normal layer to switch back-and-forth as necessary. Select the Lady - Normal Layer, right mouse-click then select Duplicate.

    Rename the layer by double-clicking on the layer then providing a new name such as Lady – Shade.

    First, strip colour from the Lady Shade layer. From the Adjust menu, select Hue and Saturation then Hue/Saturation/Lightness.

    When the Hue/Saturation/Lightness window will appear, set the Saturation level to about -50 to get the desired effect.

    By adjusting saturation, we end up with the Lady not matching the background. She does not blend in with the night background and sticks out like a bad paste job. We can use the Blend mode option for a layer to smooth out transitions.

    Double-click on the layer that opens the Layer Properties window. From here, adjust the Blend mode and set it using the Soft Light option.

    Tip

    When experimenting, you can set the Blend mode to the first option then cycle through using the arrow keys. This way you can preview differences in the Blend modes until you find the desired one.

    Definition – Soft Light

    Combines the Burn and Dodge blend modes.  If the color channel value of the selected layer is less than 128, the Burn blend mode is used.  If the color channel value is greater than or equal to 128, the Dodge blend mode is used.  You can use the Soft Light blend mode to add soft highlights or shadows.

    Select Soft Light, click on OK and the following effect will be shown.

    Next in Part 6, Lady Shade will be Given a Flower.


Search