Category: Tutorials

  • Caveats and Workarounds

    Dressing up the Cover – Part 2

    This is Part 2 of the Dressing up the Cover tutorial and previously we covered Font Selection and Licensing.

    When using Corel PaintShop Pro there certain behaviours that you should be aware of before moving on. Being unaware of these pitfalls can lead to a great deal of aggravation.

    Resolution Matters

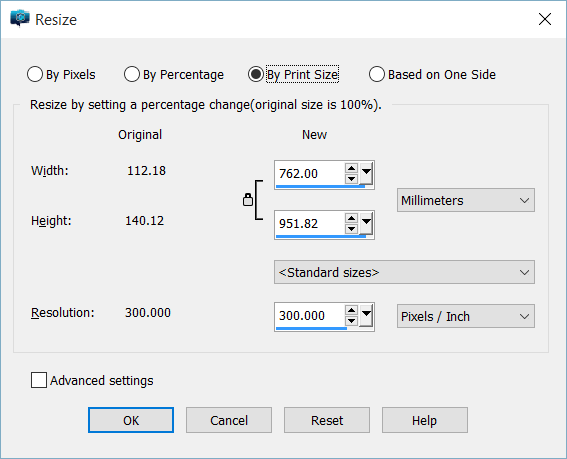
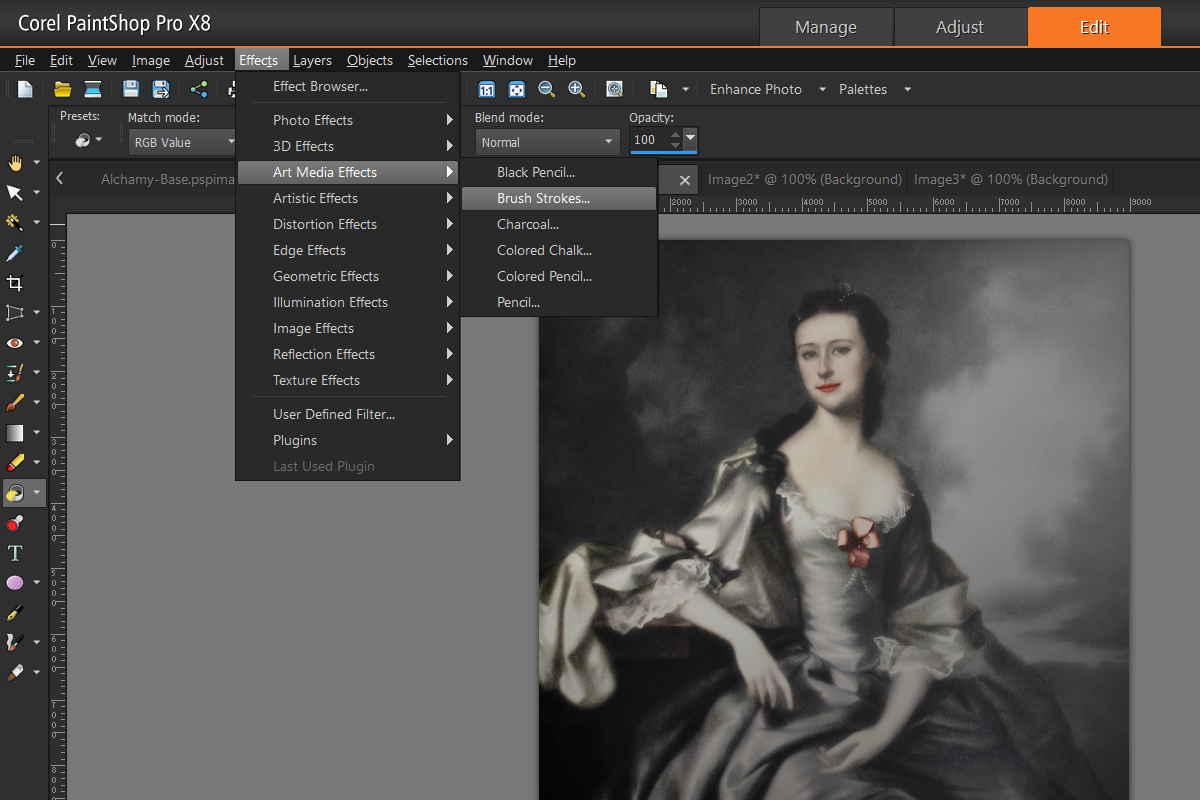
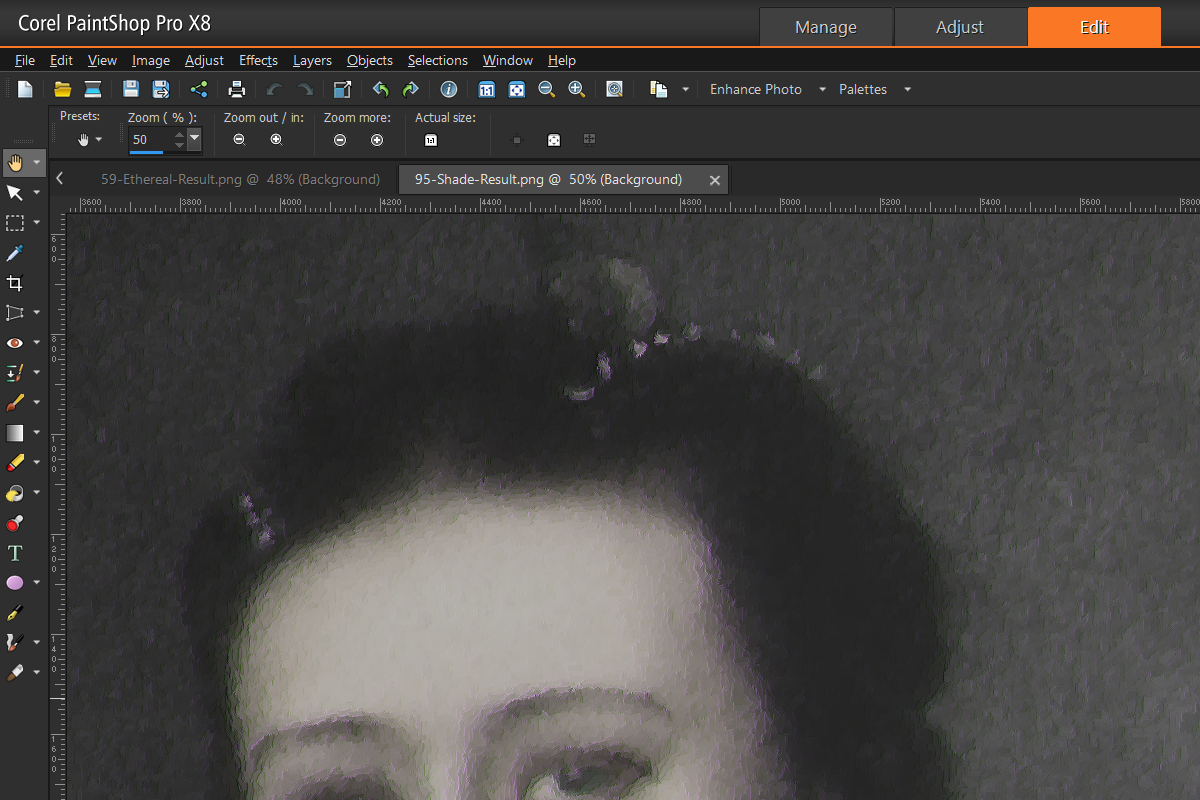
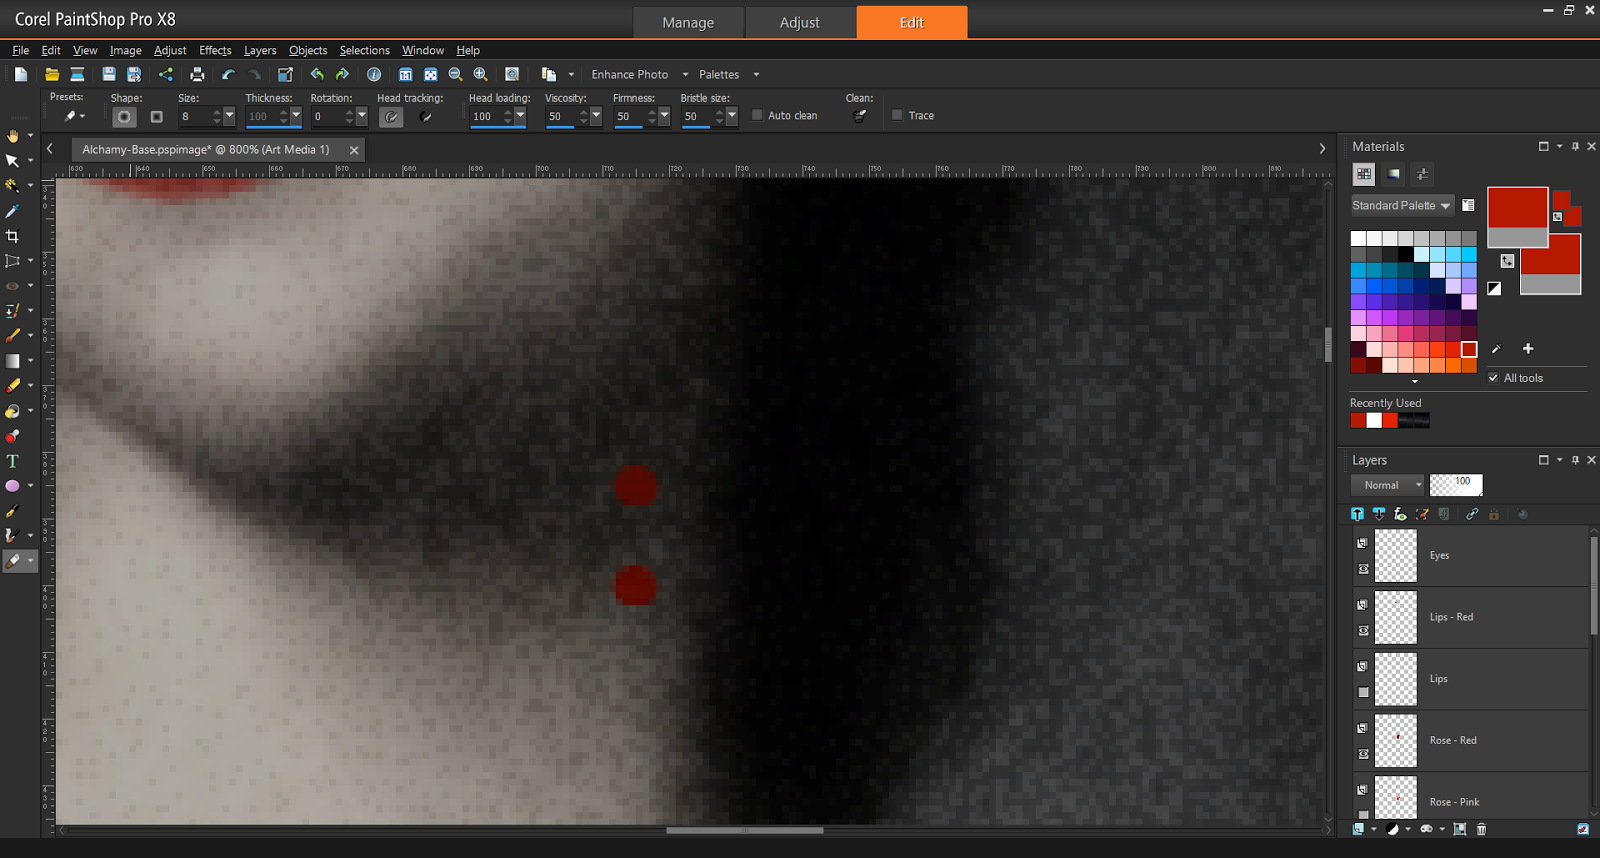
    The resolution that you with with makes a difference for a lot of operation.  If you recall from Digital Alchemy tutorials, we increased the resolution of the image then used Brush Strokes under Art Media Effects to make it look more like painting.  Ever wondered what would happens if this same operation were to be done at a lower resolution?

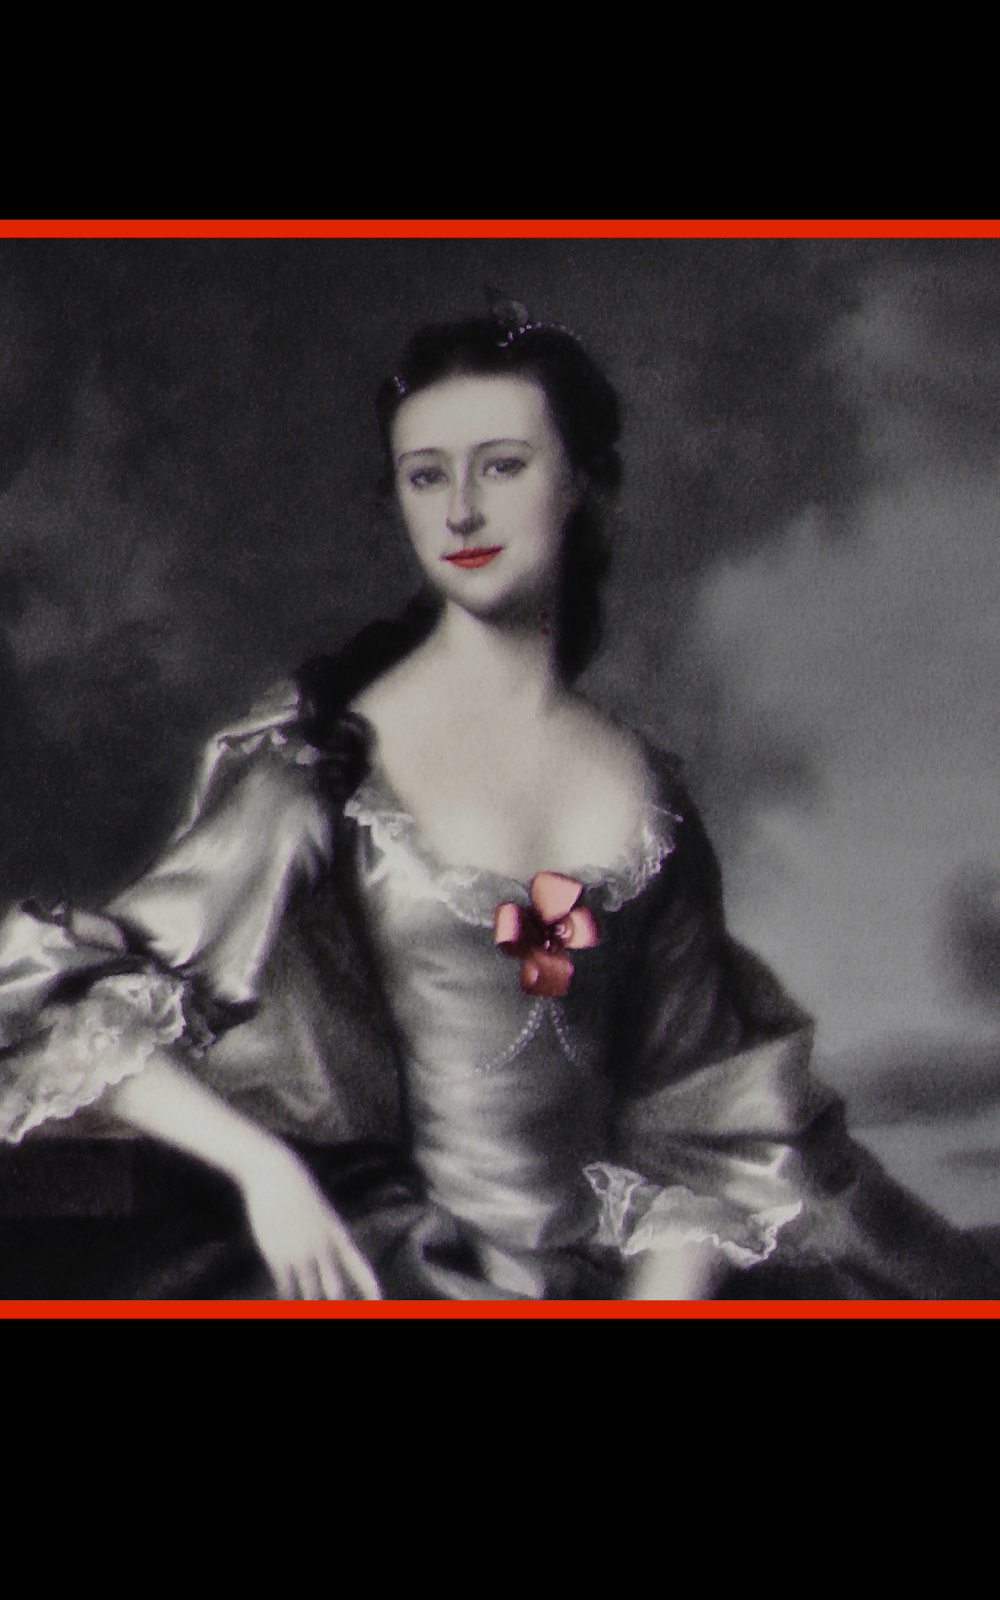
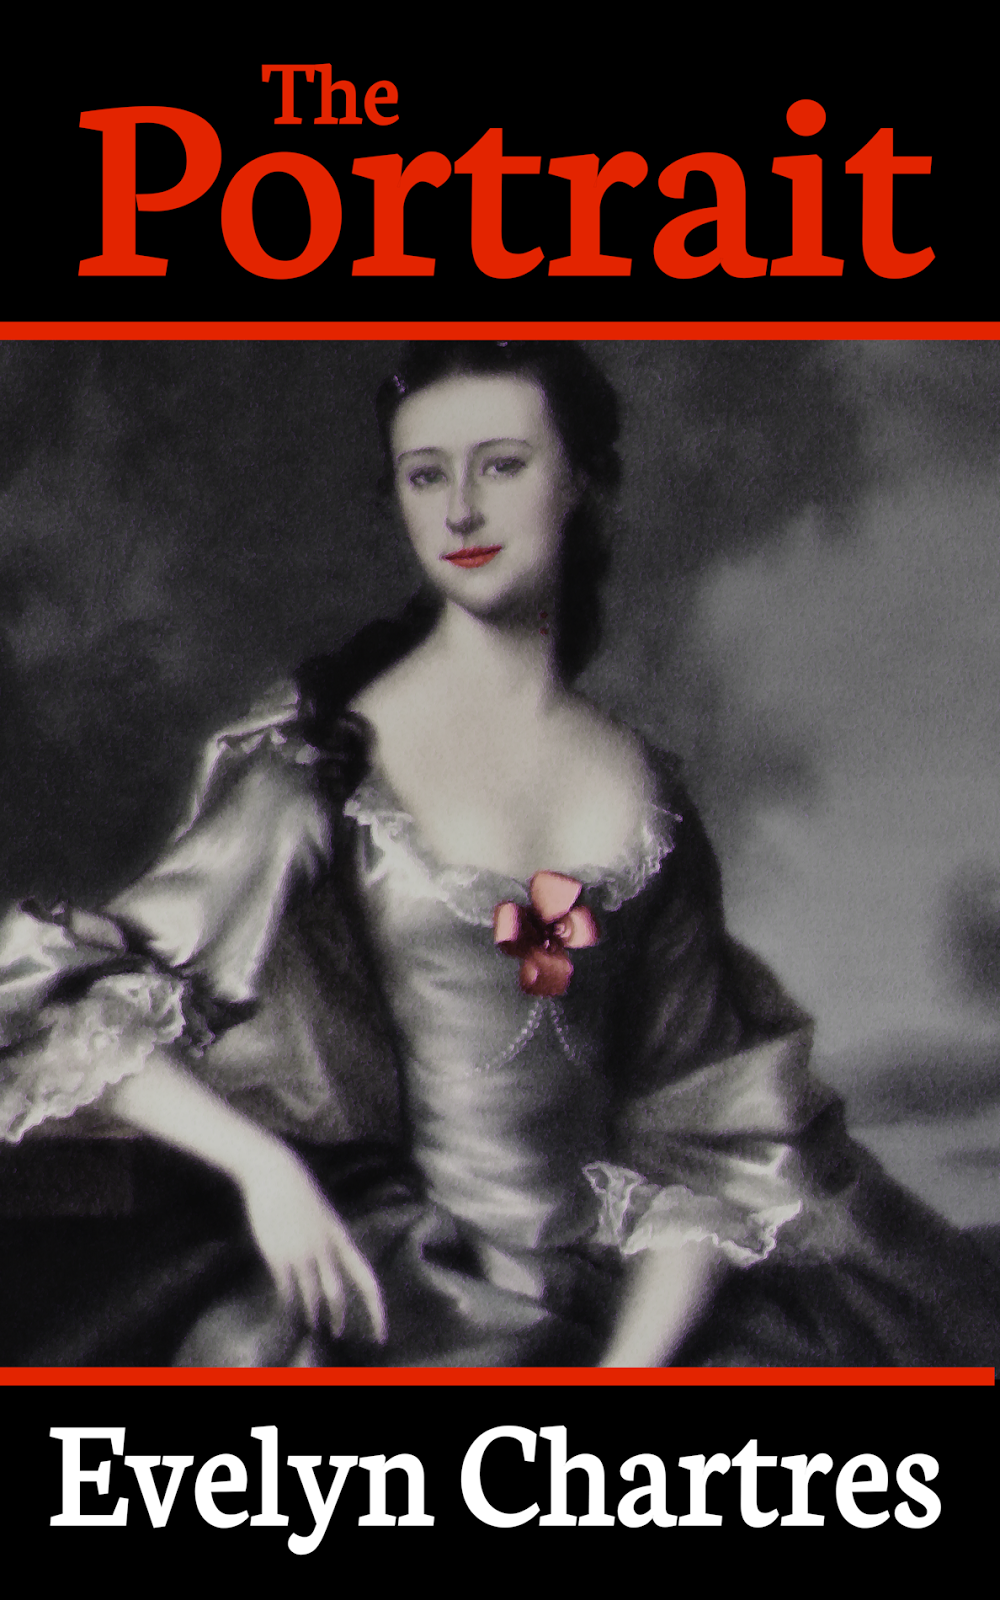
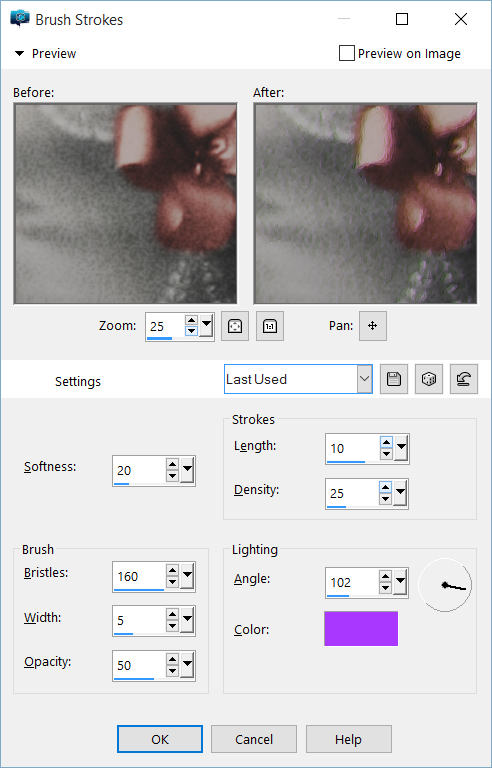
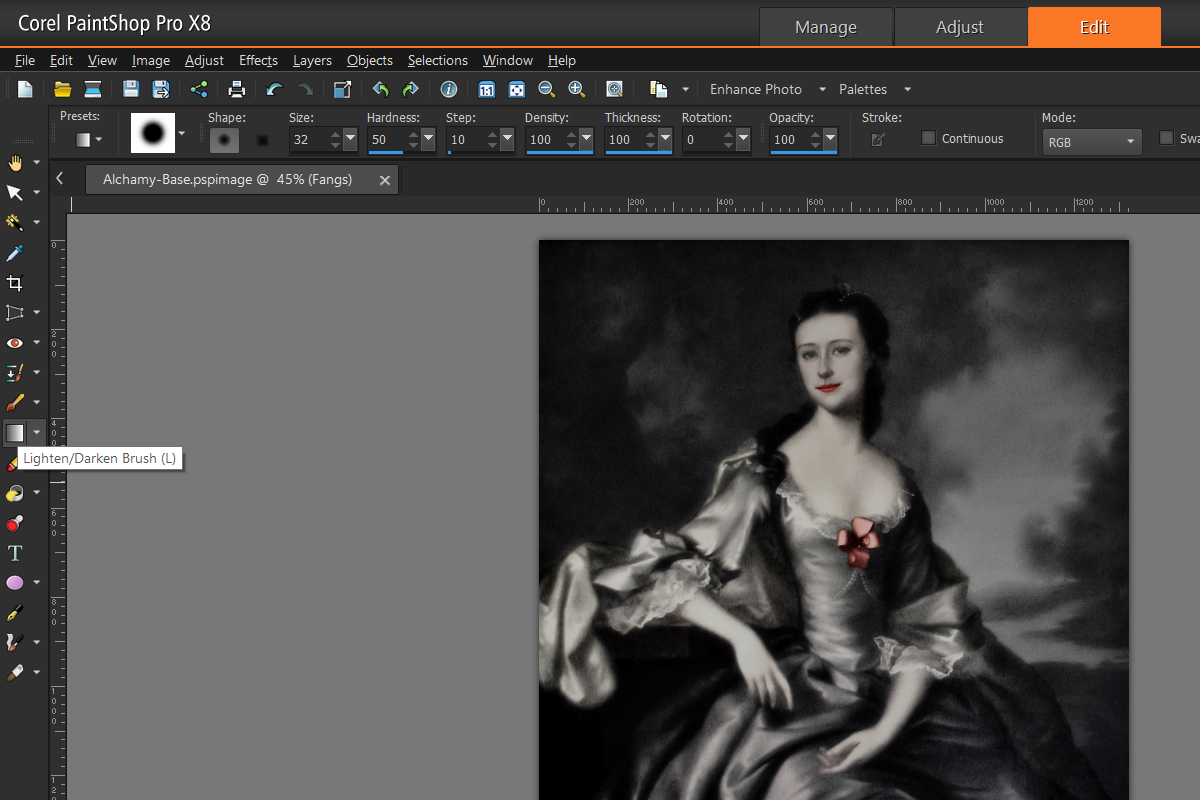
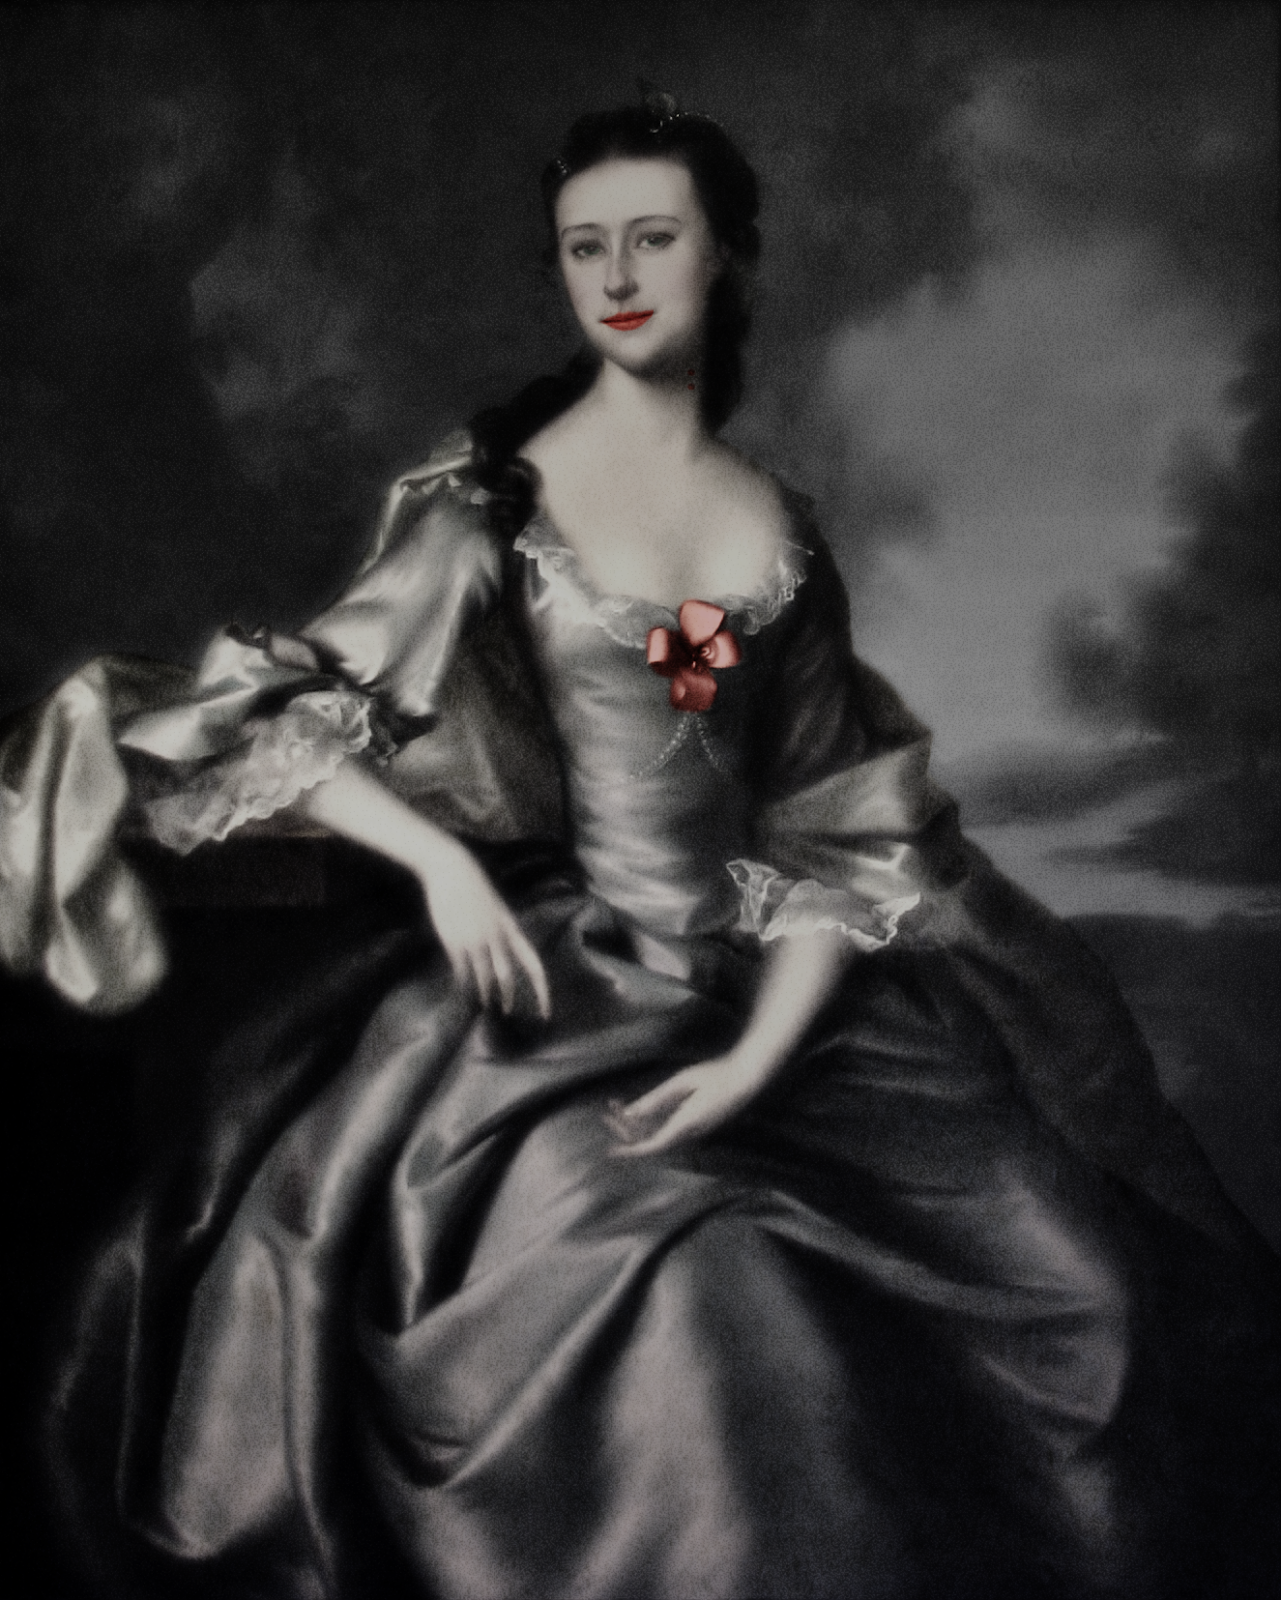
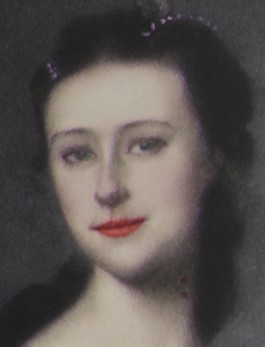
    The image below was generated using the full resolution and matches the one we generated in the tutorial.

    01-Size-Matters-Painting-Full.png

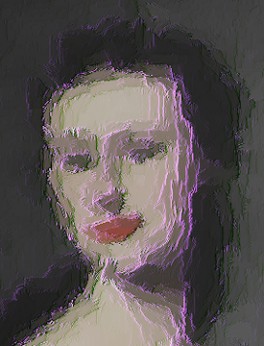
    This second image was done using the original resolution. As you can see, the image is no longer recognizable and most of the details have been lost in the operation. This is not the desired effect since it radically changes the look and feel of the work.

    02-Size-Matters-Painting-Small.png

    While we could change the Brush Strokes settings to work on a smaller scale, the truth is that this option is not always available. Hence you may never be able to achieve the same look by working at alternate resolutions.

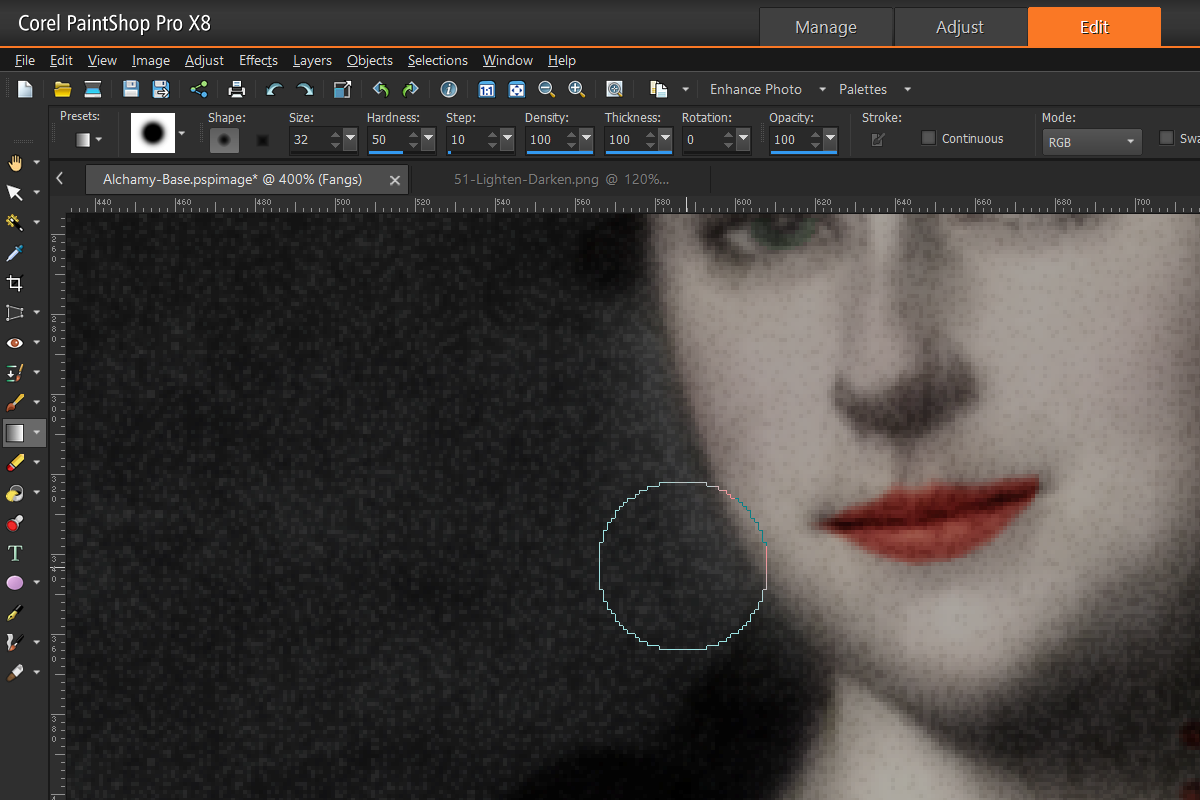
    Working in large resolutions has its own problems, since memory and processor usage increase so operations take longer. The Brush Strokes effect we used above took several minutes to run at full resolution, while was done in seconds for the lower resolution image.


    Higher Resolution Blues

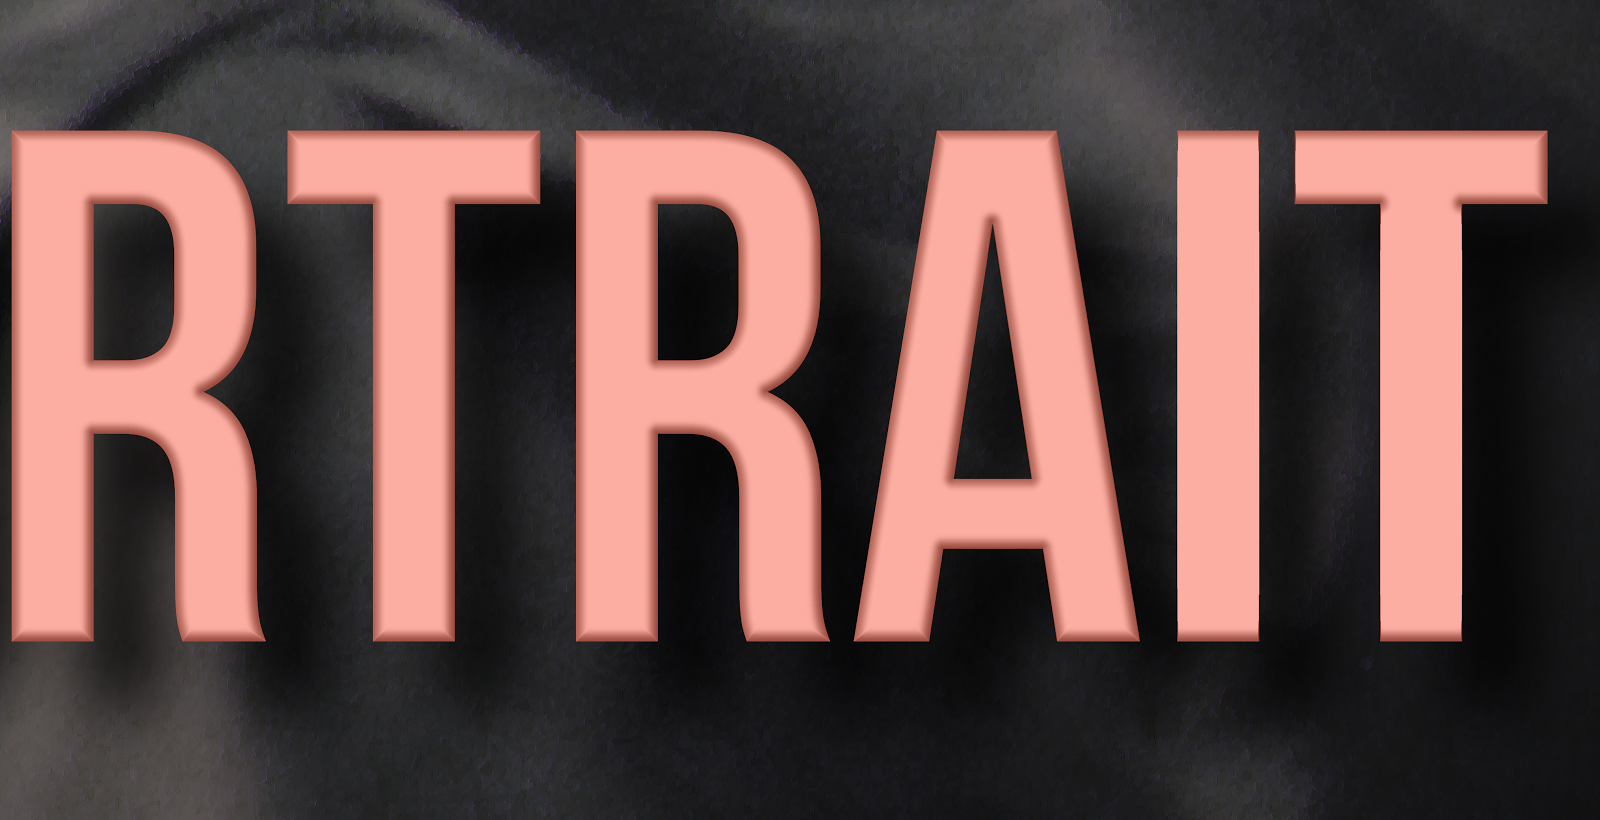
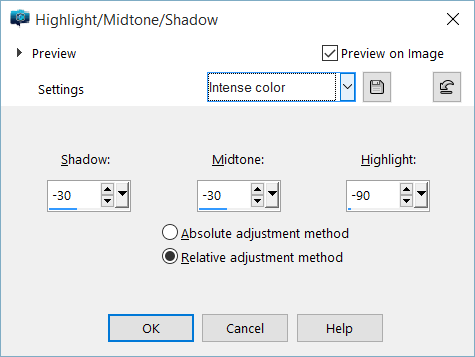
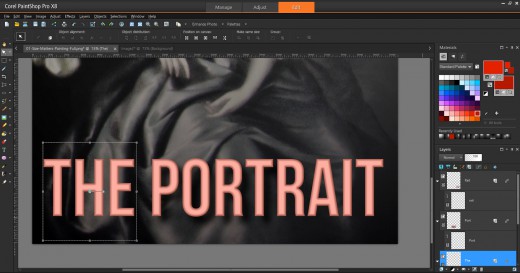
    At higher resolutions, Corel PaintShop Pro will not always complete its operations. When using Layer Styles some text some effects will trail off. This seems to be a problem related to the overall area the program is working with. For example, in the image below we added a Bevel and Drop Shadow.

    03-Size-Matters-Font-Effects.png

    You can see the two last letters are not fully rendered, a matter which is obvious when you compare the two visible T’s in the title.

    Note

    This rendering behaviour was seen in Corel PaintShop Pro X7 and X8.  It may not have existed in prior versions.

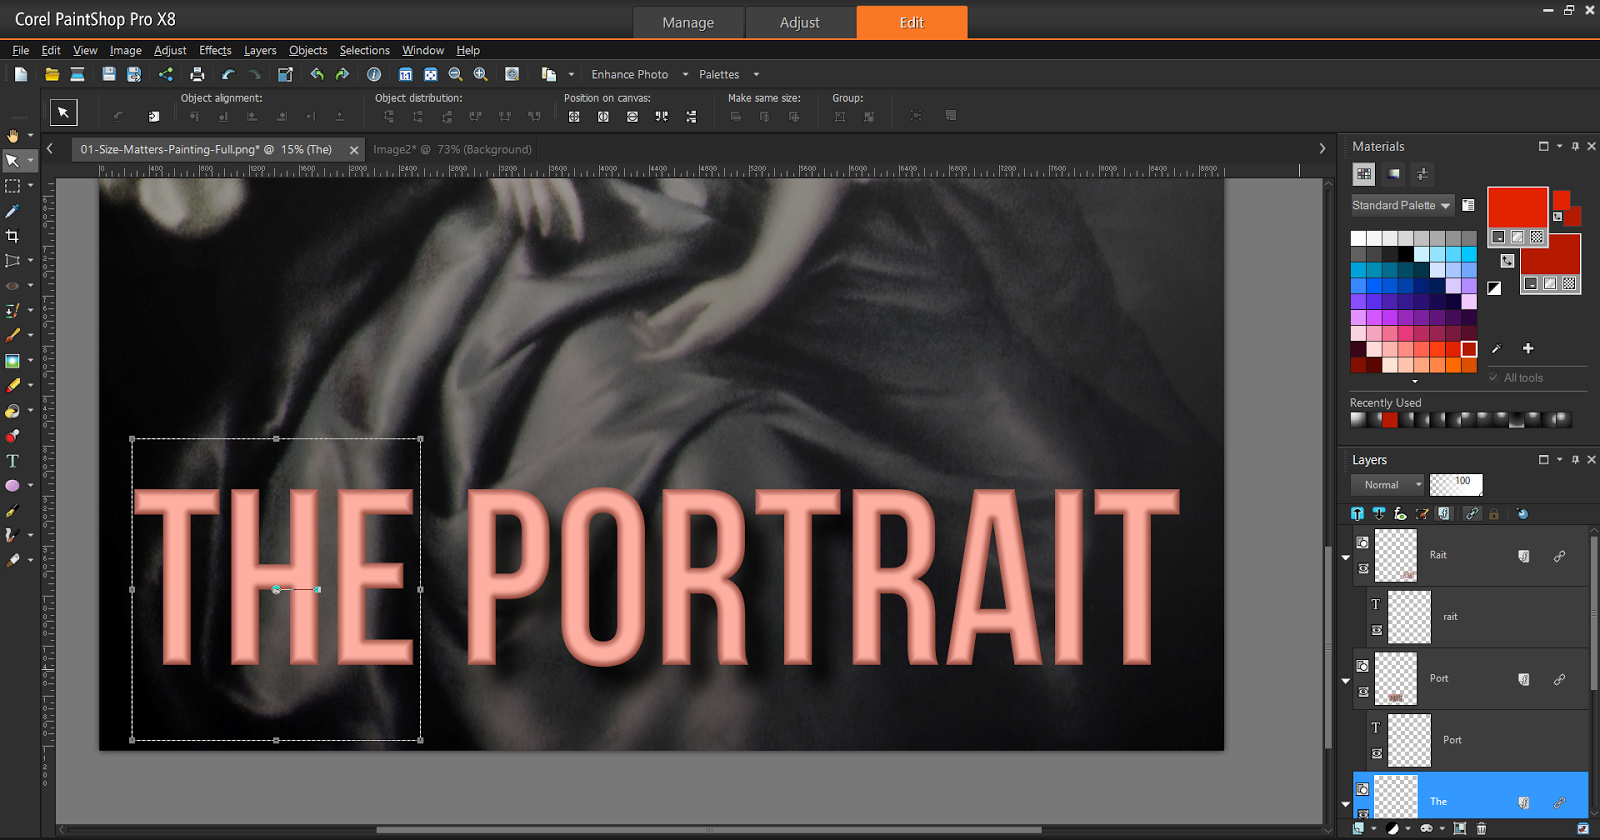
    Fortunately there is a workaround, though it requires splitting the title into multiple Vector Layers. Each layer will be rendered individually to display as expected.

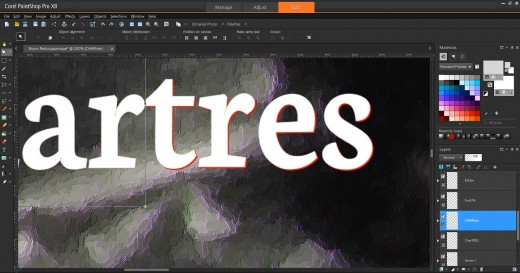
    To make it easier to align the components together, create the complete Text Line, then create them in smaller parts. It is recommended that you use different colours for the reference, so that you can overlay and observe where you not aligned, like below with the tres section of the Author Name.

    04-Size-Matters-Font-Workaround-Create.png

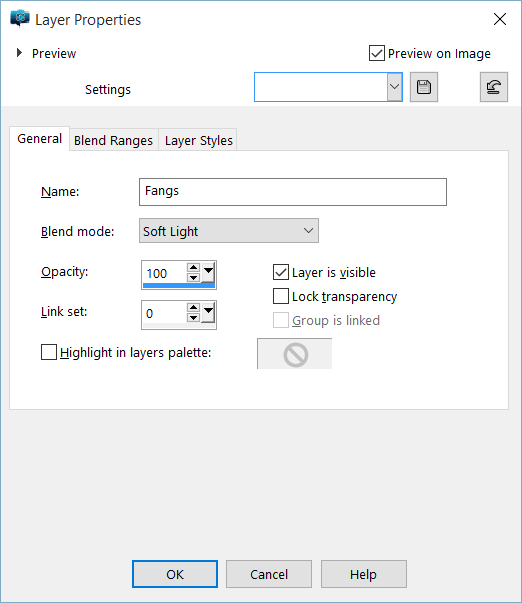
    Above we have both sets of fonts under one Vector Layer. As long as all the components are in the same layer they will render improperly. So we need to create two new Vector Layers and transfer the parts into them.

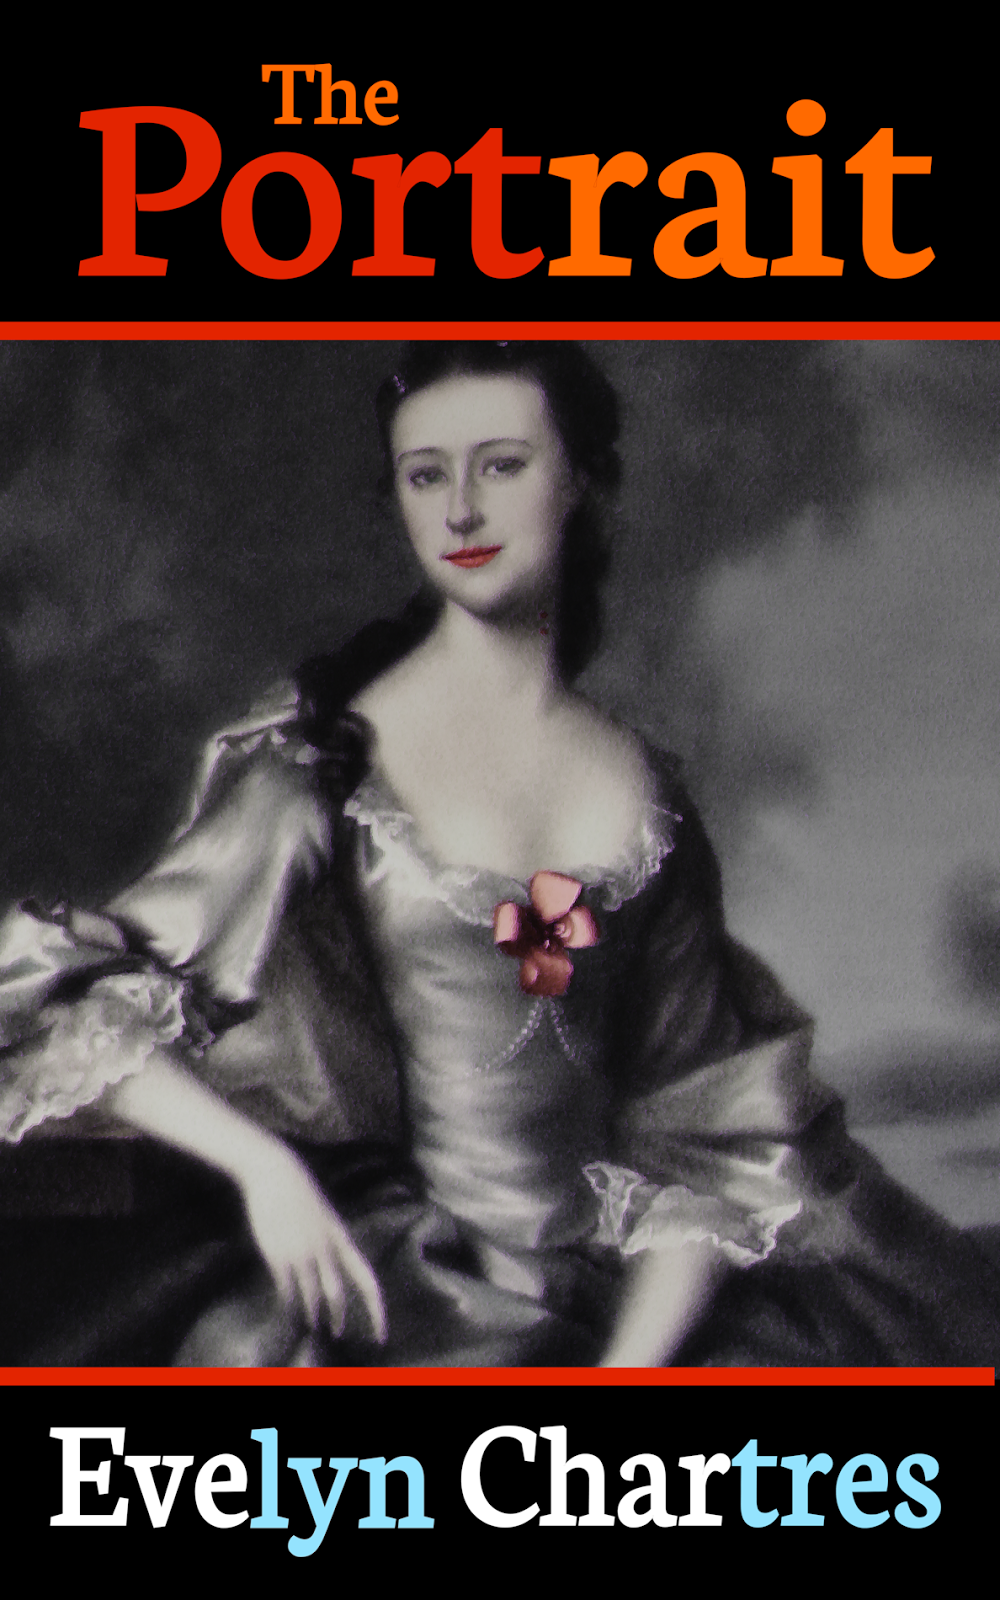
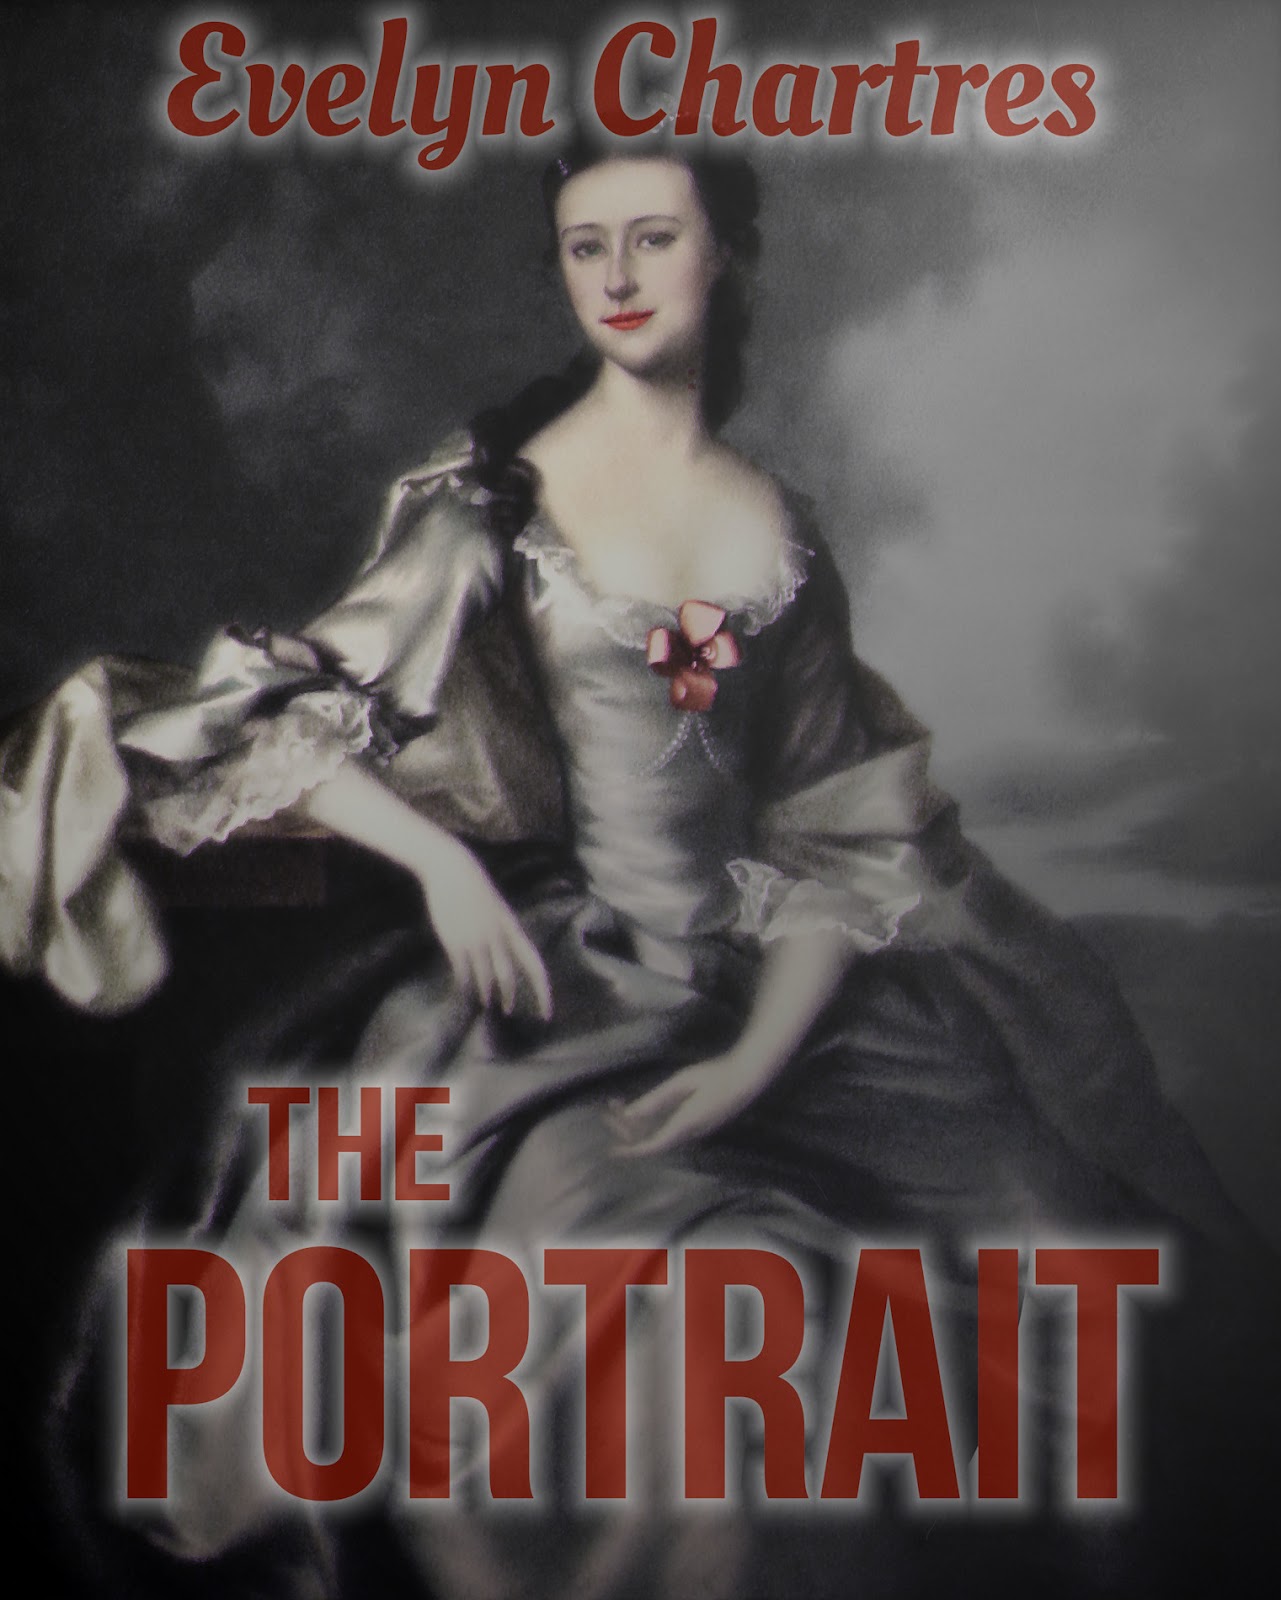
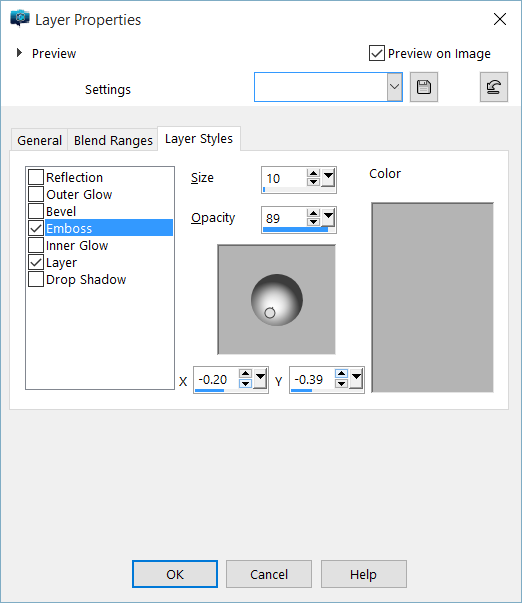
    Once the parts have been moved, you must individually manage Layer Styles for each Vector Layer. Use the same settings for Drop Shadow and Bevel. Once complete your fonts will render correctly like we see in the image below.

    05-Size-Matters-Font-Workaround-Individual.png

    Now that the effect renders properly, the image can be exported without incident.

    Note

    When satisfied with the look of your Layer Styles disable or hide them.  When Layer Styles are on or visible Corel PaintShop Pro slows down noticeably.

    Watch Your Groups

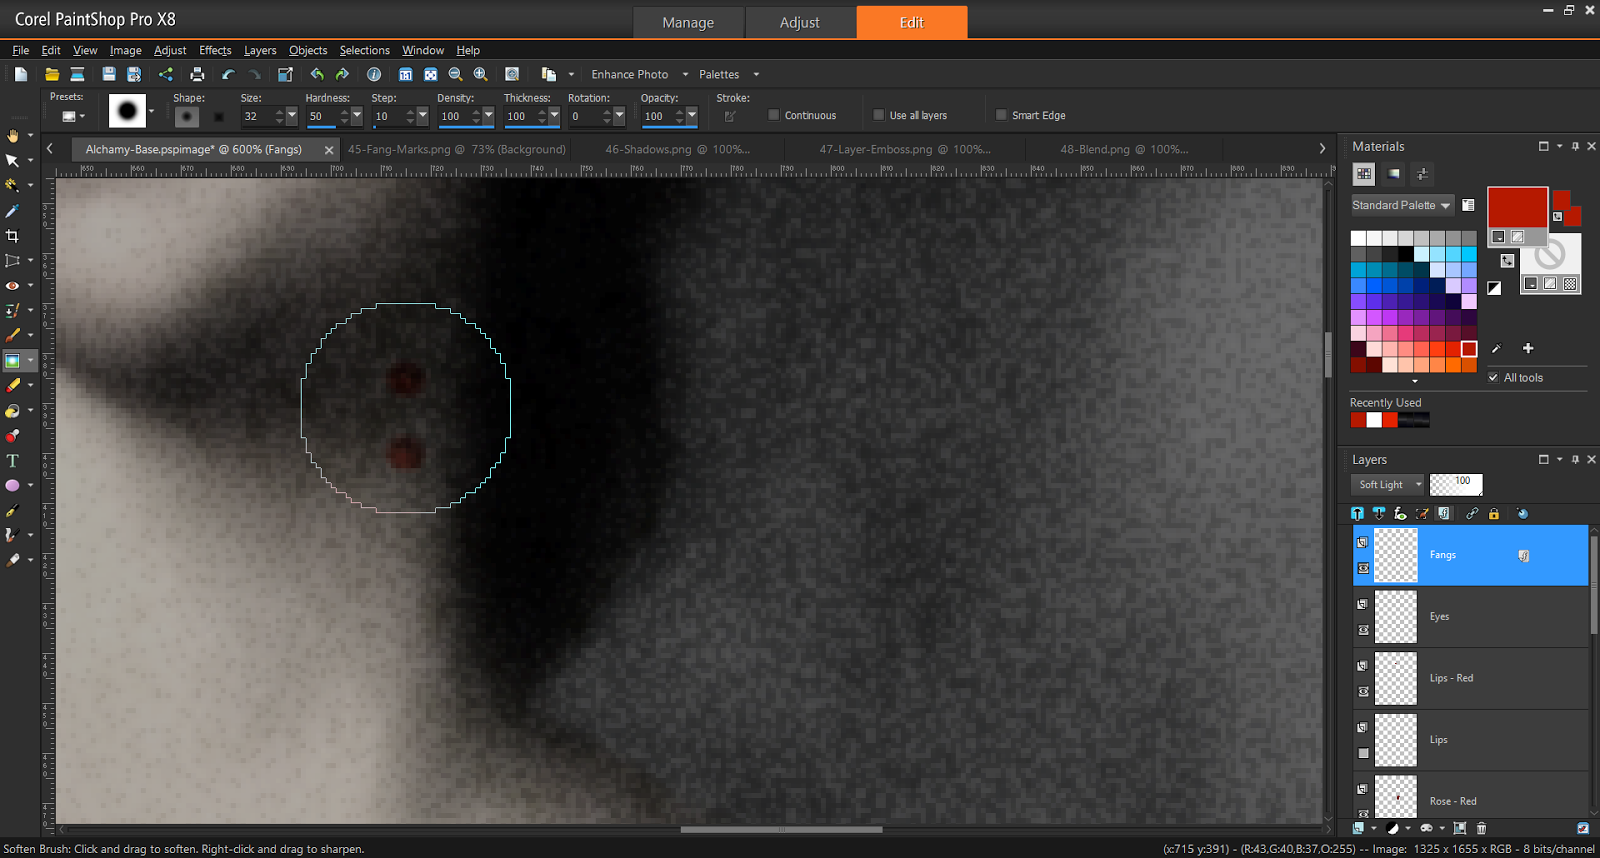
    How you group your elements may play a part in how they are rendered. When dealing with Layer Styles, distant items can create artefacts in between for no logical reason. To showcase this behaviour, we added an Outer Glow effect, with a Transparency and get artefacts in the middle.

    06-Grouping Matters.jpg

    The generated material can be a nightmare to remove, especially at high resolutions since the system responds slowly. The easiest option is to remove this effect entirely and make sure that the Top and Bottom Text Lines are in separate Vector Layers before enabling the effect.

    07-Grouping-Matters-Corrected.jpg

    Now have the effect desired without introduced artefacts.  Easy!

    Unexpected Effects

    There are various behaviours related to the Text Tool which should be noted.

    Creating Multiple Text Lines

    When you are creating a Text Line, you cannot simply click elsewhere to create a new Text Line. One way I found to get around this limitation was to switch to the Pick Tool then revert to the Text Tool.

    Alternatively you can click on the Background Layer which will have the same effect. Additionally this method will force the creation of a new Vector Layer vice stacking them into the same Vector Layer.

    Text Wrap Around

    The first behaviour relates to elements created when using the Rectangle Tool or similar. Rectangles, ellipses, symmetric and preset shapes will change the behaviour of your Text Tool if you accidentally work too close to them.

    This image outlines one of the more common problems.

    08-Unexpected-Text-Behaviour-Wrap.png

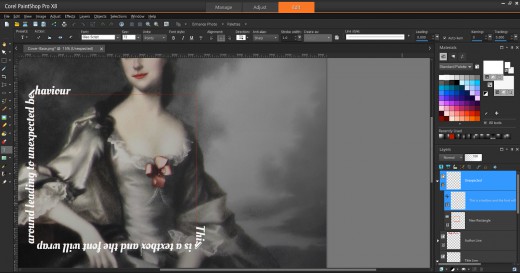
    When we clicked near the border, the icon changed to a Text Tool with a Border. Now text will wrap around the object in question. When expected, this is an awesome feature, otherwise it will drive you up the wall!
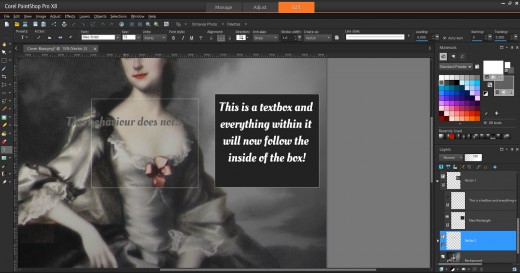
    Text Boxes

    Now when you click inside of the box, text will flow within the confines of the shape. This essentially creates a Textbox which is a desirable feature that should have been incorporated into the Text Tool directly. However, there is a catch and if your background is transparent this capability will not be enabled. The screen below demonstrates both behaviours.

    09-Unexpected-Text-Behaviour-Textbox.png

    Watch Where You Click

    Attempting to use items from the Tools Bar have the potential to behave differently. Creating text items in quick succession will group them naturally into a single Vector Layer and lead to the problems outlined in Watch Your Groups.

    As a test we used the Rectangle Tool to create a new Rectangle. We also did not pay attention to the selected layer and ended up passing on the set Transparency and Layer Styles to the new object.

    10-Unexpected-Text-Behaviour-Layers-Selection.png

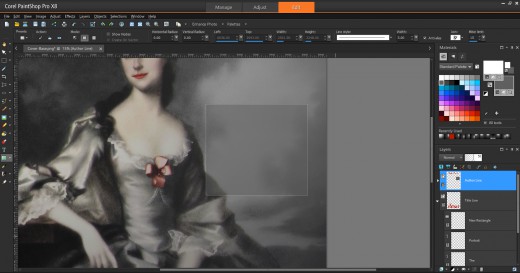
    This can lead to confusion and generate hard to remove artefacts. So be aware of which layer you are working on prior to moving forward.

    Note

    If you get into the habit of selecting the Background Layer prior to every operation, then newly created elements will fall under a new layer.  You can rearrange them at a later time.

    In Part 3, we will create a New Image and Place Lady Shade.


  • Selecting the Font

    Dressing up the Cover – Part 1

    This is Part 1 of the Dressing up the Cover tutorial. Font selection is vital in the successful creation of a cover. For example, the use of Comic Sans MS for a horror novel may come across as a poor fit. Unfortunately, navigating through the sheer volume of existing fonts can be an arduous task.

    Fortunately, a fair amount of the leg work has been done for us. Creative Indie has a page entitled 300+ Fool-Proof Fonts to use for your Book Cover Design which outlines popular fonts based on specific genres. Still, there are aspects you should consider prior to selecting your fonts.

    What Is the License?

    Let us take a look at the font Moonlight Shadow to explain. This beautiful font suits multiple genres, including Fantasy and Gothic Horror. However, this font has license restrictions which requires licensing. The price for a license varies from $10 to $100 USD based on uses.

    Note

    As a general rule, if you download a font and there is no licensing information, then it is likely pirated.  Conduct a more thorough search online to confirm its license.

    Sites like the Open Font Library can be useful to work around paid licensing. This site and others like it cater to free and open source fonts; albeit it at the cost of a reduced selection. Alternatively some fonts are available to you when you buy and install vendor software. An example of this is Trajan Pro, which is installed with Adobe Photoshop.

    Some sites will offer up a free version of the paid font. These tend to be crippled in some way, such as limited character sets, styles, kerning and so forth. Even with these limitations, this is a great way to determine if a font is suitable before paying for it.

    What Formats Are Available?

    Microsoft Windows supports True Type Fonts and Open Type Fonts. These are the most common font formats found today. However, there are other formats out there which will not import. Keep that in mind when searching for fonts.

    Note

    Corel PaintShop Pro does not need to be restarted to see new fonts.  This can be a great timesaver when experimenting with new fonts!  All you need to do is open the Font Selection Drop-Down menu to access new fonts.

    How Does It Look?

    Selecting a font can be difficult when you are looking at a small sample set. I found it helpful to group favourites together on one image. That way they can be compared as a group, the following image showcases this.

    00-Fonts-Play.jpg

    I used the title of the novel above to see how it appears using that specific font. While most of these were selected because they were free or open source, there are some paid fonts included as well.

    The reason this image was created using a red font over a black background was to see how these appeared at reduced resolutions. Red on black tends to degrade quickly when resolutions drop, which is a key feature to note since Amazon.com shrinks your covers down to 160px for thumbnails.

    Next in Part 2, we will discuss Caveats and Workarounds.


  • A Mild Dose of the ‘Eat Me’ Cake

    Digital Alchemy – Part 12

    This is Part 12 of the Digital Alchemy tutorial and previously we created an Ethereal Night.

    The base resolution for this picture is barely within the guidelines set out by Amazon Kindle Direct Publishing. Obviously, we cannot create additional pixels where none exists. Modern programs have gotten far more effective at increasing image size without leading to a dramatic loss in quality, however there are limits and artefacts will be introduced.

    Fortunately, the original shot was a painting and we have the option of using Corel PaintShop Pro to the image in brush strokes to simulate a painting. This will smooth out errors and leave us with a high-resolution image.

    From the Image menu, select Resize.

    From the Resize window, you can resize based on Pixels, Percentage, Print Size and Based on One Side. Select By Pixels, then set the Width to 9000 pixels.

    When you switch to By Print Size, more options become available. Namely, you can set the Resolution (density) in pixels per inch (Pixels/Inch) also known as Dots Per Inch (DPI).

    This measurement is important for printing an image and should be considered when self-publishing through CreateSpace or similar. We want to set the Resolution to 300, which is better than the 96 DPI used for screens.

    Switching from one resize method to the other maintains settings; so set the Resolution then return to Pixels to find your selected pixel intact.

    Note

    This multiple section Resize window is new with Corel PaintShop Pro X8. Earlier versions had an all inclusive window instead. However, the capabilities is the same between versions.

    Now we have a larger image than the original, flaws an all. From the Effects menu, select Art Media Effects then Brush Strokes.

    Brush Strokes is powerful and yet slow effect, especially at high resolutions, so selecting the Preview on Image check-box is not recommended.

    Select Factory Defaults from Settings then change the Color under Lighting to introduce purple with the brush strokes. To learn more about these settings, click on the Dice button to observe how changes play a role in the effect.

    When satisfied with, you end up with an effect similar to the one shown below. To showcase the effect, a zoomed in portion of her head is shown to highlight the introduced purple plays a part in colouring her crown.

    Lastly, this is a full version Lady Ethereal is shown below:

    Instead of using Lady Shade, use the Soft Light blend on the Original version of the Lady. This version has more skin tone and is a better suited for some covers.


  • Removing the Lady’s Glow

    Digital Alchemy – Part 10

    This is Part 10 of the Digital Alchemy tutorial and previously we Took a Bite out of Lady Gray.

    In the process of creating an eerie night scene, a glow was introduced on the left side of the Lady’s face. This glow detract from the overall effect, so best to remove it!

    From the Tools Bar, select the Lighten/Darken Brush to address this problem.

    Note

    Since the Soften Brush is already selected, click on the arrow besides the icon to show tools selectable within that group.

    Select the Background then zoom in on the area. Since this is a combination tool, the left-mouse click will Lightenen the area while a right-mouse click Darkens. Darken the area on the background while with the Lady Shade layer remains visible to gauge the effectiveness of the correction.

    Once pleased with the results, you should end with the following end-result.

    Next in Part 11, we will create an Ethereal Night.


  • Taking a Bite Out of the Lady

    This is Part 9 of the Digital Alchemy tutorial and previously we made the Lady Green with Envy.

    Lady Shade may share the undead’s skin-tone, but lacks something linking her with vampire lore. Early on in the cover’s design it was decided that the effect should be subtle to provide the viewer with a clue. This made fangs too obvious, however puncture marks hidden in the shadow of her neck seemed appropriate.

    Using the Brush tool from the Tools Bar, place two marks in the appropriate area as shown below:

    A new layer was created when those brush marks were made. From the Adjust menu, select Brightness and Contrast then Highlight/Midtone/Shadow. When you select Highlight/Midtone/Shadow, you will be requested to convert to a Raster Layer, agree and continue.

    Set the elements as shown below or select Intense colour pre-set from Settings.

    Double-click on the Fangs Layer then click on the Layer Styles tab. We are going adjust the Emboss settings to add shadows and depth. Either replicate what you see below or experiment to add a unique flare.

    Double-click on the Fangs Layer then click on Blend Ranges tab. Select Soft Light as the Blend mode for this example.

    From the Tools Bar, select the Soften Brush. This feature smooths-out elements within the affected area, a useful feature for removing the jagged edges.

    Hover over the area then click to apply the effect, continue until satisfied. Remember to use CTRL-Z to Undo when necessary.

    When complete the effect should produce an image that looks like the one below. Not only is the end result subtle, but should make this clue worth finding.

    Next in Part 10, we will Remove the Lady’s Glow.


  • Green with Envy

    This is Part 8 of the Digital Alchemy tutorial and previousy we gave the Lady Lips to Die For.

    Now it is time to add a bit of colour to her eyes. This process can be accomplished using the Brush tool from the Tools Bar. Select a colour you wish to use from the Materials Palette (in this case a bright green), then zoom-in on Lady Shade’s eyes.

    Use the Brush tool to paint over the iris.  Cover them as best you can, we can fine-tune during the next step.

    Note

    There is no need to create a New Layer since one will be created automatically when you use the Brush tool.

    Select the Eraser tool from the Tools Bar to adjust the iris fill as necessary. Using the Eraser tool will convert the layer to a Raster Layer; this feature is desirable since it enables setting Blend Mode to Hue.

    Next in Part 9, we will Take a Bite out of the Lady.


  • Give the Lady a Flower

    Digital Alchemy – Part 6

    This is Part 6 of the Digital Alchemy tutorial where previously Lady Shade Awoke.

    Lady Shade is washed out as she has no colour to make her stick out. In previous sections, we created layers for her lips and the flower. Now is the time to bring some colour back to the Lady, so let’s start with the flower adorning her dress.

    Make sure the Rose Layer is visible prior to selecting it. From the Adjust menu, select Color followed by Red/Green/Blue. When the Red/Green/Blue window appears set the options as follows:

    This above imbues the Rose Layer with a pink hue. If you are interested in having the Rose Layer take on more of a blood red colour, use the settings shown below instead. It is recommend you place these variants in separate layers so you can transition from one to the other.

    Now that the colours have been changed, we will enhance the shadows within that layer. From the Adjust menu, select Brightness and Contrast then Highlight/Midtone/Shadow.

    From the newly opened Highlight/Midtone/Shadow window; set the options as you see them below or select Intense color under Settings.

    When done, click on OK to apply this effect to the layer. Now adjust the Blend Mode by selecting Soft Light. Note, you can experiment and see how the different filters apply.

    Next in Part 7, Lady Shade will get Lips to Die For.


  • Lips to Die For

    Digital Alchemy – Part 7

    In Part 7 of the Digital Alchemy tutorial and previously we Gave the Lady a Flower.

    Modifying the lips follows the same procedures used in Give the Lady a Flower. First adjust Red/Green/Blue then Highlight/Midtone/Shadow followed by setting Blend Mode to Soft Light.

    In this case you will need to use the Eraser tool from the Tools Bar to clear out excess material. Once satisfied, your image should approximate the one below.

    Next in Part 8, Lady Shade will be Green with Envy.


  • Lady Shade Awakens

    Digital Alchemy – Part 5

    This is part 5 of the Digital Alchemy tutorial and previously we embodied the phrase Let There be Night.

    Lady Shade is a variant which has some effects normally associated with the undead. Duplicate Lady – Normal layer to switch back-and-forth as necessary. Select the Lady - Normal Layer, right mouse-click then select Duplicate.

    Rename the layer by double-clicking on the layer then providing a new name such as Lady – Shade.

    First, strip colour from the Lady Shade layer. From the Adjust menu, select Hue and Saturation then Hue/Saturation/Lightness.

    When the Hue/Saturation/Lightness window will appear, set the Saturation level to about -50 to get the desired effect.

    By adjusting saturation, we end up with the Lady not matching the background. She does not blend in with the night background and sticks out like a bad paste job. We can use the Blend mode option for a layer to smooth out transitions.

    Double-click on the layer that opens the Layer Properties window. From here, adjust the Blend mode and set it using the Soft Light option.

    Tip

    When experimenting, you can set the Blend mode to the first option then cycle through using the arrow keys. This way you can preview differences in the Blend modes until you find the desired one.

    Definition – Soft Light

    Combines the Burn and Dodge blend modes.  If the color channel value of the selected layer is less than 128, the Burn blend mode is used.  If the color channel value is greater than or equal to 128, the Dodge blend mode is used.  You can use the Soft Light blend mode to add soft highlights or shadows.

    Select Soft Light, click on OK and the following effect will be shown.

    Next in Part 6, Lady Shade will be Given a Flower.


  • Let There be Night

    Digital Alchemy – Part 4

    This is part 4 of the Digital Alchemy tutorial and where previousy we Isolated the Lady’s Lips.

    A colourful painting with a sunny background will probably not evoke a sense of dread and horror. The best way to achieve that is to turn the background into the night and we can do that with some basic features of Corel PaintShop Pro and a gradient layer. Since we are dealing with the Background Layer for now, hide all other layers.

    The first step is to transform the Background Layer into a Black and White image. While there are a myriad of ways to achieve this step; the easiest is by clicking on the Effects Menu, then Photo Effects and selecting Black and White Film.

    Note

    Converting the image to grayscale converts all layers to grayscale as well.

    The Black and White Film window will appear and enables you to fine-tune the process. The BW Normal setting had the desired effect.

    When satisfied with the settings, click on OK and you will have the following effect.

    Now we have an image that has no colour whatsoever and lacks elements to make it appear as a night scene. Now its time to apply an Infrared Filter, from the Effects Menu, select Photo Effects then Infrared Film.

    The Infrared Film window will appear and enable you to play with the pre-sets or select one that achieves the desired effect. In this situation, the Strong pre-set from Settings was used as seen below.

    When satisfied, click on OK to get results similar to the image shown below. Now the shot has gotten darker with some elements emitting a silvery hue, a nice effect that provides a haunting look.

    Now we need to create the effect of a night sky. Night skies are not uniformly black, especially when light sources like the moon are present. Gradients will add transitions along with varying transparency.

    From the Layers Palette, click on New Layer and select New Raster Layer.

    For moment we will not play with Opacity; provide a Name such as Night Gradient as like we find below.

    The new layer may appear at the wrong level. Corel PaintShop Pro layers have precedence based on their level; layers nearer to the bottom are overridden by content from higher up.

    Prior to this moment, all new layers were placed one atop the other. Now we want to make sure the Night Gradient does not affect layers other than the Background. We need to shift it down, select the Night Gradient Layer by clicking on it then move it just above the Background.

    Now it is time to play with gradients, from the Materials Palette click on the Icon on the lower-left of the colour selector (either will do). Select the second option called Gradient, after which you need to hover over the Colour Selector (a dropper icon will appear) then click to select.

    This brings up the Material Properties window. Setting up gradients can be daunting at first; to gain some insight, scroll through existing pre-sets available and see how their settings are applied. When you create a New Gradient, it will have no transitions at first.

    To add colour transition, click below the bar and a new Transition Point will appear. You can add as many as you want and removed by sliding them off either edge.

    New transition will come with two components, the first of which looks like a House and a Diamond. When one clicks on the House, select the colour it will transition to, whereas the Diamond dictates how gradual the transition will be. In our examples, we begin with Black to the middle then transitions to a Dark Blue towards the end.

    The top of the bar adjusts transparency. Similarly the colour transitions, clicking above the bar to create a new transparency and in out situation we create one then set its Opacity to 75%. The transition will create an area unaffected by the gradient, which coincides with the background body of water and adjourning trees.

    Note

    If you create a gradient that is the inverse of what you want, click on Invert check-box to correct the alignment. Alternatively, modify the Angle to achieve the same.

    From the Tools Bar, select the Flood Fill Tool and then left-mouse click (right-mouse if you used bottom selector) on the Night Gradient Layer. This will fill the layer with the gradient and cover over the Background.

    Note

    If you encounter a situation where the Flood Fill Tool only fills a portion of the layer, make sure the Use All Layers option is NOT selected.

    To blend the Night Gradient layer with the Background, adjust transparency from the Layers Palette. Set the Transparency to 60% to get the desired results.

    Tip

    If you want fine-grained control over the transparency settings of a layer, double-click on the layer then adjust it from the Layer Properties Window.

    With that the gradient is in place, the background looks more like a night scene. This forms the basis for the future modifications applied to higher layers.

    Next in Part 5, Lady Shade will Awaken.


Search