It’s a challenge to maintain consistent spacing within a manuscript. Iterative edits, multiple users, along with copy and paste oddities all contribute to the problem. While the manuscript may look fine on the surface, converting it to other formats can bring out unexpected quirks. E.g., paragraphs that start with a space, or create blank lines because of a trailing space(s).
This tutorial shows you how to normalise a manuscript using a series of Microsoft Word’s Find and Replace functions. This process will cut down on the time needed compared to doing so manually.
Copy and paste these instructions into the Find and Replace function within Microsoft Word. Replace All can be used for every operation except for the last two.
Amazon is separated into regional marketplaces. This is why you will find sites like Amazon.com (United States), Amazon.ca (Canada), and Amazon.co.uk (United Kingdom). Not all goods can be purchased in a market outside of your own, and this extends to Kindle Ebooks. How does it work for readers sent to the wrong market? While the answer is nuanced, the end result is often lost sales.
Authors are as varied as the stories they tell. Some write by hand, channeling the spirit of monks and scribes. Others prefer the feel of a typewriter, which is often portrayed in movies and novels.
Technology has allowed writers to venture into the digital realm. While authors like George R.R. Martin remain stubbornly entrenched to the technology they adopt; others look towards the horizon for technologies to aid their journey.
Many of us own phones that have more processing power than what was available to NASA during the Apollo program. However, this technology has not been widely adopted for content creation.
I’ve worked on software development projects in the past. So, once I began writing, I fell back on the tricks of the trade to refine my work.
My writing process borrows from the Spiral development model. As an author, this permits me to power through an initial draft, and polish the work over several iterative cycles.
Diagram 1. Spiral Development for the Literary World
To guide progress, I track trends to measure success. The following section outlines improvements that were made over time for two (2) of my releases:
The Grand
Diagram 2. Shows the progress made for The Grand over nine (9) cycles
What’s with the yellow line? While others measure the number of revisions within a measurable area, the yellow line measures words between revisions. I.e., the more words you have in between the better.
Visually, the changes are more dramatic:
Dark Hearts
Diagram 3. Shows the progress made for Dark Hearts over seven (7) cycles.
Again, the visual changes are more dramatic:
The Difference
The Grand (2017) was written with little feedback. Without release pressures, there was plenty of time to refine. After the book was published, several changes were made to the manuscript to account for feedback in reviews.
Dark Hearts (2022) involved external feedback throughout which led to more work up front. Once I got near the one thousand (1000) revision count for the manuscript, I knew that it’s time to pass the work on to my editor.
The Process
The process is roughly four steps as follows:
Working Version
Convert the manuscript into the format to be used for revision. While I convert the manuscript to an eBook, there are other methods available:
Printing the manuscript.
Modifying the manuscript styles to force yourself to view the content differently. For example, change the font, size, and colour.
The goal is to avoid reviewing the document in the same way you’d write or edit. I often call this switching from content creation to reader mode.
The Great Pause
After my working copy is complete, I set the project aside and tackle something new. Tasks range from reading a novel to painting the house.
If you want to maintain momentum, you may want to consider:
Working on cover.
Working on the blurb.
Preparing the website for the release.
Preparing the marketing material. Or.
Writing a newsletter to mark your progress.
This phase seeks to take your mind off the manuscript and approach the work with fresh eyes in the ensuing steps. This increases the chances of being objective when reviewing the manuscript.
A good example about this behaviour is an article on how the brain interprets words. Note how this paragraph is legible for many despite the spelling.
Aoccdrnig to a rscheearch at Cmabrigde Uinervtisy, it deosn’t mttaer in waht oredr the ltteers in a wrod are, the olny iprmoetnt tihng is taht the frist and lsat ltteer be at the rghit pclae. The rset can be a toatl mses and you can sitll raed it wouthit porbelm. Tihs is bcuseae the huamn mnid deos not raed ervey lteter by istlef, but the wrod as a wlohe.
If your mind can read such garbled text. Imagine what it can do when intimately familiar with the text?
Note
It’s entirely possible to edit too much. A good sign is when you’re skimming the material vice reading. If you become sick and tired of reading your own manuscript, it’s time to take a break and step away.
Feedback
Feedback is critical for this process, otherwise our creation exists within a bubble. While challenging for new writers, engaging others is a good way to catch plot holes, or fill in the details that your readers will be looking for.
There are different types of feedback:
Alpha Readers. Alpha readers are typically engaged during the writing phase. These should be trusted readers that you can bounce ideas off.
Beta Readers. These readers are engaged later in the process, and for me that’s around revision 2 or 3. For new readers, it’s a good idea to provide them with a list of questions to work through.
Editors. Editors here will focus on story structure and pacing who help you keep the reader engaged. Some editors may advise you that there could be significant structuring or restructuring of a manuscript, so engage them early.
Note
Good editors are worth their weight in gold. Because of the investment, some independent authors rely on Alpha and Beta readers to address developmental concerns.
I don’t recommend engaging a developmental editor without prior interaction. Many will do a sample for you, which is a great way to determine if the opportunity exists for a lasting working relationship.
This step is often concurrent with The Pause. This is an opportunity to distribute a working copy to readers in order to solicit input and opinions.
This step can employ services like Wattpad and Patreon for enabling interested readers to follow your progress and interact.
Revise and Implement
In this step, you’ll revise chapters, tweak, and make corrections to the content. This process is sometimes referred to as redlining and was traditionally done using pen and paper. The term also evokes memories of school papers dripping in red ink.
Note
Tools like Grammarly and ProWritingAid are invaluable during this stage. They can help with your writing and even assist you in finding issues like inconsistencies in spelling, echoes (repeated sentences and lines), complex sentences, and so forth.
However, these programs are not perfect and should not be trusted blindly. It’s often possible to have the tool recommend you add a comma, only to recommend its removal the next time you run through.
I use a Kindle Keyboard which permits me to type in comments. These comments are annotations of changes that will need to be made to the manuscript later. Early revisions tend to generate lots of corrections, so I transcribe often to avoid data loss.
Diagram 4. Mock-up view of a review process on a Kindle Keyboard
Over the cycles, the number of revisions drop in number and complexity. Whereas during the final cycle, I’m looking for things like elusive typos.
This stage also permits you to adjust chapters, including their order. You may opt to add, rewrite, split or remove chapters. Just like you would add, fix or remove features in a software project.
Repeat!
Start the process all over again. Create a new version of the manuscript, take a break, revise and implement. With every revision look at your metrics to measure progress.
Towards the end you’ll know when it’s ready. For me, that’s when I hit one thousand (1000) revisions for whole of the manuscript.
Revisions may have different goals. The first should be about adjusting the structure and detail, while later revisions concentrate on trimming the fat and finding those elusive typos.
A good way of staying focused is to track your progress. Otherwise, you’ll end up in an infinite loop. You have to find that point where the manuscript is ‘good enough‘ to be passed on.
After ‘Good Enough’
This is the stage where you hand off the manuscript to someone else for a sober second look. Primarily someone who will review the document for lingering errors. I use my editor for this step, but a trusted reader can help as well.
Alas there is no rest for the weary, as there’s still work to be done before release. This includes but is not limited to:
Normalise your manuscript (editors often help with this step).
Format your manuscript for print, and eBook.
Integrate the cover with the manuscript.
Release your book.
Advertise!
More on Editors
There are many types of editors. Here is a distinction between the types and when you should engage them in the process:
Developmental. Major story and character points, early in the process, no line editing or proofreading.
Substantive/Content Editors. Once you have a solid story, it’s time to catch lingering plot issues.
Copy/Line Editors. Your story itself is solid, now it’s time to make the writing tighter, sharper, and stronger; improve the reading experience.
Proofreaders. This is absolutely last step before you go to print, addressing only basic punctuation and grammar, but not touching the story or the writing style.
Some editors will perform one or several of these roles. In many cases, it’s prudent to get another editor for proofreading as a final check of the manuscript.
How to format your manuscript for print on Microsoft Word and not rip your hair out!
Microsoft Word, like most user-friendly software attempts to make your life easier by making assumptions. When using Microsoft Word‘s more advanced features, you may encounter annoying side-effects. In other cases, the application’s resistance to doing what you ask may have you ripping your hair out.
This tutorial focuses on such behaviours observed when working on manuscripts with of Microsoft Word. More specifically, the following subjects are detailed:
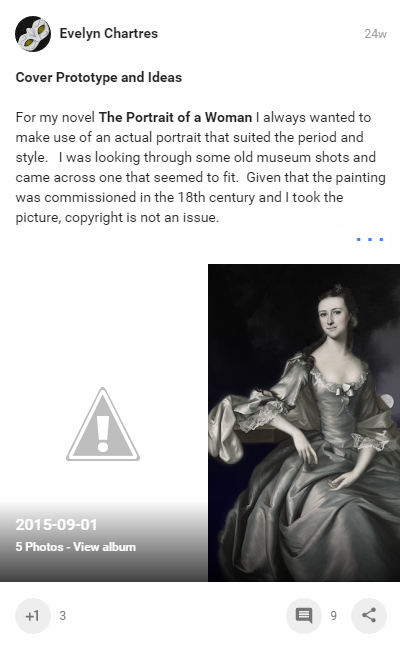
I discovered through trial-and-error that dropping a series of images into a gallery then asking users to comment was inefficient. Some of the reasons for this include:
Users tend to ignore titles and will comment on the first, or third image. Unfortunately some sites will vary the order;
Users have a hard time comparing covers which are very similar in design. This requires them to look back and forth, which makes comparisons more difficult.
Images dropped into a gallery may not exist or be accessible later. The first time I created a sample gallery to compare against, the images became unavailable and was unable to address the issue. This particular behaviour is showcased below:
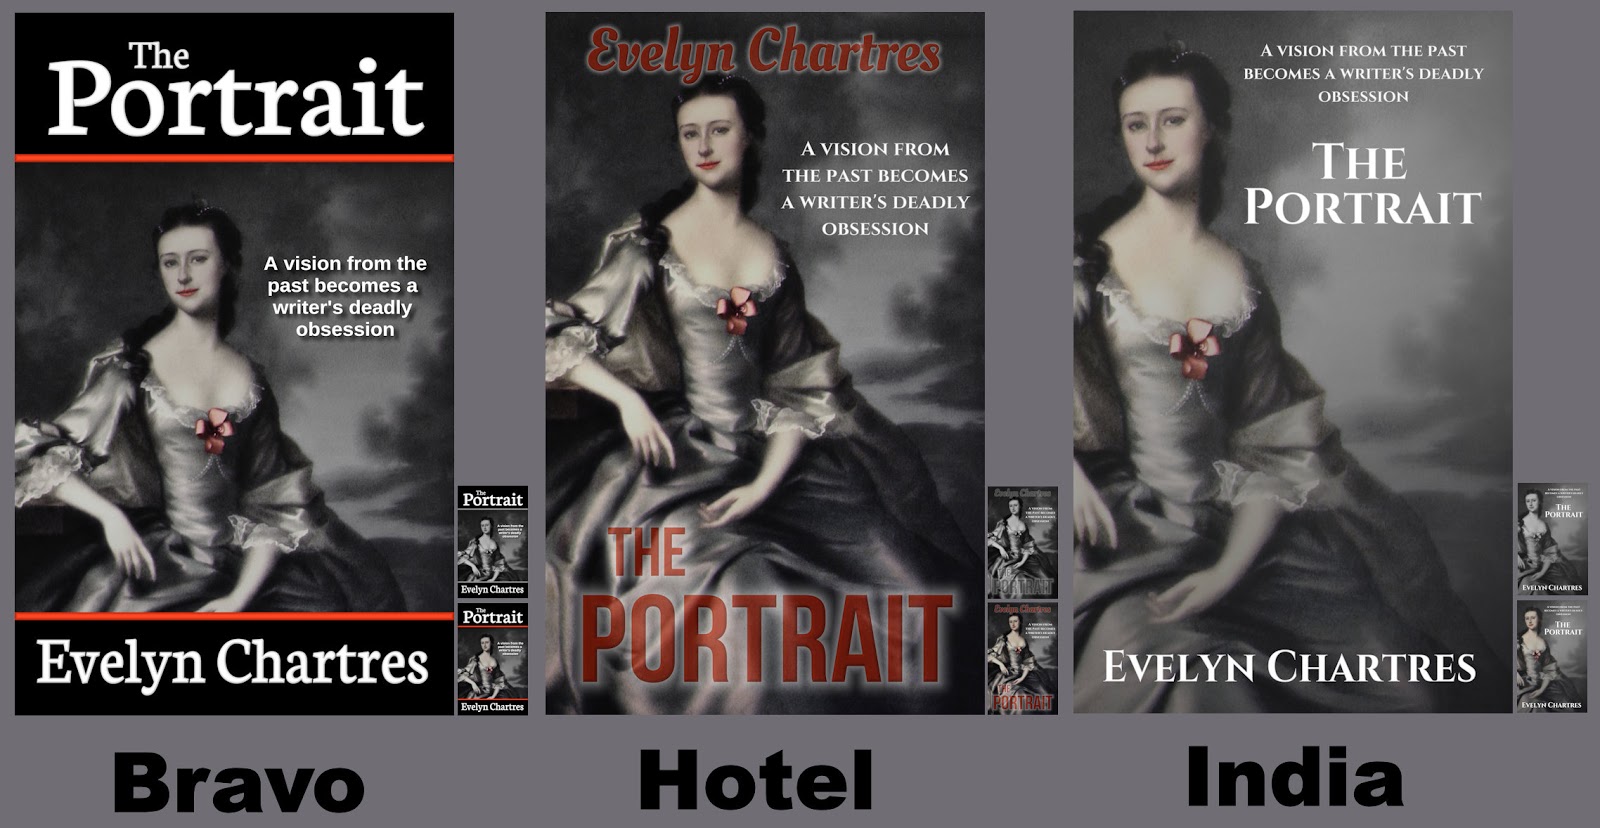
To mitigate the above points, I created a swatch containing all of the images. This permits me to provide titles, a consistent order and can throw in thumbnails to compare how covers will appear at smaller dimensions. That single image will mean users need only click-once to get a view of all versions, which increases the chance of getting meaningful commentary.
Creating a Swatch is straightforward; create a canvas large enough to fit the desired versions. Since Amazon Kindle Direct Publishing lists covers should be least625 x 1000 pixels, all featured variants meet the minimum.
Using larger covers in the swatch can make it too large to upload at many sites. Additionally, the swatch would take more time to view and require users to zoom-in and out frequently. Hence sticking to the minimum provides avoids a whole slew of issues.
Cutting Down to Size
Before we begin, we need to create usable variations. The files we created containLayers and Styles which react differently at lower resolutions. Additionally, we want to preserve these originals, so use the Save as Copy feature to avoid modifying the source files.
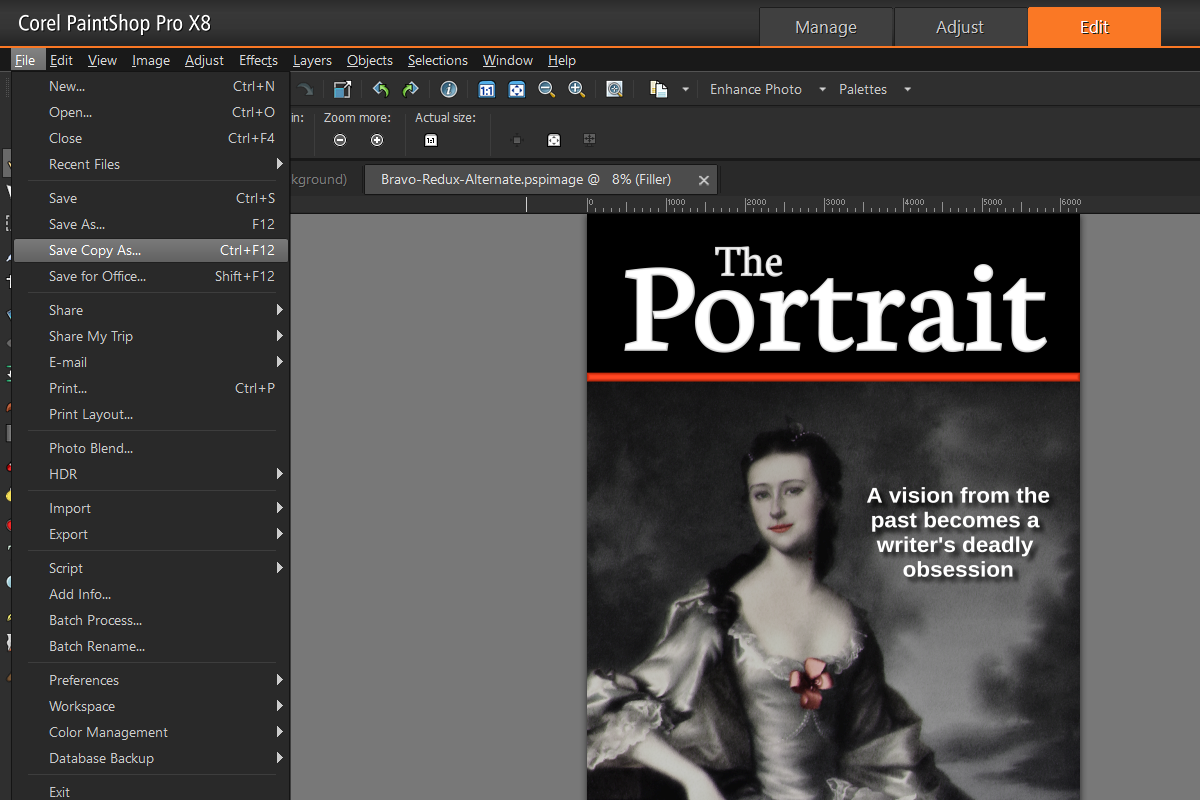
Open up your BravoPaint Shop Pro project file then from the File menu click on Save Copy As.
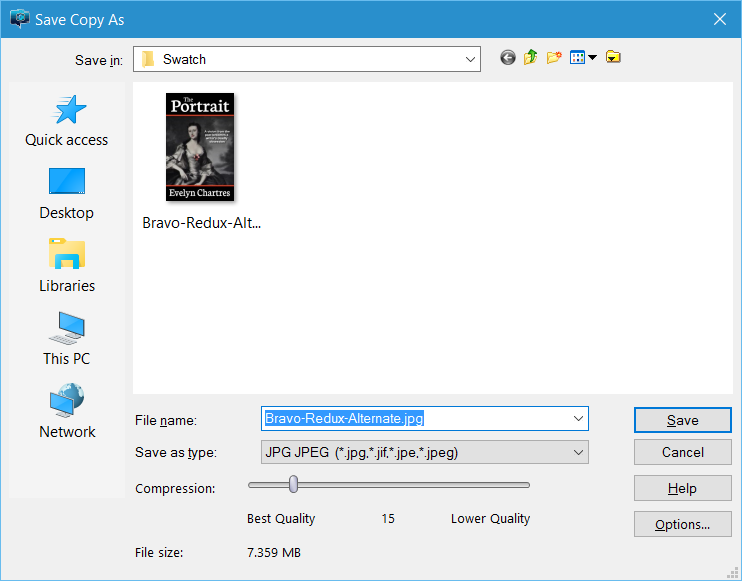
This feature permits you to save a copy of the image without modifying the working image. Select either JPG or PNG formats then click on Save.
Note
Ensure that your save path and file name are correct prior to completing this operation.
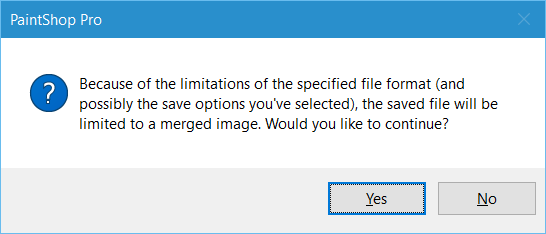
You will be presented with a warning about losing Layers and Styles through a Merger. This is precisely what we want, since the image is to be resized later. Click on Yes, then open this newly created image.
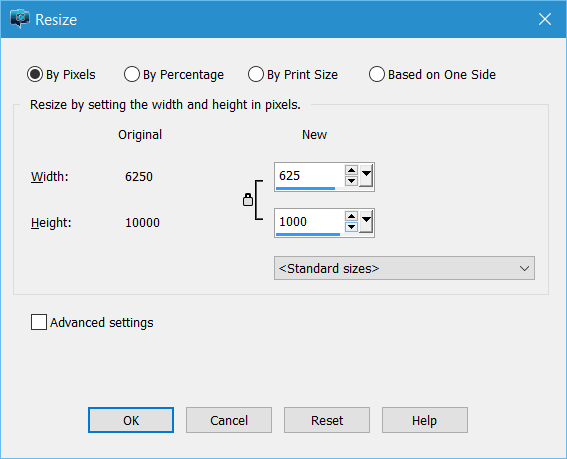
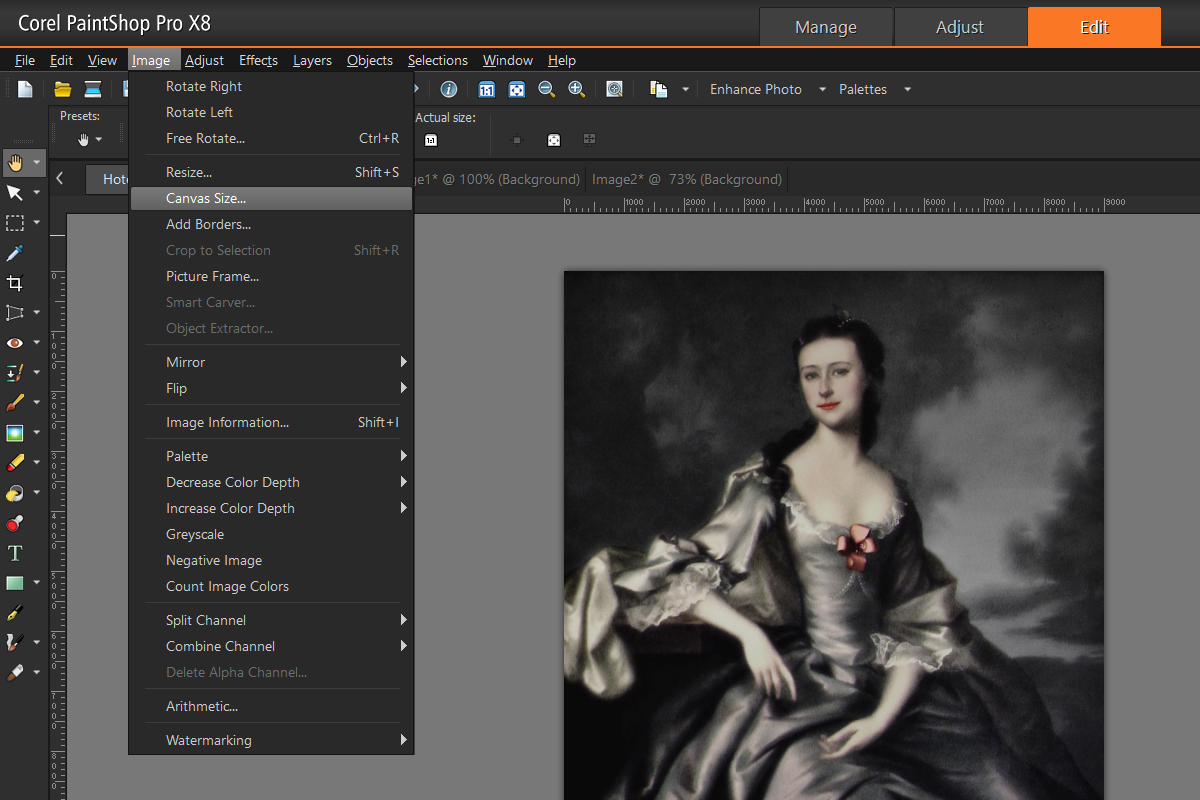
From the Image menu click on Resize.
A new window will pop-up. Resize to 625 x 1000pixels or settings that allows you to meet the requirements. Since our examples made use of increments of the minimum size, so the window appears as follows:
Once satisfied, click on the OK button.
Repeat the abovesteps for each variant; in this tutorial we did the same for Hotel and India.
Creating the Canvas
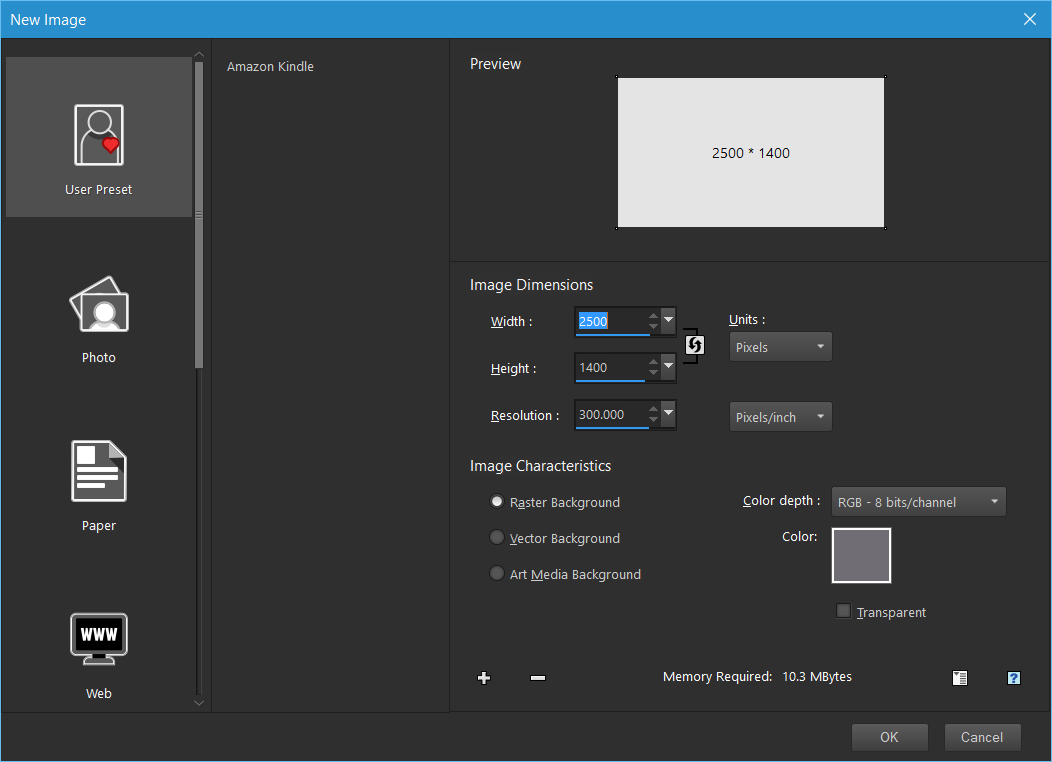
Since we are dealing with three variants (Bravo, Hotel and India) we need to create a swatch that permits fitting in all three. We also need to include a buffer since thumbnails will be added as well. So we create a canvas that is:
Width — 2500 pixels.
Height — 1400 pixels.
Resolution — 300 dpi.
From the File menu click on New. This will bring up a new window, replicate the options shown below:
The colour of your background should be something neutral. This provides a separation between the covers and will not distract the viewer. For the above example, we used a variant of grey.
Once satisfied click on OK and a new image with the appropriate dimensions will be created.
Dropping in the Variants
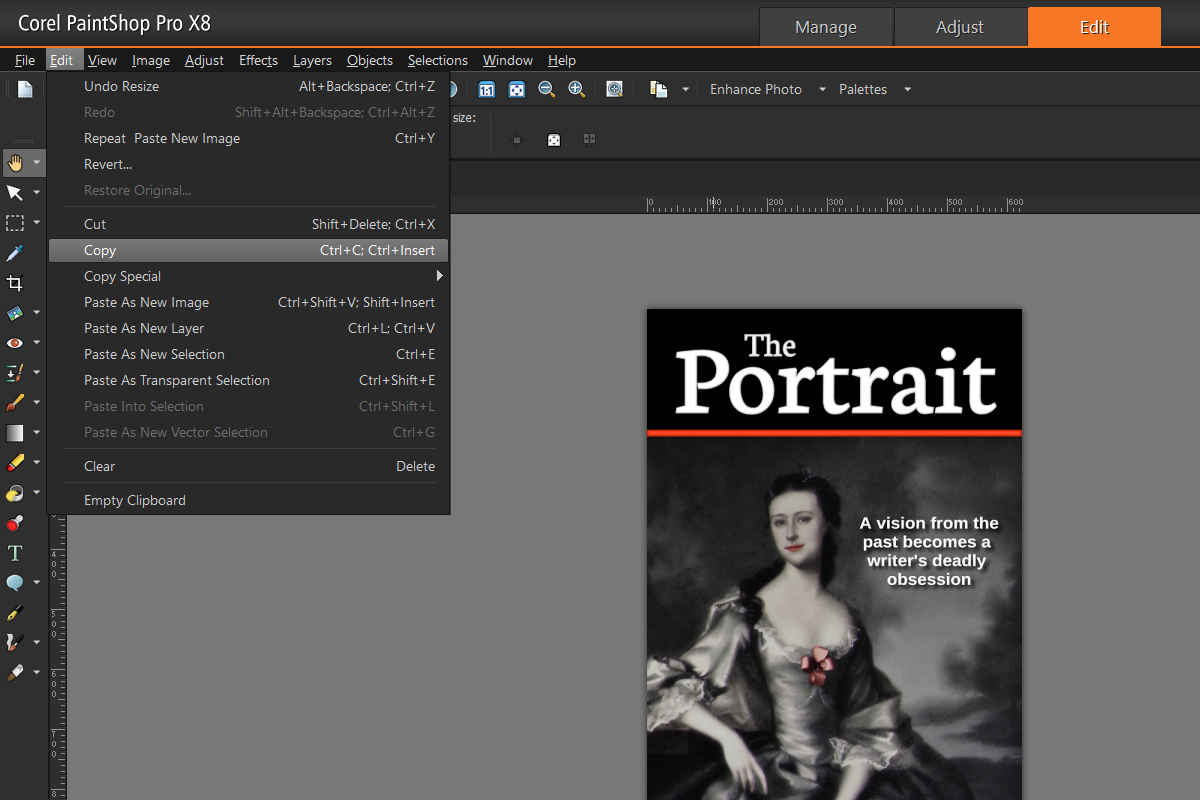
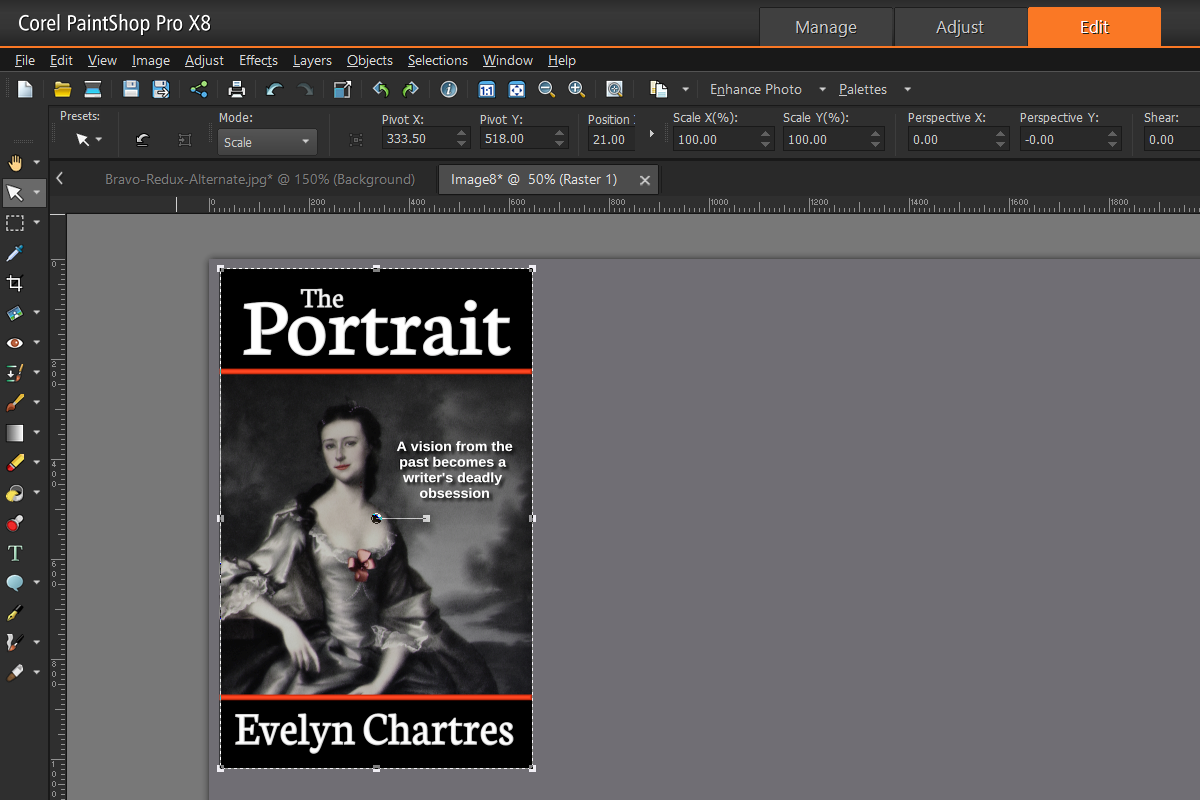
Now drop in copies of the variations onto the canvas. Click on your copy of Bravo then select the Background Layer. Now from Edit menu, click on Copy or use the CTRL-C keyboard combination.
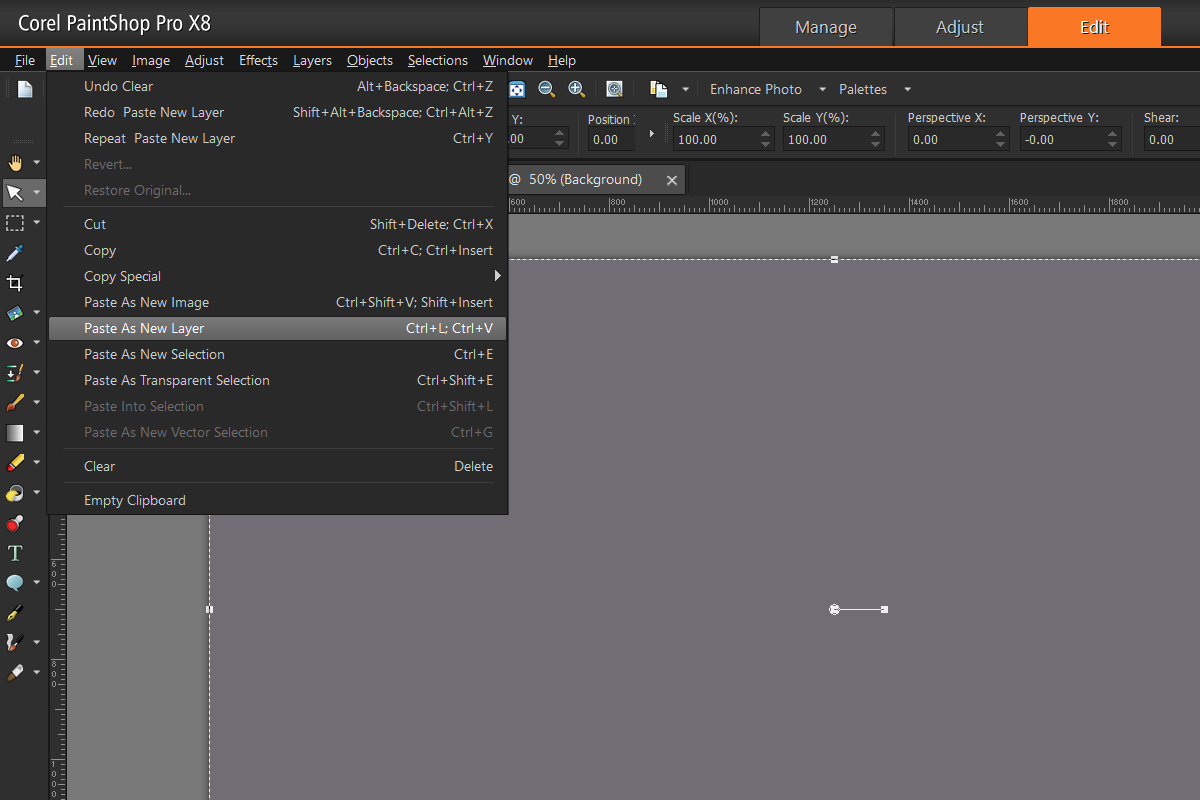
This will place a copy into your clipboard. Switch to your Swatch then from the Edit menu click on Paste As New Layer.
This will drop-inBravo, which can be moved anywhere onto the canvas. Since this is our first entry, place it near the edge on the left and leave a bit of spacing.
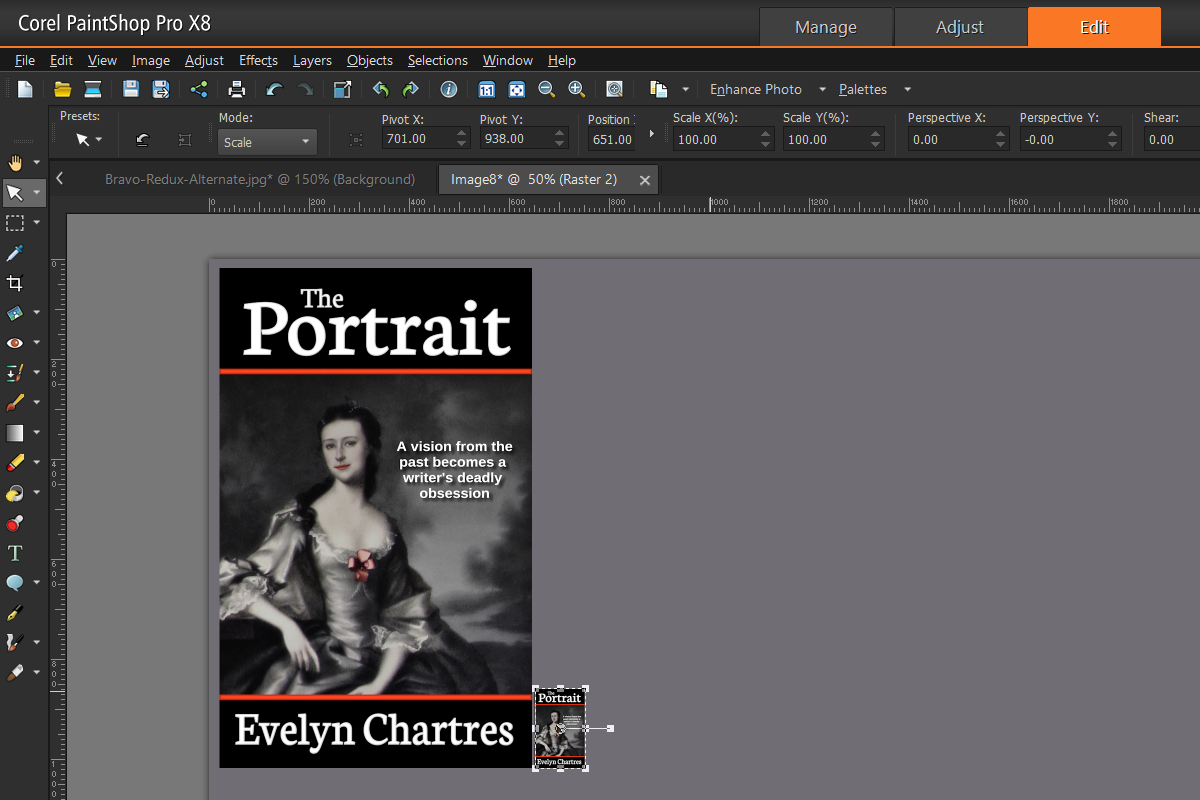
Now add-in the thumbnails for Bravo. Switch to your Copy of Bravo and shrink down the image to a maximum160×160 pixels. Repeat the Copy-and-Paste operation done previously then drop-in the thumbnail.
Now we can compare the full-sized cover to the thumbnail. This permits us to see how the image appears on Amazon.com. Now we lack a method of seeing how it appears on a black and white display like the Kindle Paperwhite.
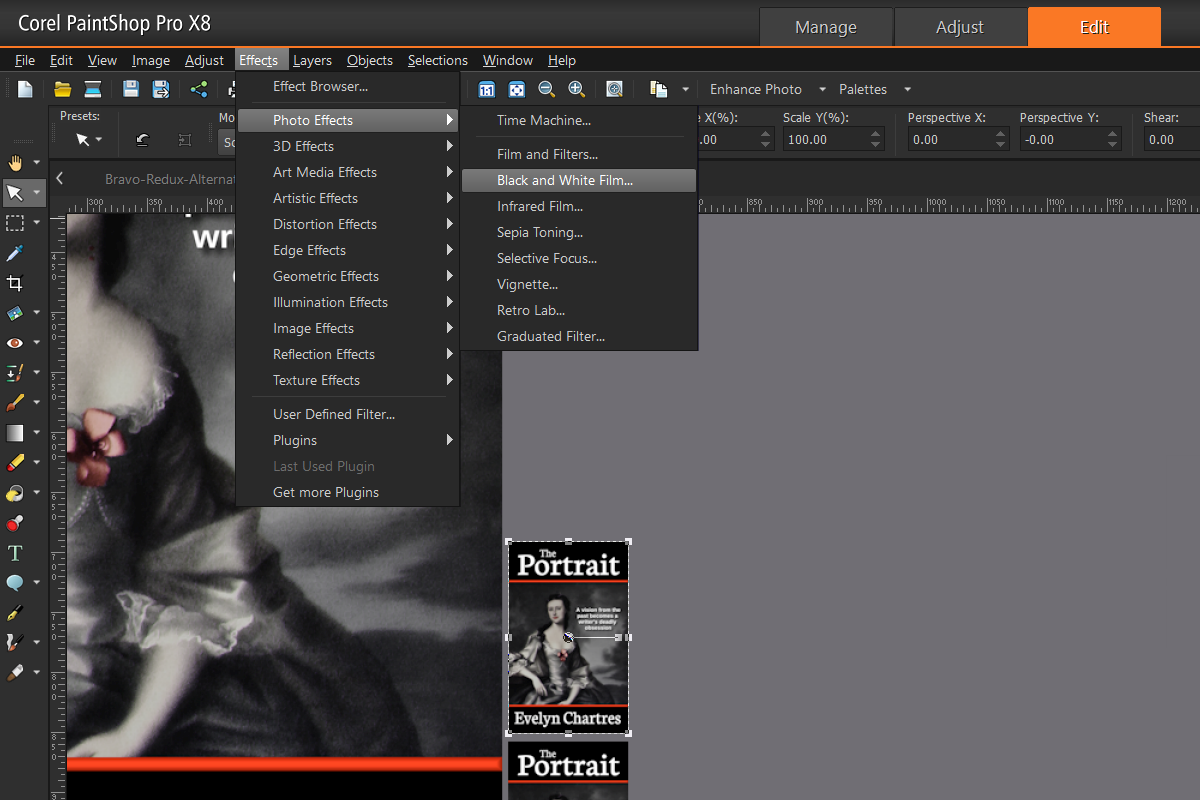
Drop-in another thumbnail then from the Effects menu, selectPhoto Effects then Black and White Film.
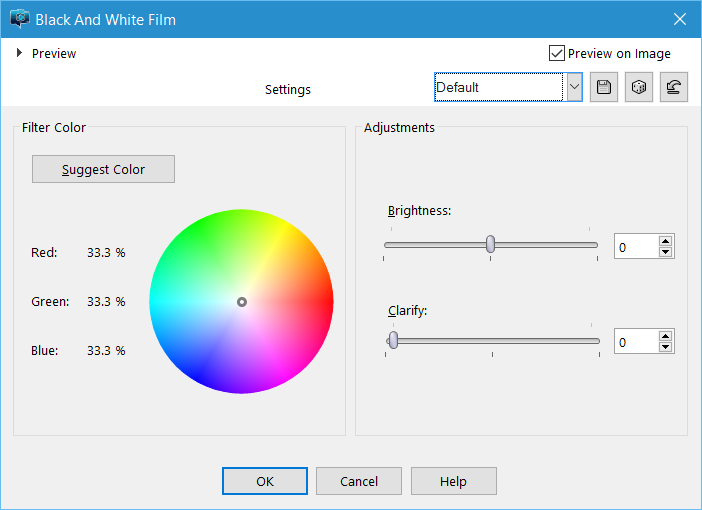
A new window will appear, I found that Default is sufficient for this step.
When satisfied, click on OK.
To add in a label, from the Tools Bar, select the Text Tool. For this example, Arial Black at 28 pointsset all Black was used. Adjust as necessary to end up with a result that looks like the following:
Now you have the following on your swatch:
Main image;
Thumbnail;
Black and white thumbnail; and
Label.
Repeat as necessary for the other variants.
Final Touches
Once finished, crop the Image to remove any unused space. You should end up with an end-result that resembles the following:
Now you have one image that gives you an overview the three covers. It’s easy to compare one against another and allows you to see how they hold up at lower dimensions and on black and white displays.
Hotel does not display well as a thumbnail or in black and white. That alone should steer you away from that design.
Create these whenever you wish to compare a sample set of covers.
This is Part 6 of the Dressing up the Cover tutorial and previously we covered Taglines and Layer Styles.
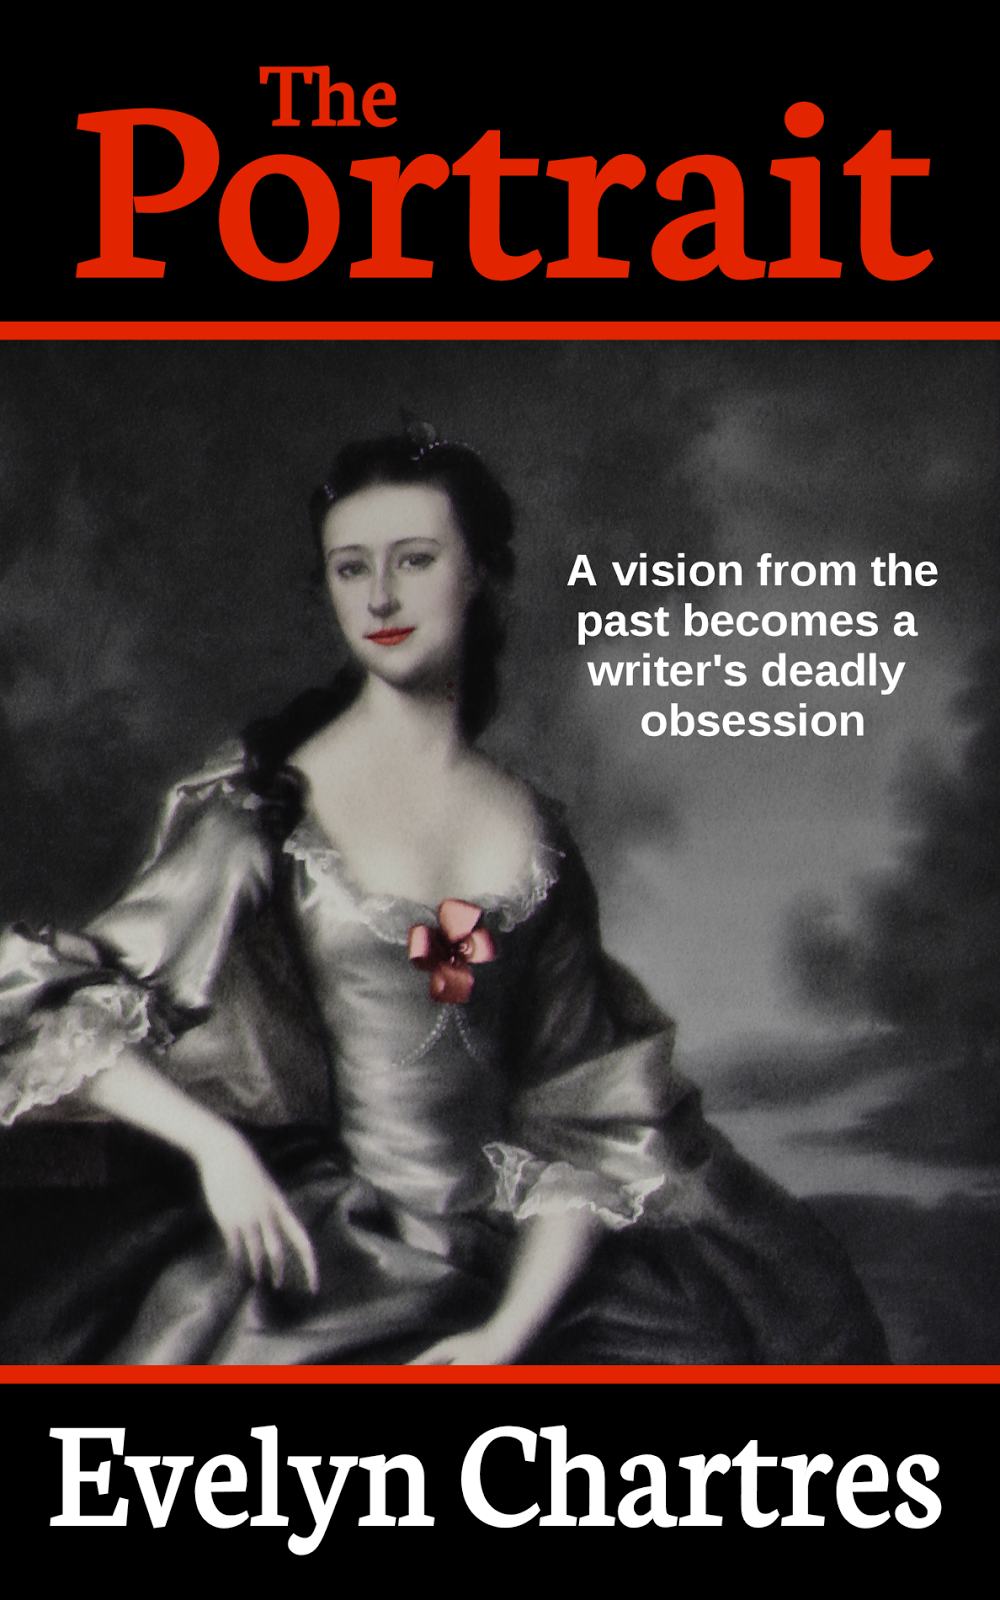
Notes on Bravo
Bravo was originally released along with two (2) other variants and was by far the most popular of the three (3). Feedback shown below led to the creation of other variants.
“Bravo caught my attention better than the others.”
“Bravo looks the most professional, although the fonts are kind of sterile.”
“I’m not a fan of any of them. They all scream —self-published— in the worst of ways.”
“None of them say horror to me. If you’re sold on using the image, I’ definitely try to bring it out in the fonts. Look at some popular horror titles and see what they use. That will give you an idea of what communicates —horror— to readers.”
Overall, the points brought forward were related to the choice of font and how the cover did not fit the ideal horror cover. The Portrait does not subscribe to the modern ideals of horror, at least in terms of gore playing a large part.
People expected to see streaks of blood, fangs protruding from the lady’s mouth or vast amounts of gore. This worked against the story of the premise where the supernatural settings are concealed for most of the novel and would potentially spoil the surprise!
There was a noticed distaste for the red borders employed with this particular variant. While I initially believed that they infused the cover with a bit of colour, people predominantly disagreed and preferred to have no transitions as all.
Over all I managed to pick up a few points to work on:
Keep some distance between the outside edges of the image and the font. Text elements are more likely to remain visible if the image needs to be truncated or applied to a printed cover;
The use of red for fonts to add in colour may not work out as expected. Reddoes not display well in black and white images;
There is a strong preference for covers to use an image covering the whole of the visible area. This led to the development of Hotel and India variations which are covered later;
Font selection is key and has been discussed before. There was a strong push for Trajan Pro as a general-purpose font.
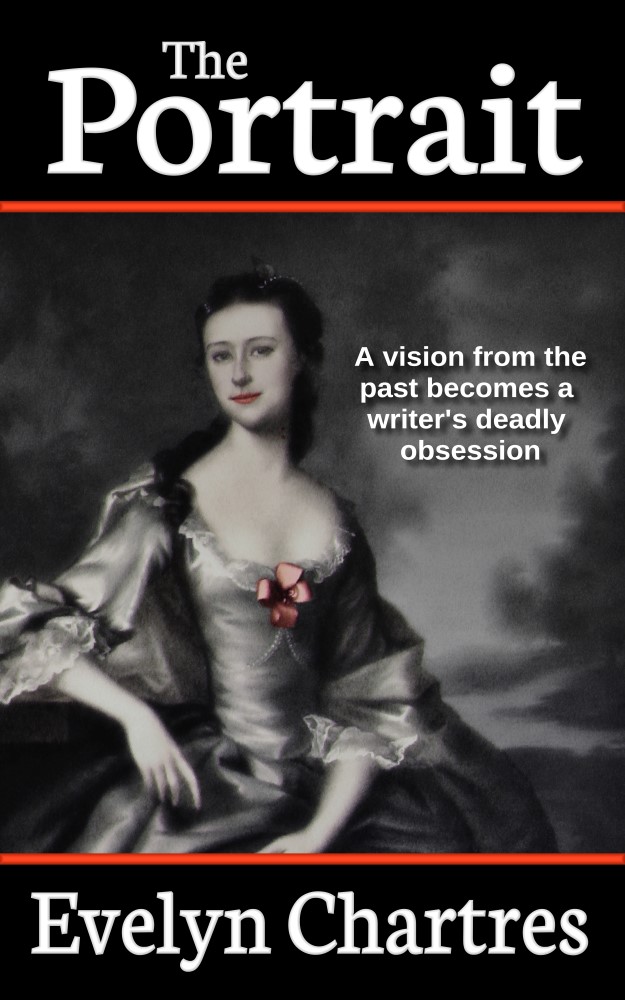
Some recommendations were applied to Bravo which created the variant below. While it does not address all of the faults, it does provide an incremental improvement.
A Hotel Visit
Hotel was a variant that aimed to make use of different fonts that would grab the attention of a potential reader. This version also made use of transparencies and the outer glow effect which differs from other versions. While Hoteluniversally reviled in comments it does have certain features that were fun to explore.
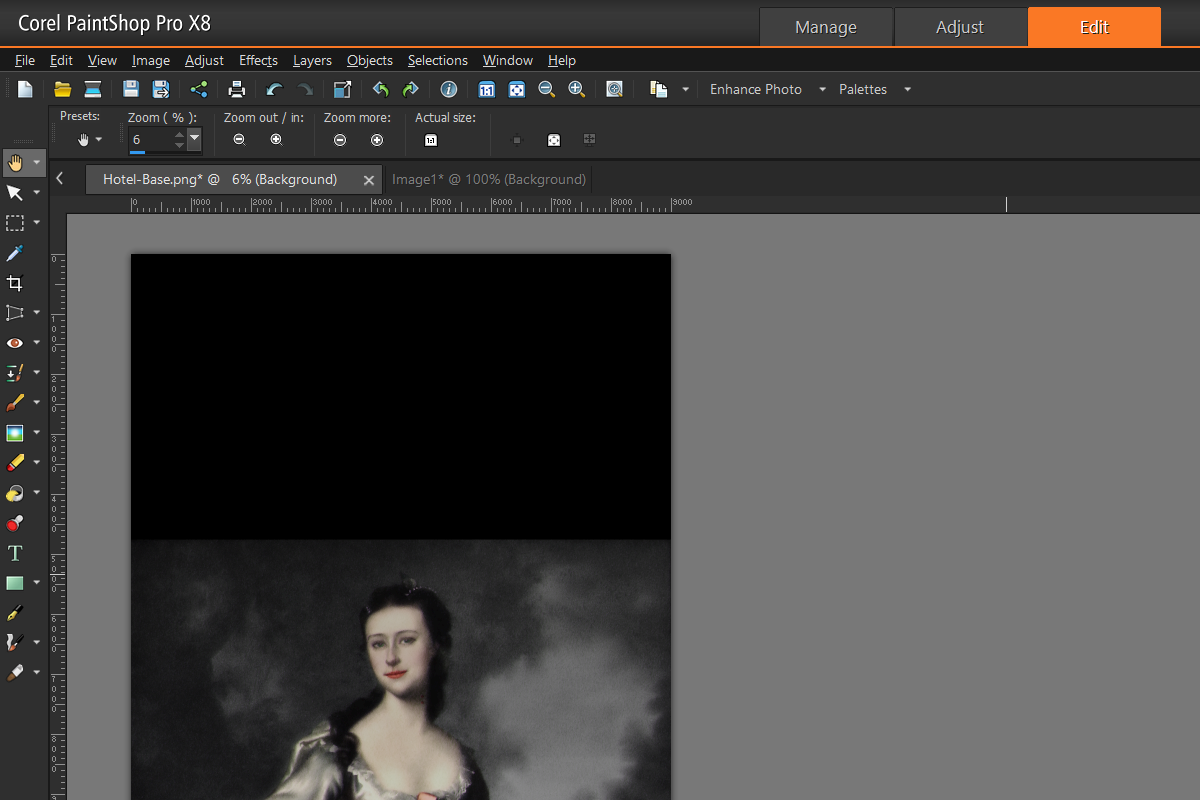
You will need to make use of the Lady Normal Base, to proceed with this aspect of the tutorial.
The cover size is longer than the original image allows . To achieve this we needed to create a mirror image copy then join them at the seams. This increases the space above her head to prevent the Author’s Name from obstructing her face.
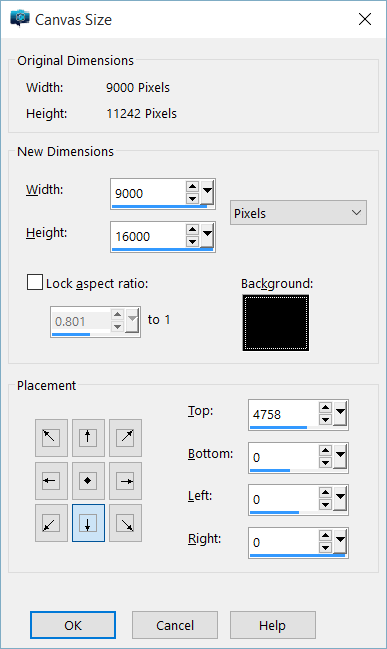
From the Image menu, selectCanvas Size.
A newWindow appears, which permits you to adjust the Size of the canvas. Increase the Height of to 16000 pixels then ensure Placement is set to Bottom, Middle as shown:
Click on the OK button, which adds an empty space above the image found.
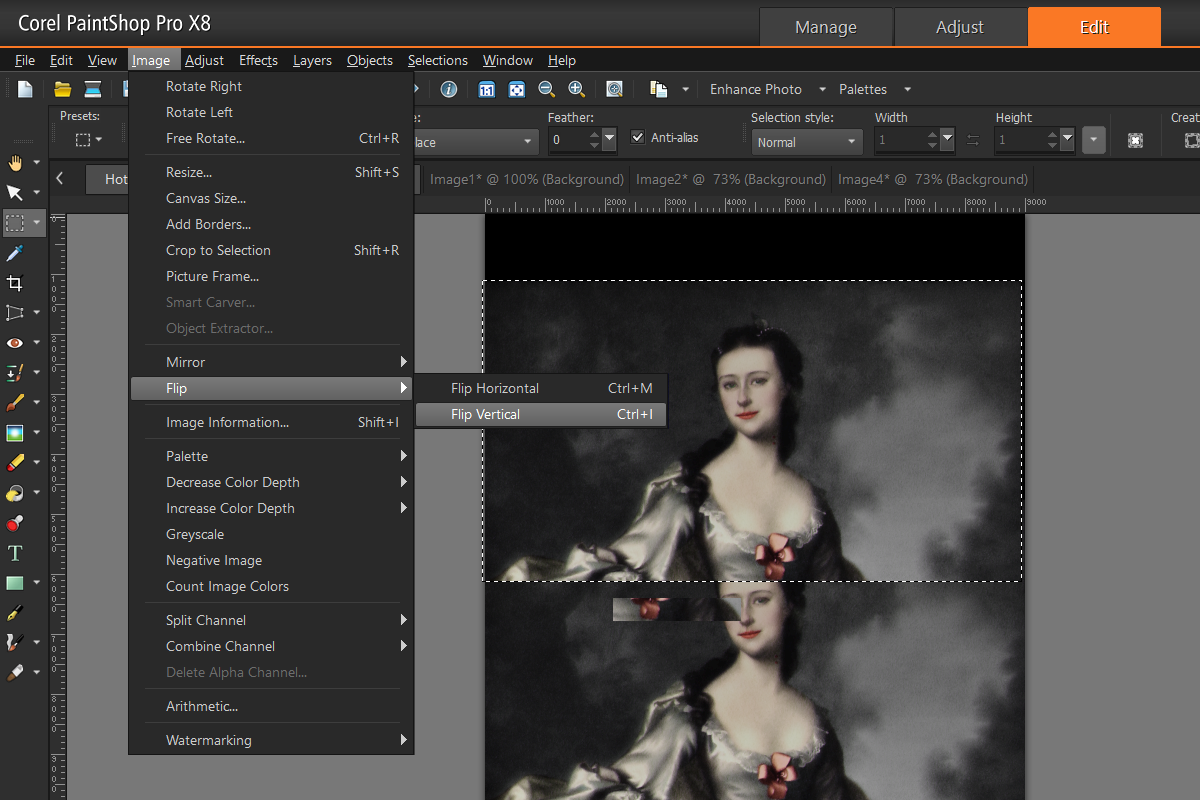
Using the Selection Tool, make a copy of the top portion of the Base then Paste as a New Layer. You up with two copies of the Top with the new selection that needs to be flipped.
From the Image MenuselectFlip then Flip Vertical.
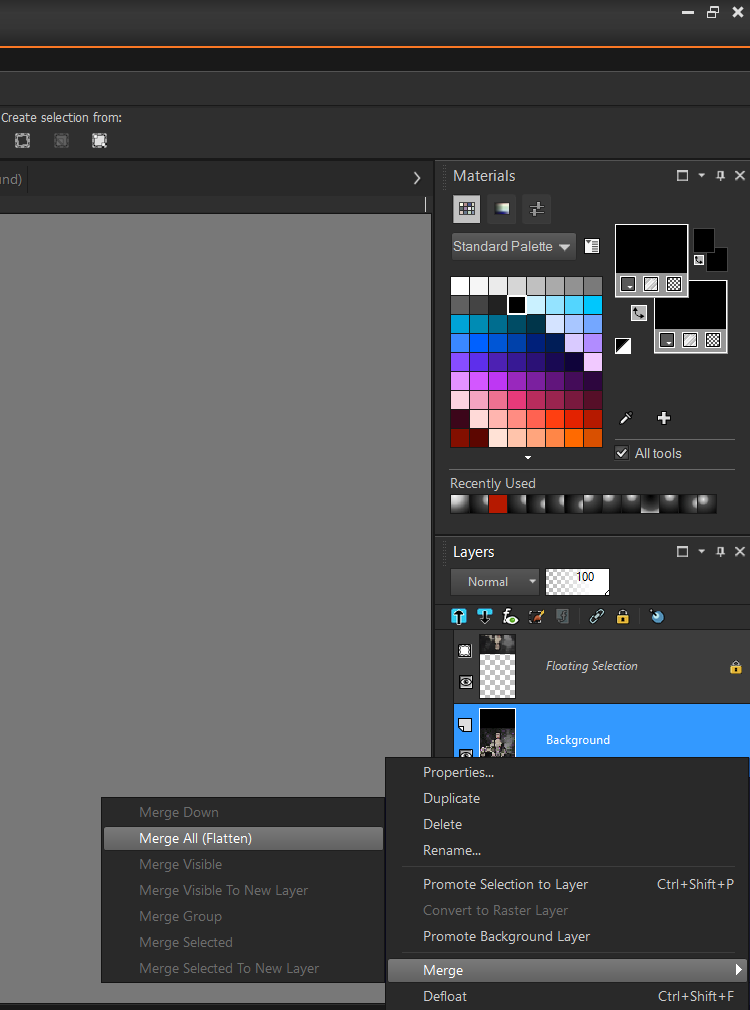
Line-up the images as though they were part of a mirror image. Once satisfied with the merger, right-mouse click on the layers then from the MergePopup-MenuselectMerge All (Flatten).
This operation will merge both layers together. You may need to experiment until the connection is seamless.
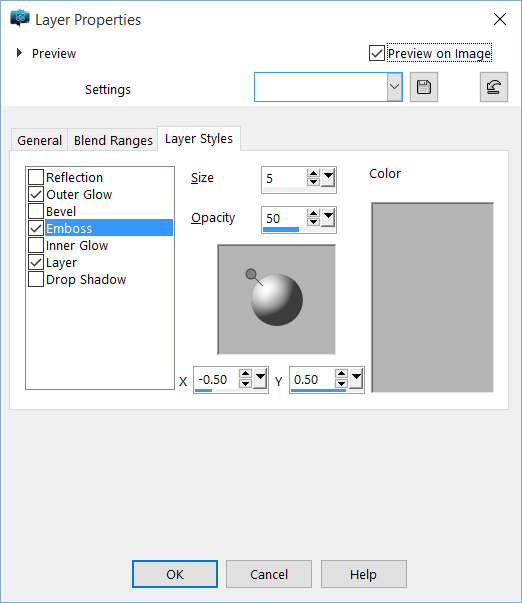
Next add the Author, Title and Taglines. As mentioned previously, Layer Styles for Author and Title employ of Outer Glow, Emboss and Transparencies to get the desired effect. To reproduce the effects showcased on the cover the following fonts were used.
Title — Bebas Neue Bold
Author — Oleo Script
Tagline — Cinzel (Bolded)
For Layer Stylesadjust until settings match the options below:
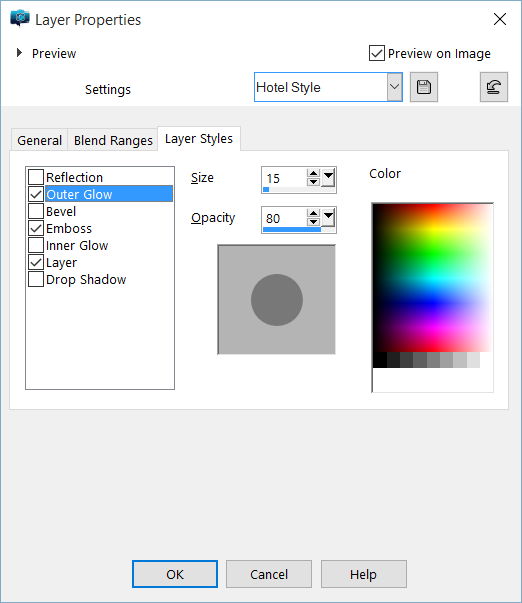
The next step is to adjust the Outer Glow, set it to match those shown below:
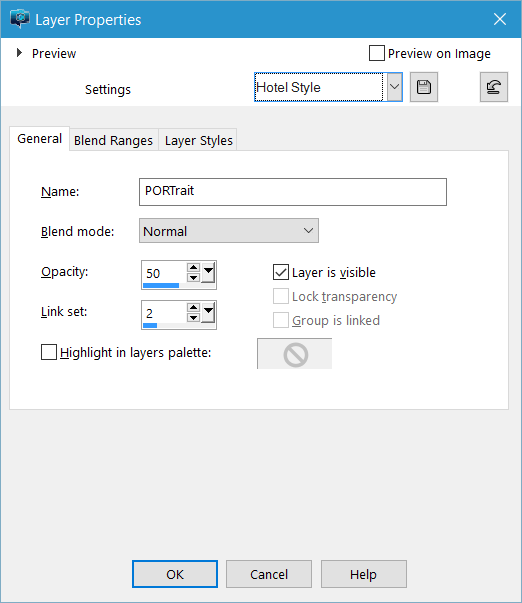
While there are a lot of ways to adjust transparency, you can do so from the GeneralTab of the Layer Properties window. Copy the settings found below then save it for later use. This ensures consistency when applying it to other layers.
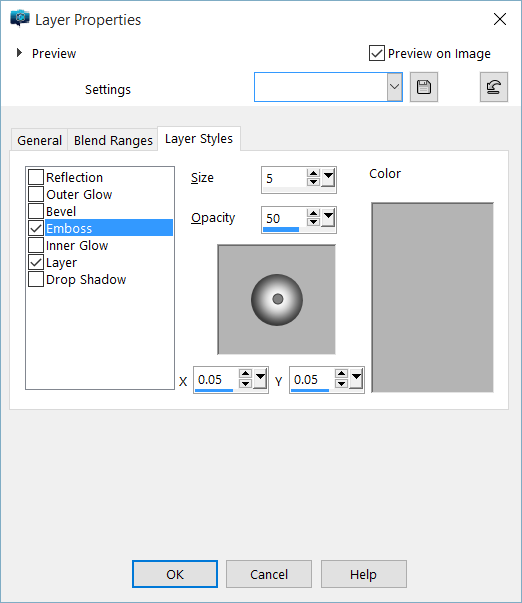
The Tagline only makes use of Emboss, copy the settings below to match our style.
The Tagline only makes use of Emboss, copy the settings below to match our style.
You end up with a cover which looks roughly like our sample.
A Trip to India
India was not one of my designs. Ironically, an acquaintance used a phone app to whip up a design she felt worked well. This formed the basis for cover design used on The Portrait.
Other than making use of Lady Ethereal as a base, this design uses techniques which have been explained before. To the following fonts were used:
The Find and Replace capabilities within Microsoft Word are impressive. However, the interface is not necessarily intuitive and some of features can work against one another. Once aware of these limitations, we can use this capability to perform a series of tasks quickly and efficiently.
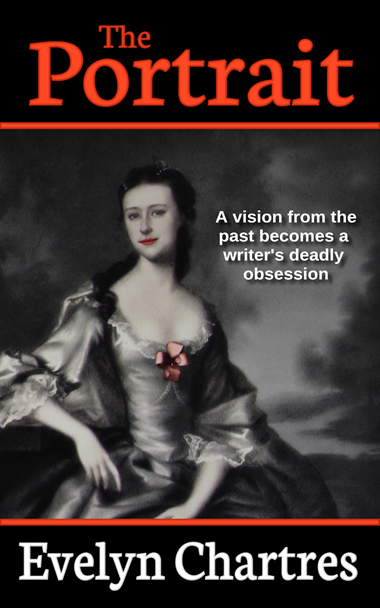
This tutorial will reference the same text throughout. A sample to follow along with is included below:
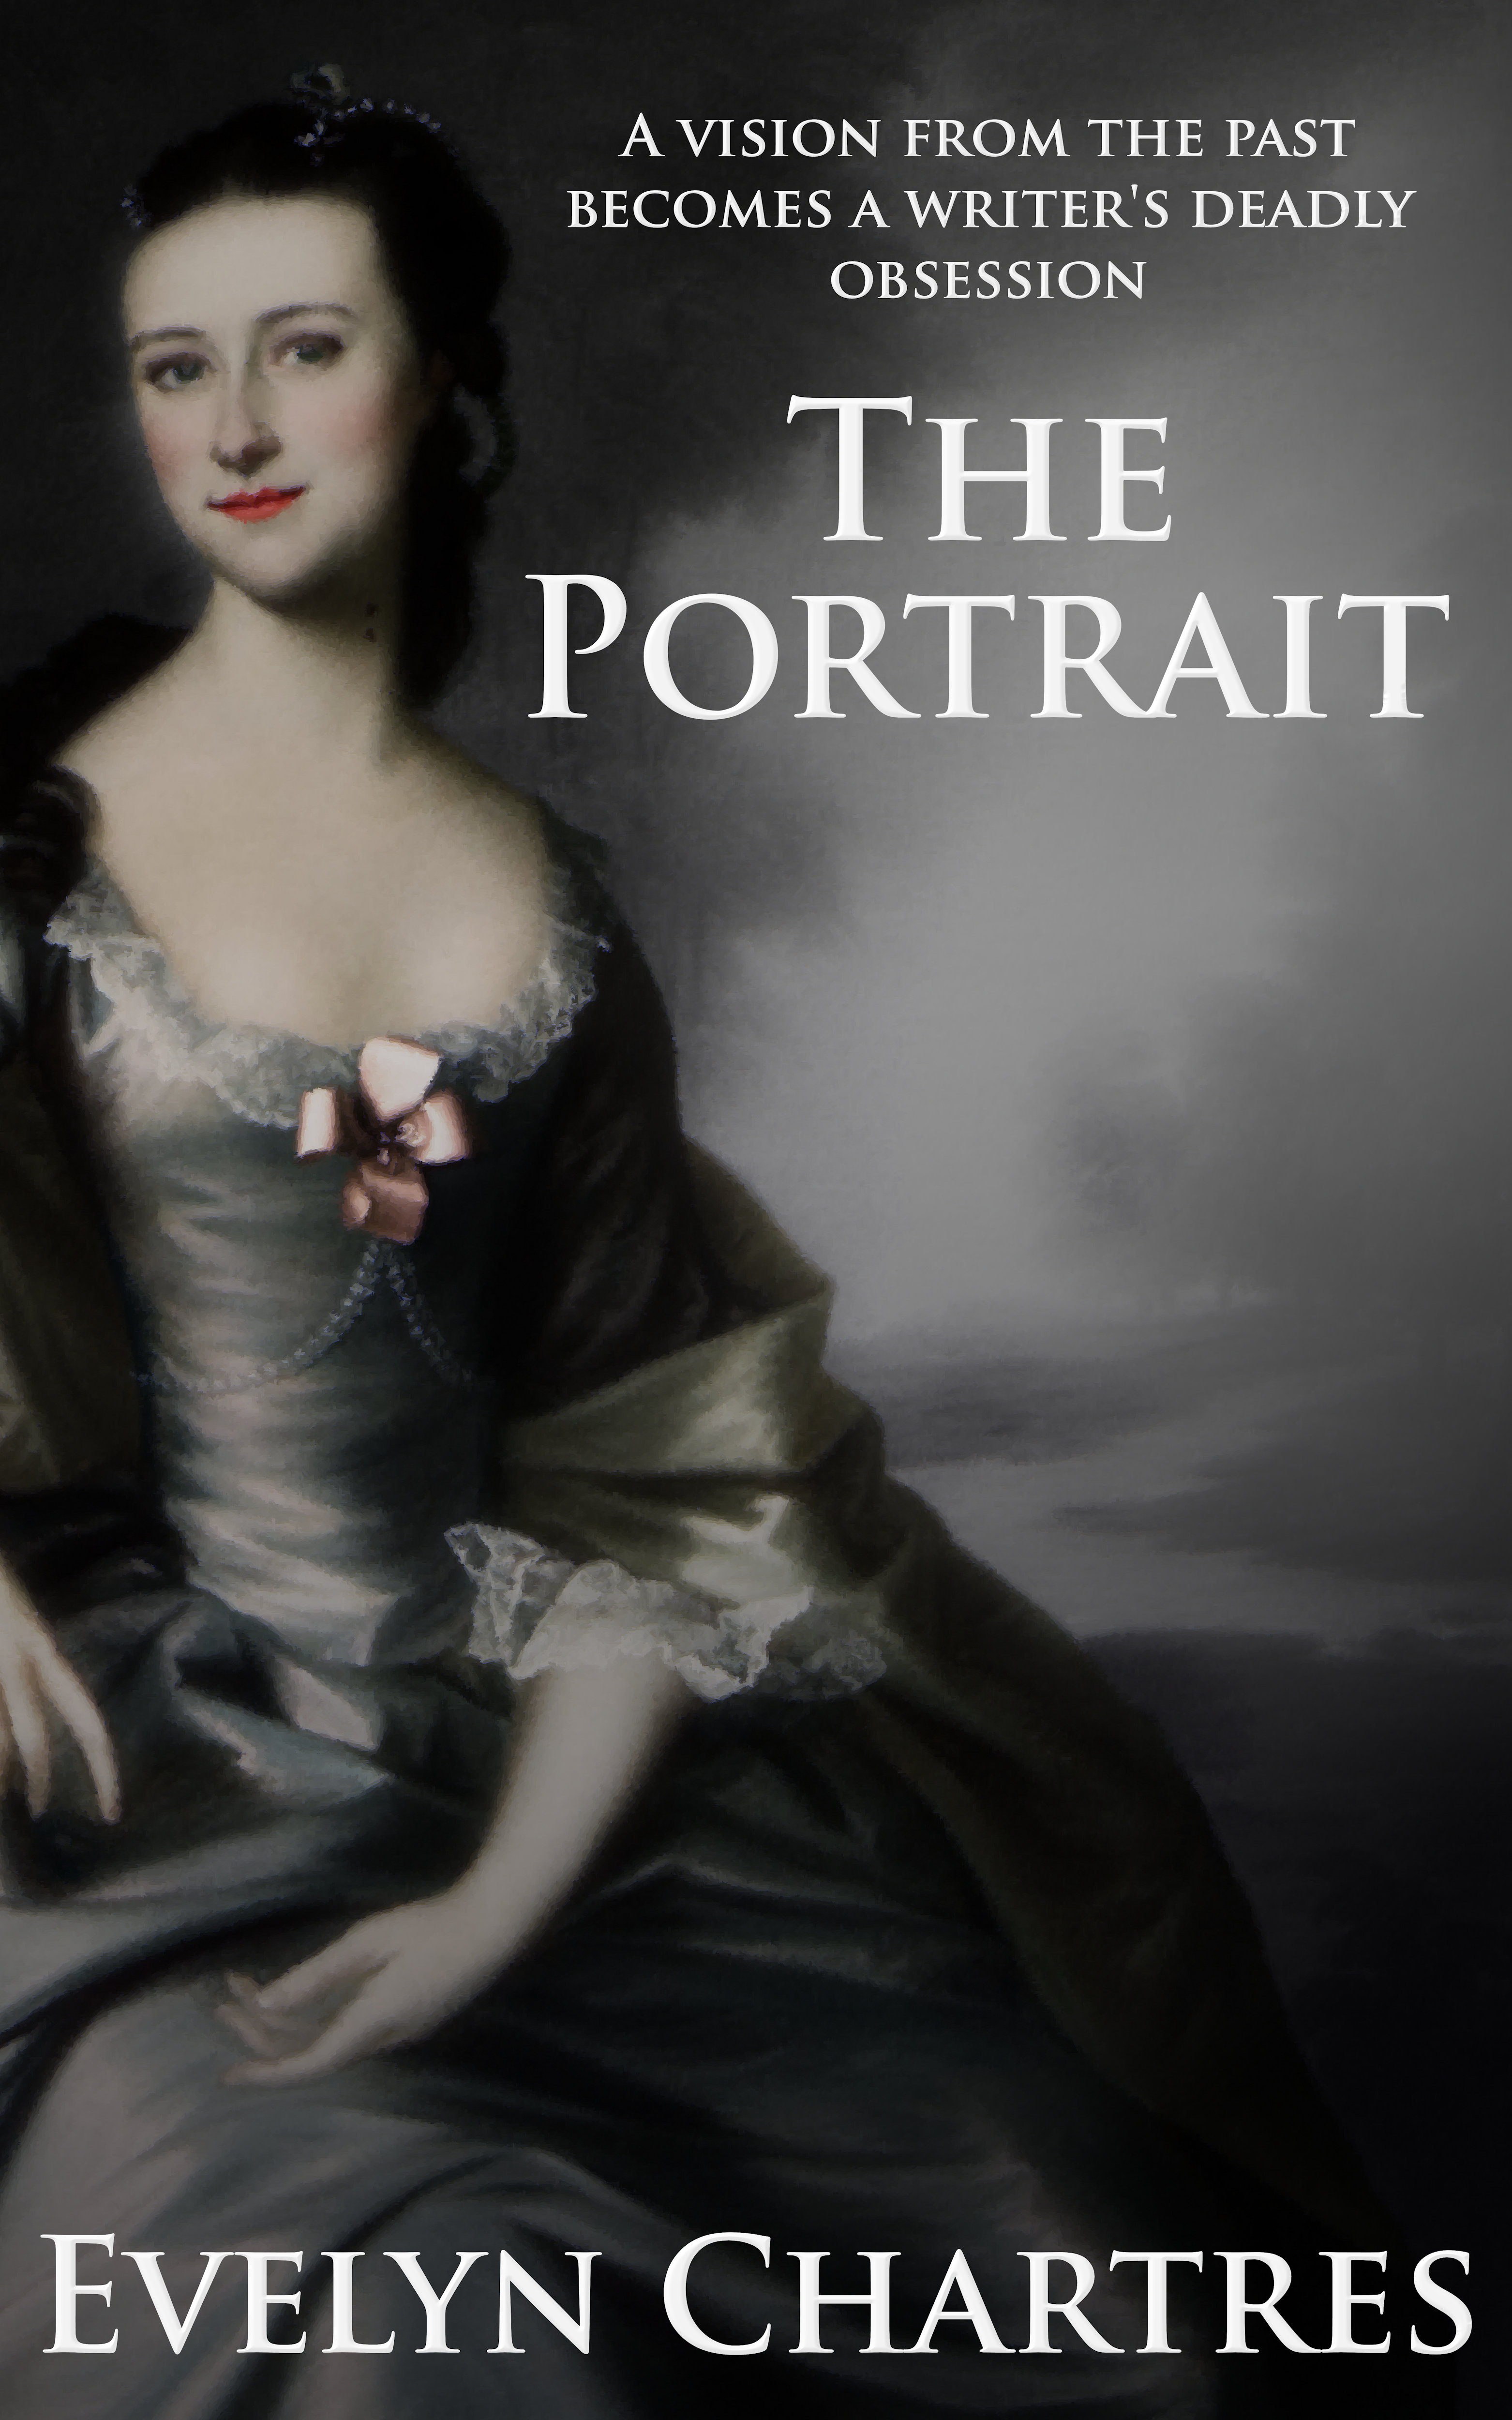
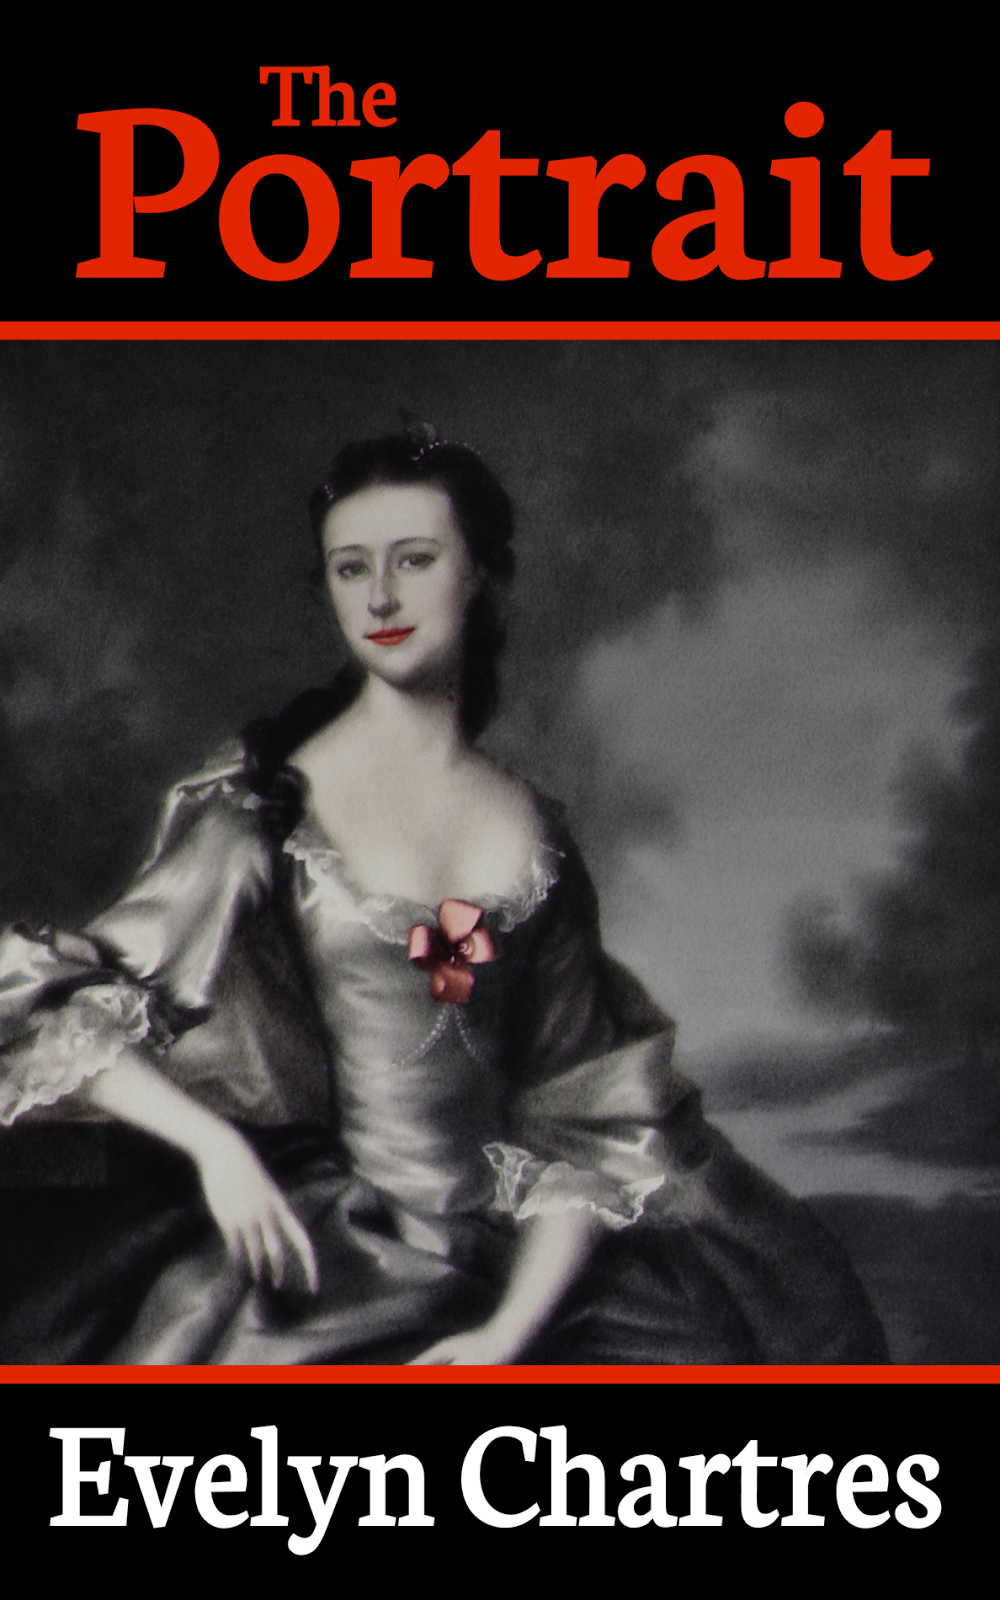
“A vision from the past becomes a writer’s deadly obsession,” Evelyn Chartres.
The Portrait is a Gothic horror about Victoria Frost, an author who develops an unhealthy obsession for her character. As events unfold, her obsession begins to turn on her forcing the author to question her sanity. Is this simply insanity or are there other factors in play?
The Portrait is a mixture of contemporary and historical pieces with the latter revolving around her character and muse. In this novel, the author will revisit an iconic scene using both prose and art yielding new pieces to the puzzle.
Posting on Google+
Google+ is a social media site, which supports limited formatting when posting. These features however are not selectable through a menu, but interpreted by special characters embedded within the posts. For convenience, three (3) formatting options are shown below.
Italics, _Word_
Bold, *Word*
Strikethrough, -Word-
Say you have a document which has been drafted in WordPress or Microsoft Word with formatting in place. Using the example provided, we can findItalics, Bold and Strikethrough formatted text and replace add in our special characters.
Note: Due to the similarity in methods, only Italics is covered.
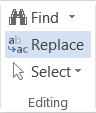
From the Home Ribbon, click on Replace as which will pop-up the Find and Replace window.
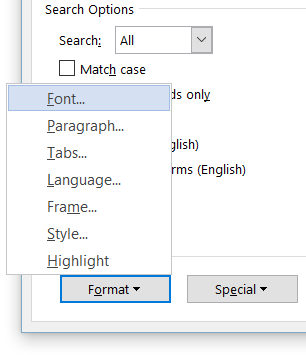
First, ensure your cursor is in the Find what textbox. In bottom-left corner there is a Format button, click on the Format button then selectFont from the pop-up menu.
Note: If you cannot see the Format button, then click on the More > > button. It will expand the window and display additional capabilities.
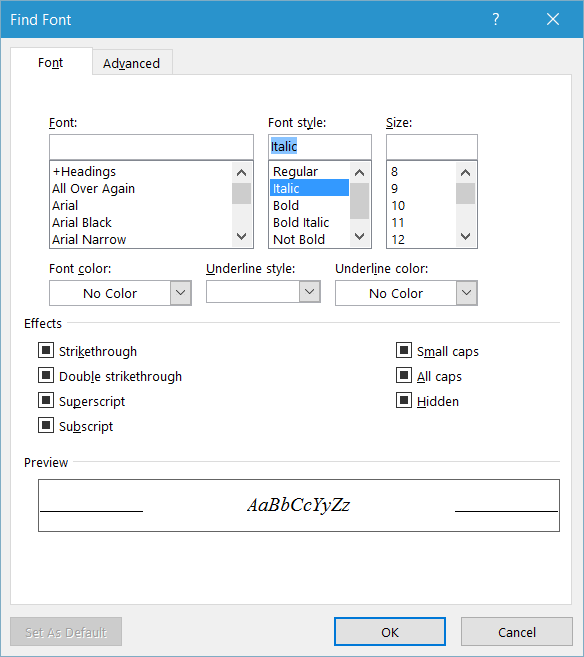
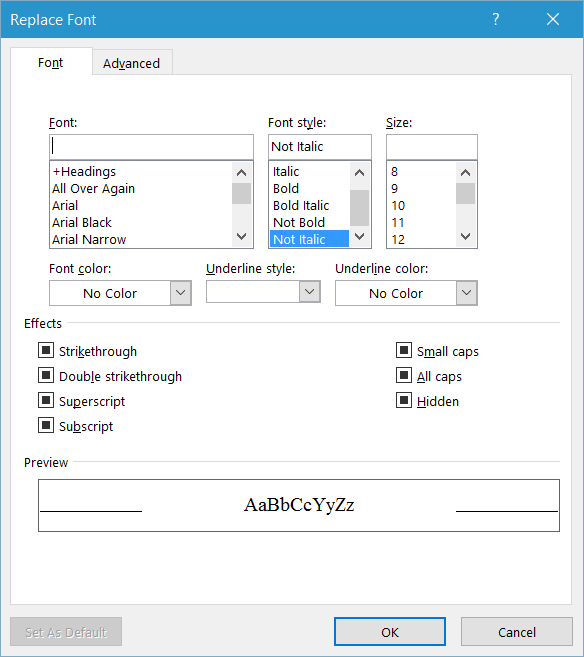
The Find Font window will appear and provides an extensive search capability. In this situation, we need only selectItalic from Font style section. ClickOK to proceed.
Repeat the previous two (2) steps, this time ensuring the cursor is in the Replace with textbox. This time selectNot Italic from the Font style section.
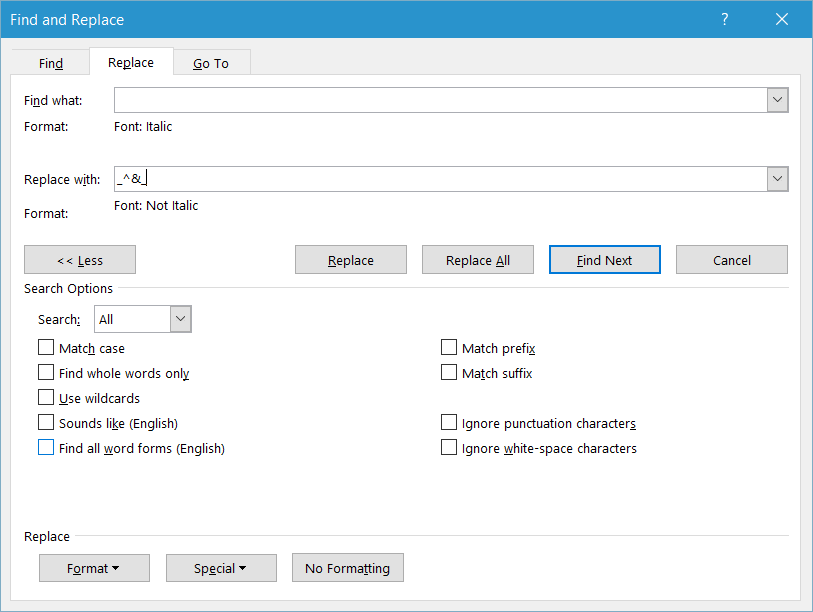
The image below shows how Find and Replace has been configured to search for Font: Italic and replace with Font: Not Italic. This removes the formatting and prevents it being found in later searches.
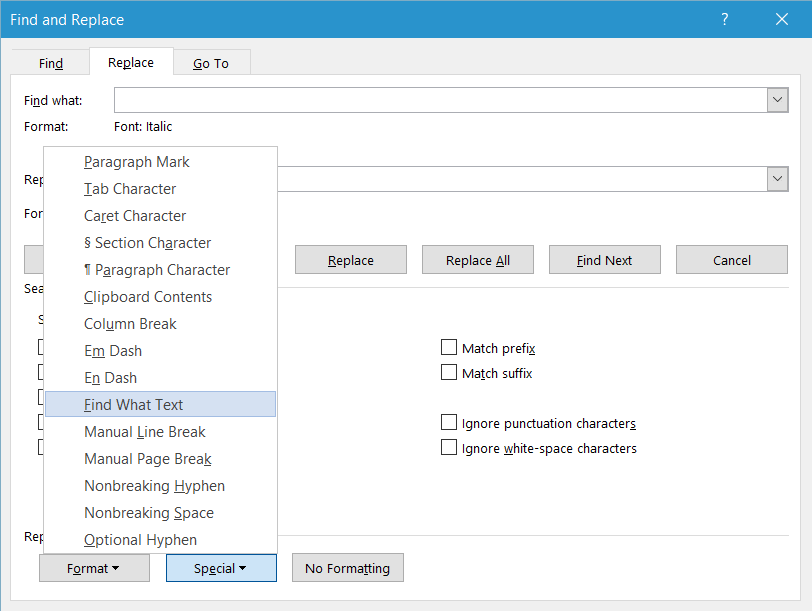
To have Google+ see the formatting we need to insert an underscore (_) at either end of the relevant text. Start by typing in two (2) underscores (__) in the Replace with textbox then move your cursor between these characters.
Click on the Special button then selectFind What Text as shown below.
This inserts^& into the Replace with textbox in between the underscores. This sequence of characters references text found during the search.
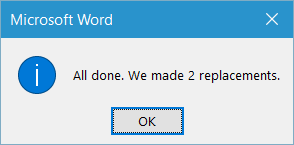
If necessary, adjust the Replace with textbox to look like the image below. When satisfied, click on Replace All, which brings up the following pop-up.
Click on the OK button, close the Find and Replace window to find the following result:
“A vision from the past becomes a writer’s deadly obsession,” Evelyn Chartres.
The Portrait is a _Gothic horror_ about _Victoria Frost_, an author who develops an unhealthy obsession for her character. As events unfold, her obsession begins to turn on her forcing the author to question her sanity. Is this simply insanity or are there other factors in play?
The Portrait is a mixture of contemporary and historical pieces with the latter revolving around her character and muse. In this novel, the author will revisit an iconic scene using both prose and art yielding new pieces to the puzzle.
Repeat the above to replace out Bold*^&* and Strikethrough-^&- fonts. When done, all you need to do is Copy and Paste your text into your Google+ post and you are set!
This is Part 5 of the Dressing up the Cover tutorial and previously we covered Borders and Text.
Make use of the Pick Tool from the Tools Bar to reduce the size of Lady Shade until she fits within the confines of the borders. Take your time to ensure that the resize operation is done using one of the Corners to maintainAspect Ratio.
Note
Sometimes the Pick Toolwill notResize. Attempts to modify will instead alter the Perspective which is not the desired behaviour. To correct this behaviour change the Mode to Scale.
After completing your adjustments Lady Shade should look roughly like below.
Now is the time to add a Tagline, a sentence or short paragraph which is used to grab a reader. Since we not use complex Layer Styles for this section we can go ahead and create it one layer.
The Liberation Sans Font was used for the tagline. The Font Size was set to 72 Points so we can work on it later. Note that Bold or Italics in the Font Styles were not selected.
To match our example the following line was used:
A vision from the
past becomes a
writer’s deadly
obsession
Once the text is inserted, resized then moved the appropriate location (shown below) the image should resemble the following.
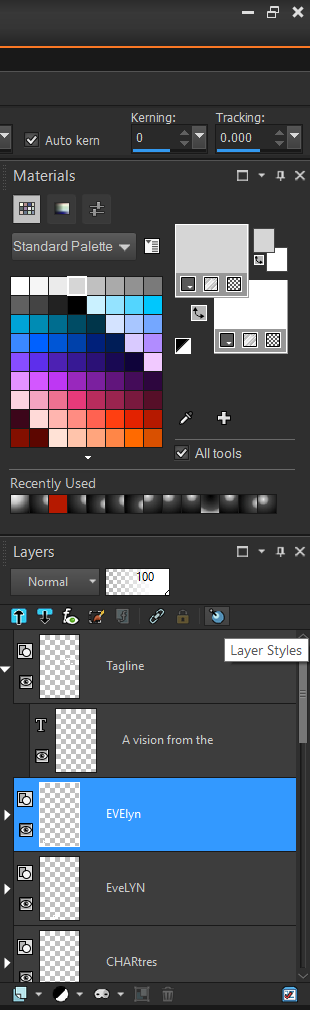
Next make use of Layer Styles to finish up the Text Lines and Borders. From the Layers Panel, select one of your Author’s Name Layer’s then click on the Layer Styles icon.
The Layer Properties window will open and feature effects applicable to layers. As seen below, operations range from Reflection and Drop Shadow effects.
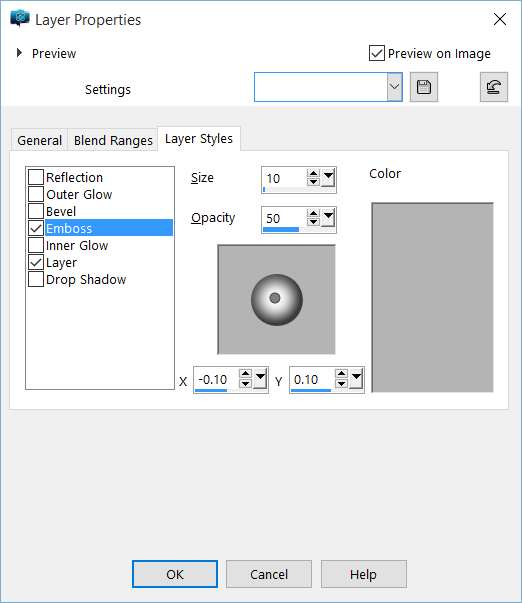
For the Title and Author we want to make use of the Emboss style, use the settings above then click on OK to set the Layer Style. This process must be repeated for each layer, so save these settings to use as pre-sets. This will ensure consistency throughout all of the elements.
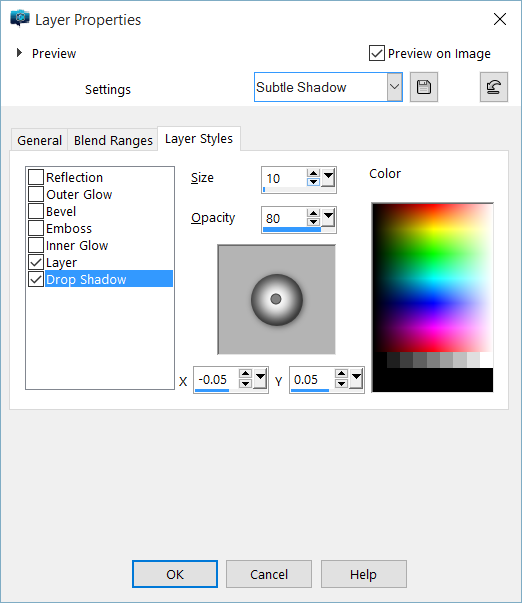
Now for the Tagline Layer, we will adjustDrop Shadow. You can copy the settings found above, to provide a subtle shadow effect to create the illusion the tagline floating over-top the Lady Shade Layer.
UseLayer Styles to Emboss the Borders as well. Once complete the cover should appear as it does below.